
Some links on this blog may contain affiliate links. If you make a purchase through one of these links, I may earn a small commission at no extra cost to you. Thank you for supporting Enchanted Kids Moment!
Christmas is full of gifts, decorations, treats, and exciting plans, but some of the sweetest moments can come from something much simpler.
Making a card together gives kids a chance to slow down and think about the people they love. Instead of simply choosing a card from a store, they can create something personal and fill it with their own words, drawings, and little details.
A Christmas gratitude card is especially lovely because it gives children a reason to pause and say thank you. They can make one for a grandparent, teacher, sibling, friend, neighbor, or anyone who made their year a little brighter.
The best part is that this craft does not require complicated materials or impressive crafting skills. Kids can make the cards their own, and you can adapt the project for different ages.
Younger children can draw pictures and add stickers, while older kids can write a thoughtful message inside. Even a few imperfect fingerprints or wobbly letters can make the finished card feel more special.
If you are looking for a simple Christmas activity that keeps little hands busy while creating something meaningful, this is a wonderful one to try.
Let’s gather a few supplies and make a Christmas gratitude card your child will be proud to give.
What You Need to Make Christmas Gratitude Card With Kids
You only need a handful of basic craft supplies for this project.
Cardstock or Blank Cards
Use white, cream, kraft, or any Christmas-inspired color your child likes.
Cardstock works particularly well because it feels sturdier than ordinary printer paper. You can also use pre-folded blank cards if you want to make the project even quicker.
Colored Paper
Choose a few Christmas colors for decorations.
Red, green, white, gold, and silver are easy choices, but you can let your child create a completely different color combination.
Crayons or Colored Pencils
These are perfect for younger children who want to draw their own Christmas pictures.
Markers can work too, but crayons and colored pencils make it easier to keep the project controlled and low-mess.
Child-Safe Scissors
Older children can cut their own shapes, while younger children should have an adult handle the cutting.
You can prepare the shapes ahead of time if you want the craft to move faster.
Glue Stick
A glue stick makes attaching paper decorations simple and helps avoid the puddles of liquid glue that can quickly turn a fun craft into a messy one.
Christmas Stickers
These are optional, but they make decorating much easier for younger children.
Look for stickers featuring stars, snowflakes, Christmas trees, presents, ornaments, or candy canes.
Ribbon or Washi Tape
A small piece of ribbon or Christmas-themed washi tape can add a pretty finishing detail.
You do not need much. A simple strip along the edge can be enough.
Pencil
Keep a pencil nearby for lightly sketching shapes before cutting them.
It can also help younger children trace simple designs.
A Pen or Fine-Tip Marker
You will need something for writing the gratitude message inside the card.
For younger children, an adult can write down their words while they decorate the card.
Optional: Glitter
Glitter can add sparkle, but it is completely optional.
If you want to keep this Christmas craft low-mess, skip loose glitter and use glitter stickers, glitter cardstock, or metallic markers instead.
If you enjoy creating meaningful childhood moments, you may also like The Ultimate Guide to Creating Meaningful Childhood Memories With Kids.
How to Make a Christmas Gratitude Card With Kids
Step 1: Gather Your Supplies
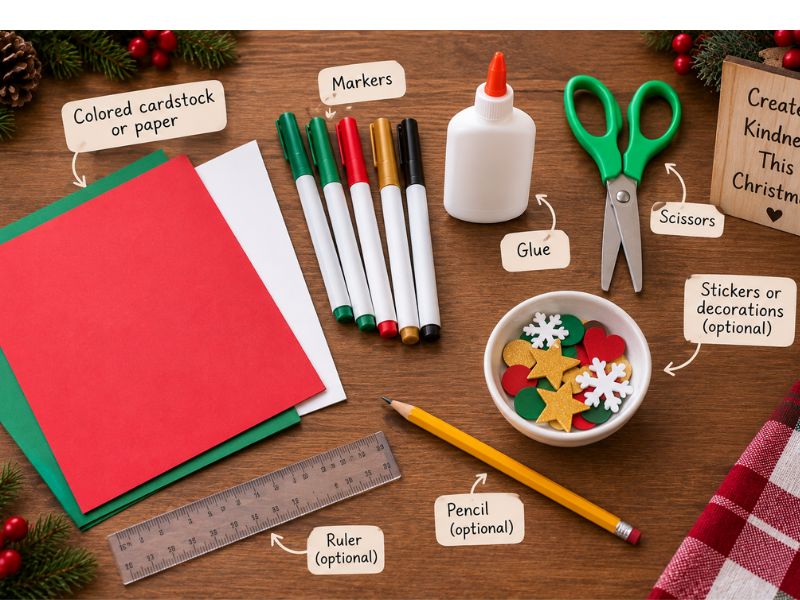
Before you begin, gather everything you need so your child can focus on creating.
You will need:
- Cardstock or thick construction paper
- Colored paper in green, brown, gold, red, or other Christmas colors
- Child-safe scissors
- Glue stick or liquid craft glue
- Pencil
- Colored markers or crayons
- Small stickers or paper shapes for decorating
- Washable paint, if using fingerprints
- Cotton balls, optional
- Ruler, optional
Choose a sturdy cardstock for the card base so it can hold the decorations without bending.
If you want more creative ideas using everyday supplies, explore 25 Fun & Easy Indoor DIY Activities and Crafts for Kids.
Step 2: Fold the Card Base
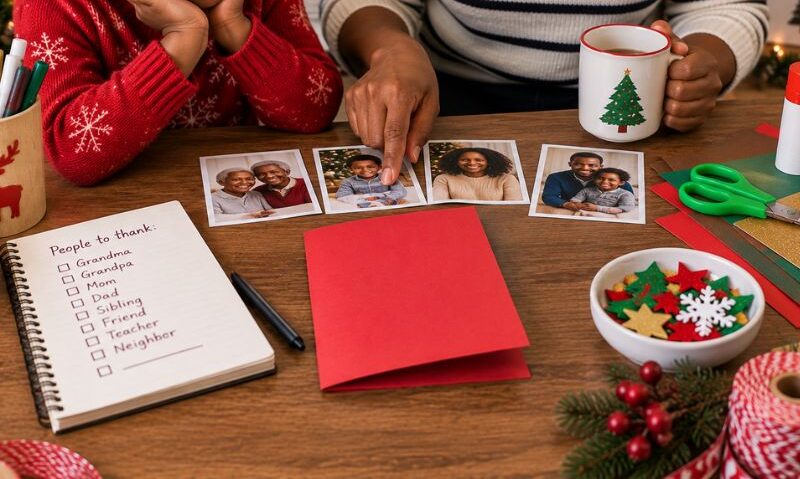
Let your child choose the color for the card.
Place the cardstock on the table and fold it in half. Line up the edges as closely as possible, then press firmly along the fold to create a clean crease. You can use a ruler to help make the fold straight if needed.
Don’t worry if your child’s fold isn’t perfect. Small imperfections are part of what makes a handmade card special.
If you love crafting activities with kids, How to Make Colorful Paper Movement Break Cards for Active Kids is your one stop guide.
Step 3: Plan the Front Design
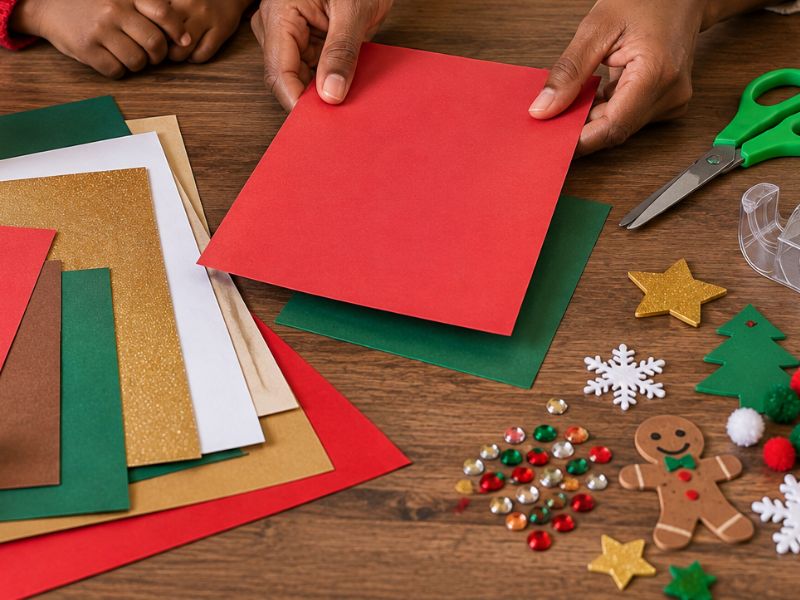
Before gluing anything down, decide what will go on the front of the card. A Christmas tree makes an easy centerpiece, but your child can choose another design such as a snowman, present, stocking, candy cane, or Christmas star.
For a simple tree, cut three green triangles in different sizes. Arrange them from largest to smallest and place a small brown rectangle underneath for the trunk. Lay all the pieces on the card first so your child can experiment with the arrangement before using glue.
Open this crafting guide next: 15 Creative Fall Crafts for Kids Using Leaves, Apples, and Pumpkins
Step 4: Build and Decorate the Christmas Tree
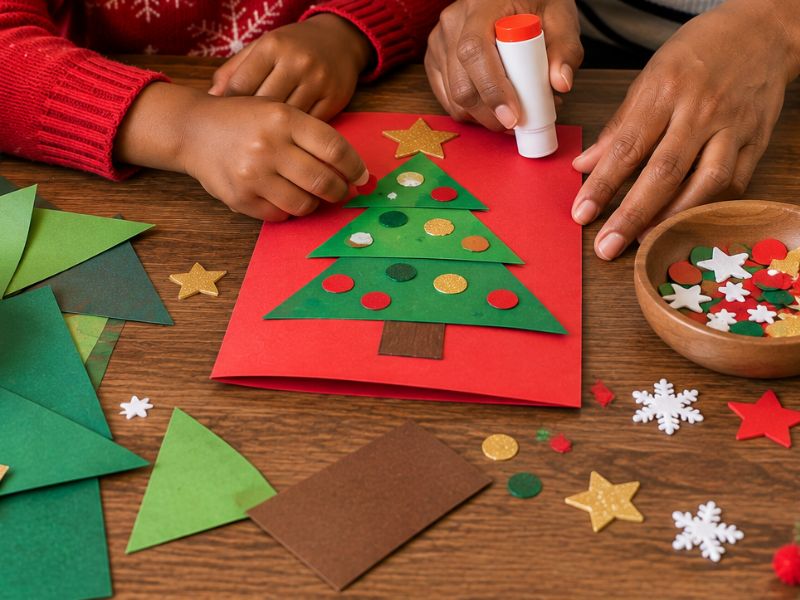
Glue the three green triangles onto the front of the card, starting with the largest piece at the bottom. Add the brown paper trunk underneath.
Now let your child decorate the tree using small paper circles, stars, stickers, markers, or other colorful shapes. Mix different colors and sizes to give the tree a playful, handmade appearance.
For the finishing touch, add a small gold or yellow star to the top of the tree . Allow your child to decide where the decorations go rather than trying to make the tree perfectly symmetrical.
This guide on How to Make a Paper Squishy Ice Cream That Looks Real and Feels Soft will get your kids to love crafting time.
Step 5: Add Extra Christmas Details
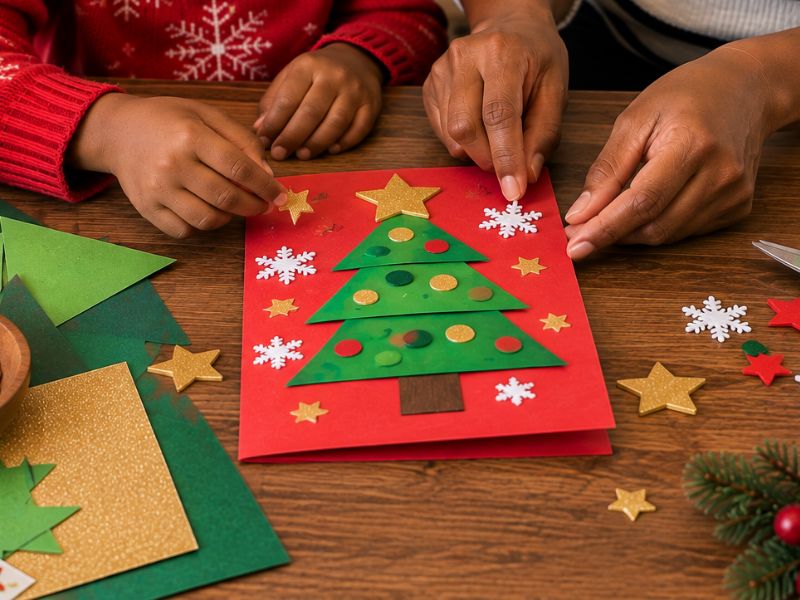
Once the main tree is finished, fill the remaining space with a few simple Christmas details. Your child can add small stars, snowflakes, hearts, presents, candy canes, or tiny trees using paper shapes, stickers, crayons, or markers.
You can also create a simple border around the card with colorful dots, lines, or small Christmas shapes. Keep the decorations relatively flat so the card will still close easily.
Do this craft with your kids: How to Make an Easy Sea Turtle Craft for Kids Using Paper Plates (Step-by-Step)
Step 6: Talk About Who They Want to Thank
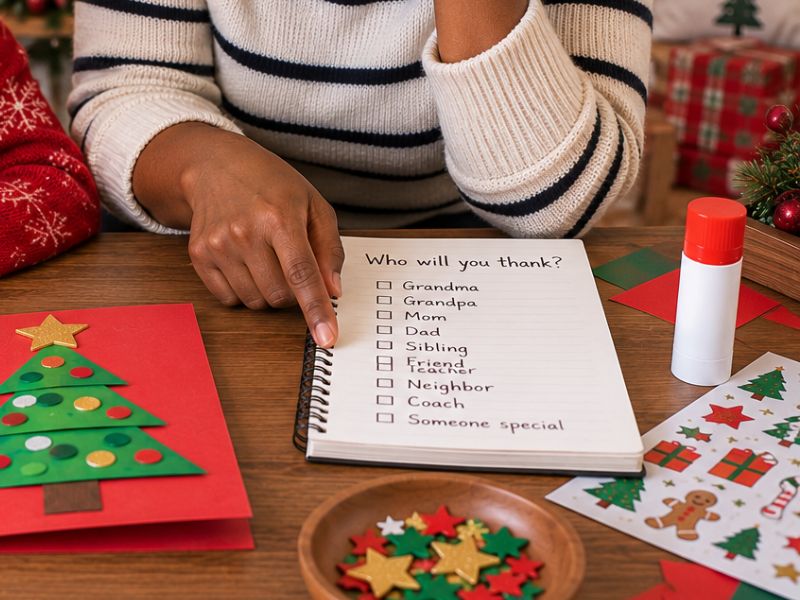
Before writing the message, ask your child who will receive the card. It could be a grandparent, parent, sibling, friend, teacher, neighbor, coach, or another special person.
Then ask a simple question:
“What are you thankful for about this person?”
Give your child time to think about their answer. Their response will become the heart of the card.
Do this How to Make an Easy Paper Plate Shark Craft for Preschoolers (Step-by-Step) craft with your kids comfortably at home.
Step 7: Write the Gratitude Message
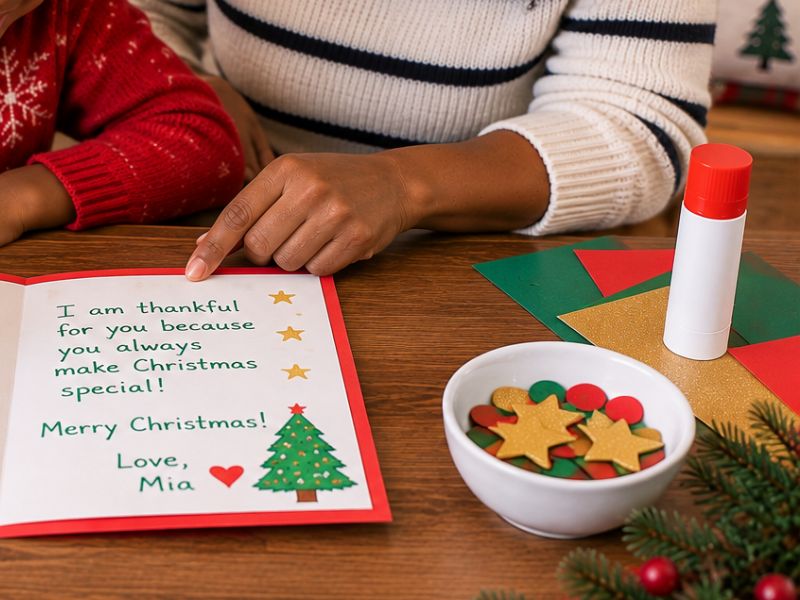
Help your child turn their idea into a short personal message.
You can use a sentence starter such as:
“I am thankful for you because…”
“Thank you for…”
“I am grateful for…”
Let your child use their own words. Don’t worry about correcting every grammatical mistake or making the message sound formal. If your child is old enough, let them write the message themselves.
For younger children, write their words on a separate sheet of paper first and let them copy or trace the message onto the card. If necessary, the adult can write the message while the child focuses on decorating.
This guide on Fun and Creative Ceramic Painting Ideas That Encourage Creativity in Kids is good for your family.
Step 8: Add a Personal Drawing
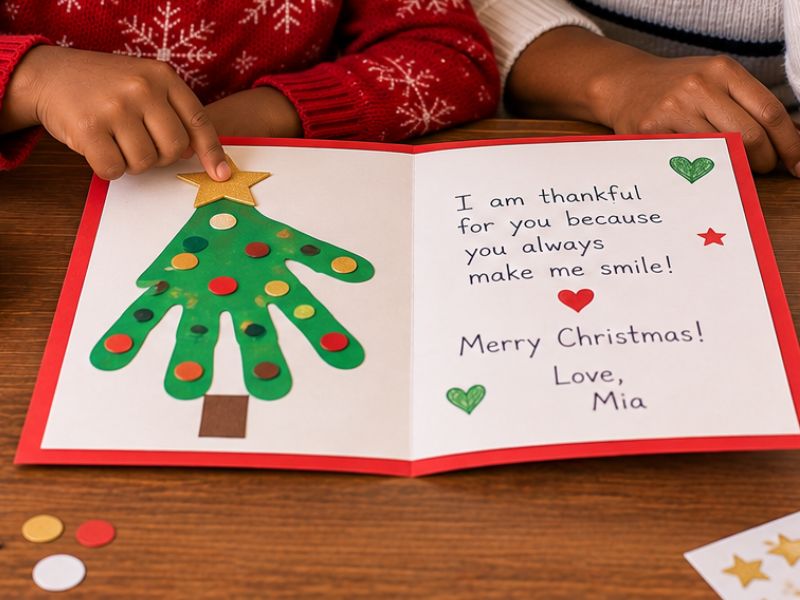
Give your child space to add a drawing connected to the person receiving the card. They might draw themselves with that person, a favorite family activity, a pet, a Christmas celebration, or another happy memory.
Let them draw freely without correcting the picture. The drawing doesn’t need to look perfect. Its personal meaning is what makes it special.
Check out this guide: 19 Unicorn Paper Crafts Kids Can Make in 30 Minutes
Step 10: Decorate the Inside
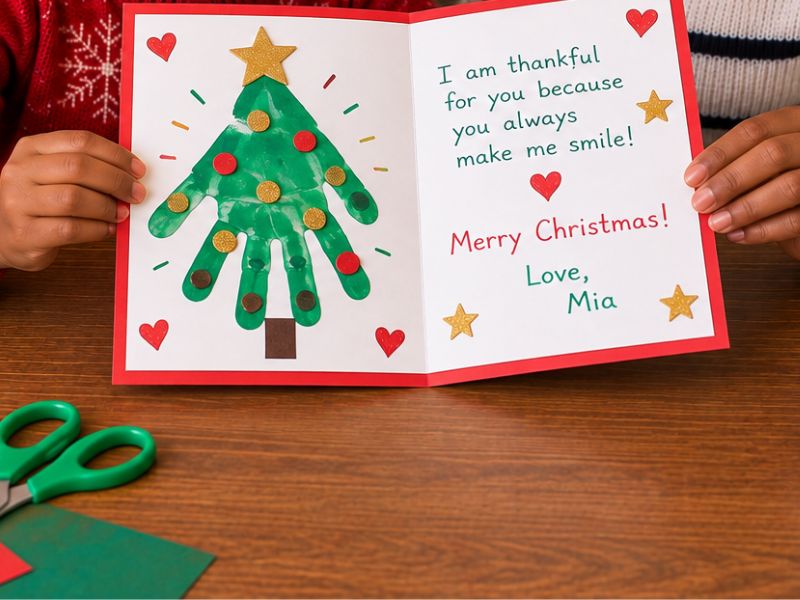
Add a few small decorations around the gratitude message inside the card. Your child can draw stars, snowflakes, hearts, or tiny Christmas trees around the edges.
Keep the center clear so the message remains easy to read. You can also add a simple strip of Christmas-colored washi tape along one edge if you have some available.
Step 11: Let the Card Dry
If you used liquid glue or paint, place the card flat in a safe area and allow everything to dry completely. Don’t stack the cards while they are still wet because the decorations may stick together or become damaged. Check that all paper pieces are firmly attached before closing the card.
Come back to this: 25 Magical Ocean Crafts for Kids That Make Summer Learning Fun
Step 12: Add the Final Signature
Once the card is completely dry, let your child sign their name. Younger children can trace their name if they need help.
Add the year underneath the signature so the card becomes a dated keepsake that the recipient can look back on in the future. Finally, help your child add a short Christmas greeting if there is enough space.
The finished card should feel personal, colorful, and unmistakably handmade—the child’s own words and artwork are what make it meaningful.
15 Christmas Gratitude Card Message Ideas for Kids
Some kids know exactly what they want to write.Others stare at the blank card and need a little inspiration. These sentence starters can help.
1. “I am thankful for you because…”
This simple sentence works for almost anyone.
2. “Thank you for…”
Kids can finish the sentence with a specific action.
3. “My favorite memory with you is…”
This encourages children to remember a shared experience.
4. “You make me happy when…”
This works especially well for grandparents, siblings, and close family members.
5. “I love when we…”
The child can describe a favorite activity.
6. “I am grateful that…”
This gives older kids more freedom to express themselves.
7. “You helped me when…”
Kids can recognize a time when someone supported them.
8. “I smile when I remember…”
This creates a lovely memory-focused message.
9. “Christmas is special because…”
Children can connect gratitude with the holiday.
10. “My favorite thing about you is…”
This makes a sweet message for a special person.
11. “Thank you for making me laugh when…”
Kids can share a funny memory.
12. “I hope we can…”
This allows children to look forward to another shared experience.
13. “One thing I will always remember is…”
This works well for older kids.
14. “You are special to me because…”
This creates a heartfelt message without requiring complicated writing.
15. “Merry Christmas to someone who…”
Kids can finish the sentence with their own description.
Easy Christmas Gratitude Card Designs
The Christmas tree design works beautifully, but kids can try several other ideas.
Christmas Present Card
Cut a large square from colourful paper and glue it onto the front of the card. Add two strips to create a ribbon, then finish with a paper bow.
Write: “You are a gift in my life.”
Christmas Stocking Card
Cut out a stocking shape and decorate it with stripes, dots, stars, or stickers. Children can write their gratitude message inside the card.
Snowman Card
Create three white circles and stack them to form a snowman. Add a carrot nose, scarf, buttons, and hat.
Write: “Wishing you a snow much fun Christmas!”
Kids often enjoy silly holiday messages, especially when they can add their own creative touches.
Christmas Lights Card
Draw a curved black line across the front of the card. Add colourful circles along the line, with each circle becoming a Christmas light. Write a short gratitude message underneath.
Gingerbread Card
Cut a gingerbread person from brown paper and add eyes, buttons, icing, and a smile. Write the gratitude message inside.
Santa Hat Card
Create a red triangle and add a white strip along the bottom. Finish with a cotton ball at the top. This design works especially well for younger children.
If your kids enjoy themed creative projects, you can also explore 25 Fun Bluey Crafts Kids Will Be Excited to Make.
Christmas Gratitude Card Ideas for Preschoolers
Preschoolers can enjoy this craft with a few simple changes. Give them larger pieces of paper and use chunky crayons and washable markers. You can also pre-cut complicated shapes before the activity begins.
Let children use stickers instead of tiny paper decorations. You can also ask them to draw the person they appreciate and then write their words underneath.
For example: “I am thankful for Grandpa.”
The child can add a drawing of Grandpa beside the sentence. This approach keeps the activity manageable while allowing the child to make real choices.
Christmas Gratitude Card Ideas for Elementary Kids
Older children can take more control of the craft. Let them plan their designs first and sketch the front of the card before cutting paper.
They can also write longer messages. Encourage them to mention a specific memory because personal experiences can make gratitude feel more genuine.
For example: “Thank you for taking me to the Christmas market last year. I still remember the lights and hot chocolate.”
If you need a larger collection of ideas, explore 31 Easy Christmas Crafts for Kids.
Make Cards for a Christmas Gathering
A Christmas gathering provides a natural opportunity for gratitude cards. Set up the craft table before guests arrive and give each child one blank card.
Ask them to create a card for someone attending the gathering. Grandparents, cousins, siblings, and friends can all receive one.
The activity gives children something creative to do while adults prepare food or chat. For more ideas for keeping kids engaged during family time, check out How to Plan a Fun Family Game Night Kids Will Enjoy.
For more memory-making ideas, read DIY Childhood Memory Box Ideas.
Make a Christmas Gratitude Wall
If several children create cards, display them together. Use string and clothespins to create a simple Christmas card wall, or attach the cards to a large piece of cardboard.
Add a heading:
“Our Christmas Gratitude Wall”
Display the cards throughout December. Kids can read the messages and see everyone’s artwork. This idea works especially well for a holiday craft party.
If you are planning a larger Christmas celebration, How to Plan a Magical Kids Birthday Party From Start to Finish has useful ideas for organising kid-friendly activity stations that can also inspire holiday setups.
Add the Cards to Christmas Gifts
A handmade gratitude card can become part of a Christmas present. Tie the card to:
- A homemade treat
- A wrapped book
- A craft
- A small keepsake
- A Christmas ornament
- A family gift
The card adds a personal touch without requiring another complicated project. Kids can also decorate the gift itself.
For party and celebration decoration inspiration, see Dollar Store Party Decor Hacks For Kids That Look Honestly Expensive.
Create a Gratitude Card for Each Family Member
One card can become a family tradition. Give each child a list of family members and ask them to create one card for each person.
The messages can stay short.
For example:
“Thank you for reading bedtime stories with me.”
“Thank you for playing games with me.”
“Thank you for making me laugh.”
“Thank you for always cheering me on.”
This activity encourages kids to notice the little things people do for them.
Make a Christmas Gratitude Card With Recycled Materials
You can create beautiful cards from leftover materials. Try using:
- Old wrapping paper
- Christmas magazine pages
- Paper bags
- Cardboard packaging
- Ribbon scraps
- Tissue paper
- Old greeting cards
- Paper scraps
Cut interesting sections from old Christmas cards and use them as decorations. Children can also turn cardboard packaging into sturdy card bases.
This approach gives craft materials a second life while encouraging children to be creative with what they already have.
Add Texture to the Card
Texture can make the card more interesting. Try adding:
- Cotton balls
- Pom-poms
- Felt
- Tissue paper
- Ribbon
- Corrugated cardboard
- Fabric scraps
For example, cotton can become snow, ribbon can become Christmas tree garland, and pom-poms can become ornaments. Tissue paper can also create a fluffy Christmas tree.
Kids can experiment with different materials and see what they like.
Christmas Gratitude Card Activity for a Classroom-Style Group
You don’t need a classroom to enjoy a group version of this activity. A holiday playdate, family gathering, or kids’ craft party can work just as well.
Give each child a card and ask them to choose someone they appreciate. Then let them create their cards using the craft materials you’ve provided. You can also offer sentence starters to children who need help expressing their thoughts.
Keep the activity relaxed and let children work at their own pace. Some kids may finish quickly, while others may spend more time decorating their cards.
For more group-friendly creative ideas, see The Complete Guide to Summer Kids Crafts Activities for Creative and Curious Kids.
How to Make the Activity Meaningful
The craft itself matters, but the conversation around it can make the activity even more meaningful. Ask children why they chose their recipient and what they appreciate about that person.
Give them time to answer without putting pressure on them. You might hear a simple response like, “Because she plays with me.” Even a short answer can reveal what matters most to a child.
Don’t turn the conversation into a formal lesson. Let it feel natural and allow children to share their thoughts in their own way. Some of the best gratitude moments happen during ordinary activities. words. Even one sentence can make the card feel personal and meaningful.
Safety Tips
Choose scissors that are appropriate for the child’s age and supervise children when they use glue, small decorations, or other craft materials. Washable supplies are also a good option for younger children.
Avoid tiny embellishments around children who still put objects in their mouths. Keep glitter controlled because it can spread quickly and become difficult to clean.
For younger kids, an adult can handle complicated cutting while the child focuses on decorating and adding their own creative touches.
Final Thoughts
Learning how to make Christmas gratitude card with kids gives children a simple way to turn appreciation into something they can share. The craft doesn’t require expensive supplies. A sheet of paper, a few crayons, and a thoughtful message can create a meaningful keepsake.
Kids can choose their colours, draw pictures, decorate Christmas trees, and write about someone special. Most importantly, they get time to think about the people who make their lives brighter.
That makes this more than another Christmas craft. It becomes a small opportunity to slow down, create something by hand, and share a little kindness.
You could make one card together this Christmas or turn the activity into a yearly tradition. Years from now, those simple cards may become some of the sweetest reminders of childhood.

