Some links on this blog may contain affiliate links. If you make a purchase through one of these links, I may earn a small commission at no extra cost to you. Thank you for supporting Enchanted Kids Moment!
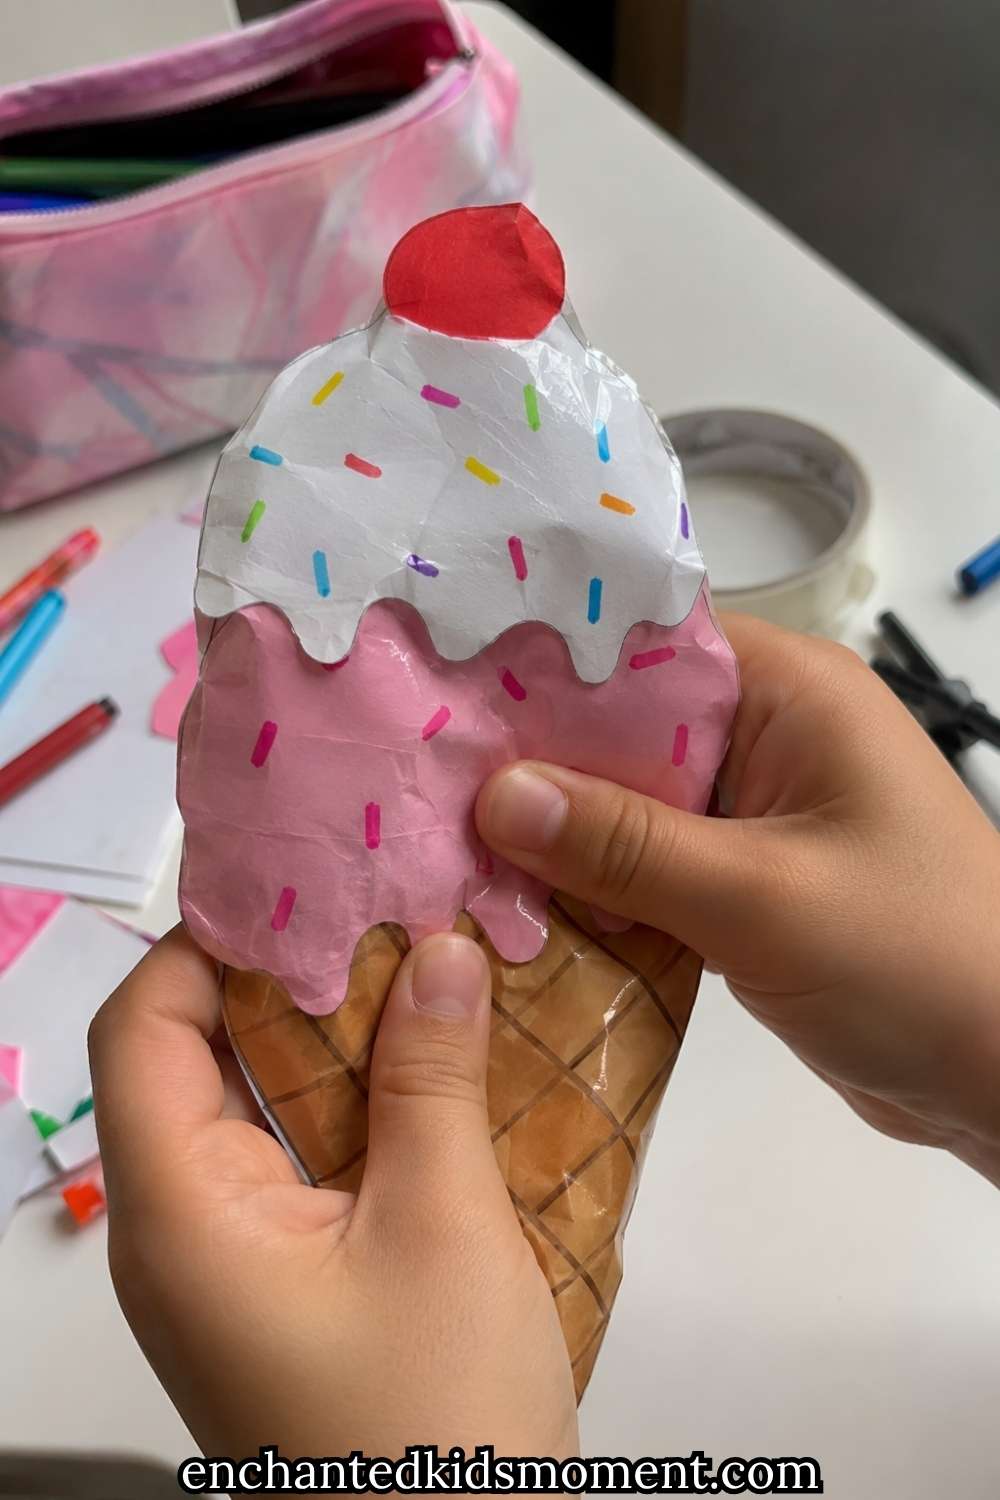
A child once handed me a paper ice cream and proudly said, “Don’t eat it. It’s my favorite squishy.” At first glance, it looked like something from a toy shop. The colorful scoop, smiling face, and tiny sprinkles made it look almost real. Then came the best part. One squeeze, and it slowly puffed back into shape. Watching how excited they felt over something they had made from paper reminded me that the simplest crafts often become the most loved.
A paper squishy ice cream is the kind of project children want to make again and again. They can choose their favorite “flavor,” decorate it with fun toppings, and create a toy they can actually play with after the crafting ends. It is creative, inexpensive, and surprisingly satisfying to make from start to finish.
Many first-time paper squishies end up looking flat, lumpy, or uneven. Sometimes the stuffing shifts around, and other times the edges split after only a few squeezes. Those little problems can make a fun project feel disappointing, especially after spending time decorating it.
The good news is that a few simple techniques make a huge difference. Choosing the right paper, sealing the edges carefully, adding just the right amount of stuffing, and shaping the ice cream before closing it all help create a softer, fuller squishy that lasts much longer.
If this is your first paper squishy project, or you simply want more fun ideas to try next, open my DIY Squishy Crafts for Sleepovers Kids Will Love (Step-by-Step Guide). It is full of creative squishies that children can make with simple craft supplies already waiting at home.
Grab your markers, paper, scissors, and stuffing because we are about to turn an ordinary sheet of paper into a colorful paper squishy ice cream that looks adorable, feels soft, and is just as much fun to squeeze as it is to make.
What You Need to Make a Paper Squishy Ice Cream
One of the best things about making a paper squishy ice cream is that you probably already have most of the supplies at home. You do not need fancy craft materials to create something colorful, soft, and fun to squeeze.
Gather everything before you begin so you can enjoy the project without stopping halfway through.
Materials
- 2 sheets of white paper
- Colored markers or colored pencils
- Black marker
- Pencil
- Eraser
- Scissors
- Clear packing tape or wide transparent tape
- Soft stuffing (polyfill, cotton, or small plastic bags)
- Ruler (optional)
Lay everything on a clean table with enough room to work. A flat surface makes tracing, cutting, and taping much easier.
If your kids enjoy creating toys from everyday supplies, they may also love my 20 DIY Squishy Crafts for Sleepovers Kids Will Love (Step-by-Step Guide) for even more fun squishy ideas.
Before You Start
Taking a few extra minutes before you begin will help your paper squishy ice cream look neater and last much longer.
Choose paper that feels sturdy but still bends easily. Regular printer paper works well because it folds without becoming too thick.
Use sharp scissors to create smooth edges.
Keep tape within easy reach since you will use it several times during the project.
Most importantly, decide what your ice cream will look like before drawing.
Ask yourself a few fun questions.
Will it be chocolate?
Will it have rainbow sprinkles?
Will it smile?
Will it have one scoop or two?
Planning the design first helps every step flow much more smoothly.
Open this later: How to Make an Easy Paper Plate Shark Craft for Preschoolers (Step-by-Step)
How to Make a Paper Squishy Ice Cream
Step 1: Sketch the Ice Cream
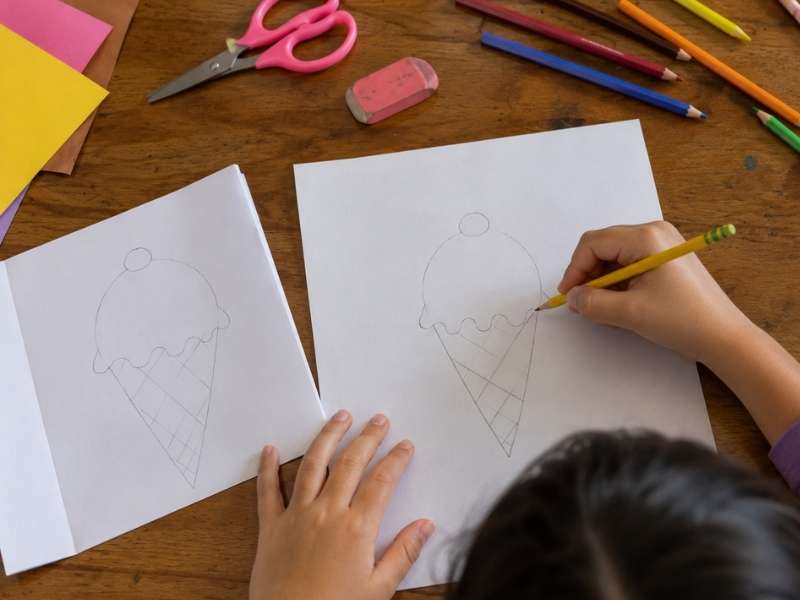
Every great paper squishy ice cream starts with a simple outline.
Take your pencil and lightly draw one large scoop of ice cream.
A slightly uneven shape often looks more realistic than a perfect circle.
Next, draw the cone underneath.
Keep the cone wide enough to hold stuffing later.
Avoid making the tip too narrow because it becomes harder to fill.
Once you like the shape, draw the same design again on another sheet of paper.
Both pieces should match as closely as possible.
Do not worry if they are not identical.
Small differences disappear once you tape the squishy together.
Save for later: 31 Minecraft Paper Craft Ideas Kids Will Want to Make Immediately
Helpful Tip
Fold one sheet of paper in half before drawing.
Cut both layers together.
This simple trick creates two matching pieces without tracing everything twice.
Step 2: Add the Cute Details
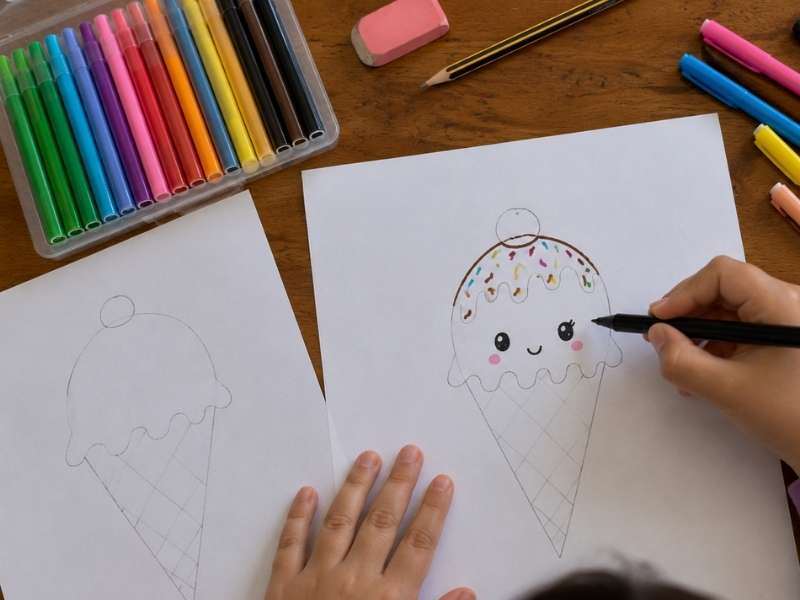
Now your paper squishy ice cream starts showing its personality.
Use a black marker to draw a happy face.
Simple designs often look the cutest.
Try adding:
- Two round eyes
- Tiny blush circles
- A smiling mouth
- Closed eyelashes
- Small eyebrows
After finishing the face, decorate the ice cream.
Draw sprinkles.
Add chocolate drizzle.
Create swirls.
Make colorful syrup running down the scoop.
Small details help the finished squishy look much more realistic.
If your child enjoys decorating paper projects,How to Make an Adorable Seashell Picture Frame Craft for Preschoolers (Step-by-Step Guide) offers another creative activity full of fun designs.
Step 3: Color Your Ice Cream
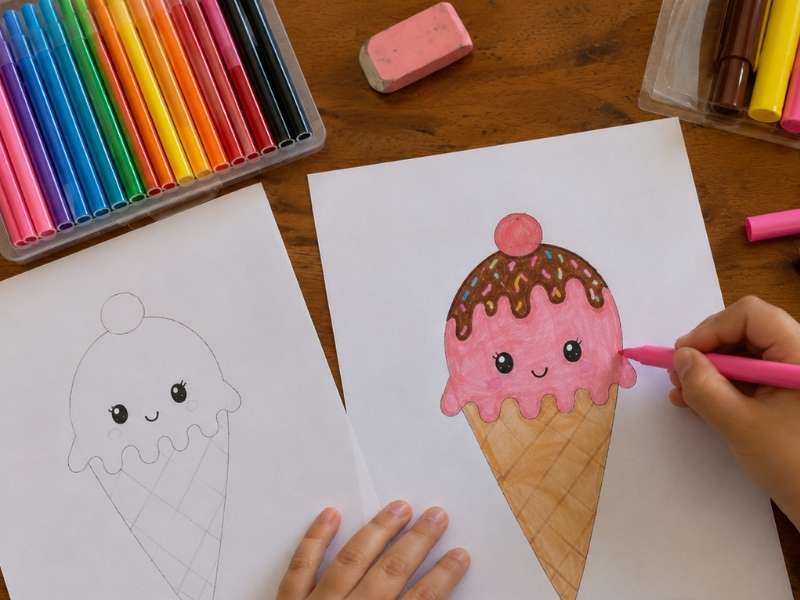
This step brings your paper squishy ice cream to life.
Choose colors that make the design look delicious.
Some fun combinations include:
Strawberry
Pink scoop.
Red sprinkles.
Tan cone.
Chocolate
Brown scoop.
Chocolate drizzle.
White sprinkles.
Mint
Light green scoop.
Dark green sprinkles.
Brown cone.
Rainbow
Pastel sections.
Colorful toppings.
Bright cone.
Color evenly across the paper.
Bookmark this guide: 15 Creative Fall Crafts for Kids Using Leaves, Apples, and Pumpkins
Press lightly with your markers to avoid soaking the paper.
Adding a second layer of color creates gentle shading.
Darker edges also make the scoop appear rounder.
Make It Look More Real
Add a slightly darker shade underneath the dripping syrup.
Blend lighter colors toward the middle.
Those tiny touches create depth without much extra work.
Step 4: Protect the Drawing With Tape
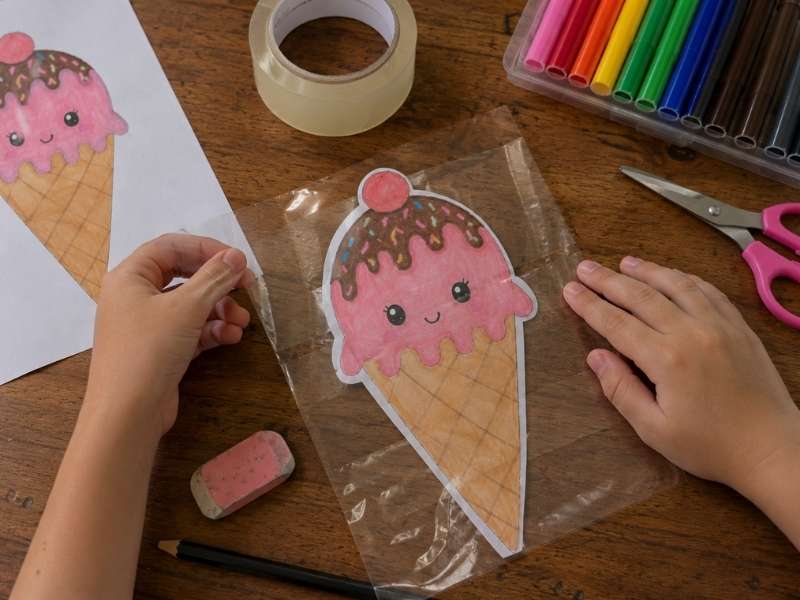
Many beginners skip this step.
Later, they discover that the colors begin rubbing off after only a few squeezes.
Cover both paper pieces completely with clear packing tape before cutting them out.
Lay each strip carefully.
Let the edges overlap slightly.
Smooth every strip with your fingers as you go.
Try to avoid wrinkles.
Small air bubbles are not a problem.
Large bubbles can make the finished paper squishy ice cream look uneven.
Once both sides feel smooth, trim away any tape hanging over the edges.
The tape gives your squishy a shiny finish while helping it survive hundreds of squeezes.
Step 5: Cut Out Both Pieces
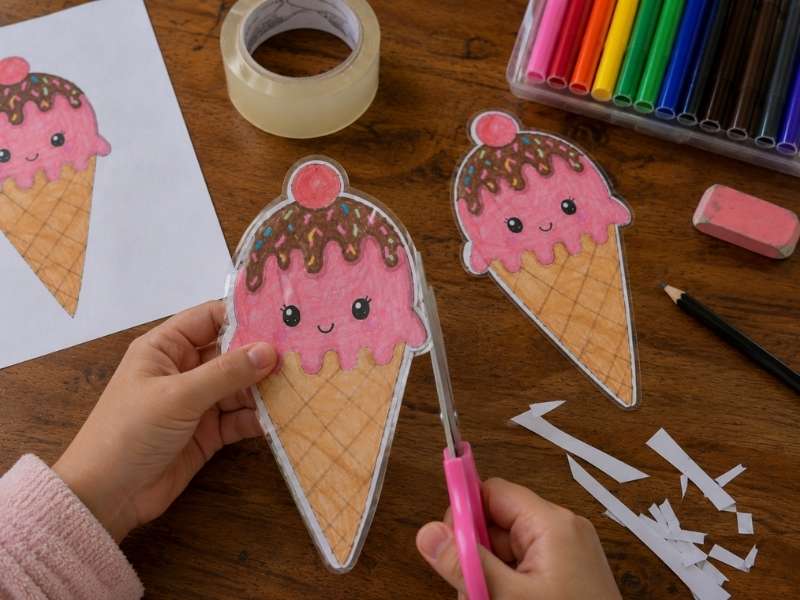
Now it is time to cut out your design.
Use sharp scissors.
Follow the outline slowly.
Take your time around the curved scoop.
Smooth edges help the finished squishy look much more professional.
When both pieces are finished, place them on top of each other.
Check that they line up.
Trim any uneven sections before moving to the next step.
Do not worry about tiny imperfections.
Once your paper squishy ice cream gets stuffed and sealed, those little differences become almost impossible to notice.
Pin this for later: 21 Adorable Shark Crafts for Preschoolers: Easy Summer Ocean Activities Kids Love
Quick Check Before Moving On
Before grabbing the tape again, make sure you have:
Two matching ice cream pieces
Bright, finished coloring
Decorative details
Smooth taped surfaces
Cleanly cut edges
Everything is now ready for turning your paper craft into a soft, slow-rising squishy.
Step 6: Tape the Edges Together
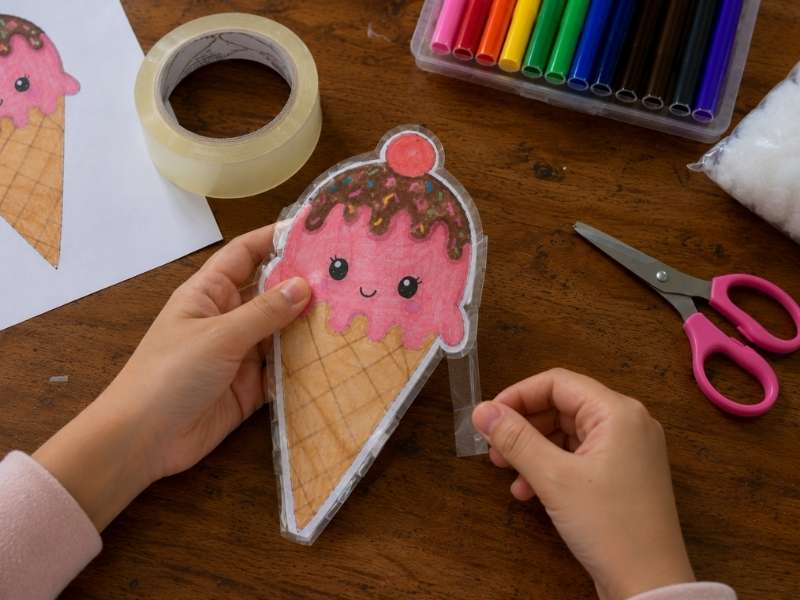
Now your paper squishy ice cream starts looking like a real squishy instead of two separate pieces of paper.
Place both ice cream pieces together with the decorated sides facing out.
Start taping around the edges.
Work slowly instead of trying to finish everything at once.
Cut several short strips of clear packing tape rather than using one long piece. Short strips bend around the curves much more easily and create a cleaner finish.
Press each strip down firmly before adding the next one.
Leave a small opening near the bottom of the cone.
You will use that opening to add the stuffing later.
Come back to this: 23 Adorable Ceramic Mug Painting Ideas for Kids That Make the Sweetest Keepsakes
Keep the Tape Neat
Try not to stretch the tape.
Smooth it gently with your fingers as you work.
If you notice wrinkles, lift the tape carefully and place it again before moving on.
A little patience during this step helps your paper squishy ice cream last much longer.
Step 7: Add Soft Stuffing
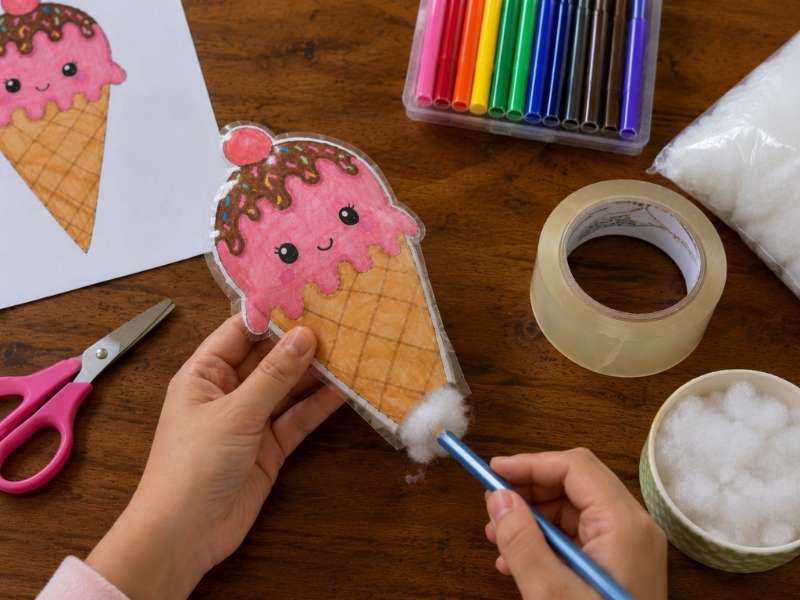
The stuffing gives your paper squishy ice cream its soft, squishy feel.
Pull your filling into small pieces instead of using one large clump.
Small pieces spread more evenly inside the paper.
Start by filling the scoop.
Use a pencil or the end of a wooden spoon to push the stuffing into the rounded edges.
Those corners often stay empty if you rush.
Once the scoop feels full, continue filling the cone.
Stop every few minutes and gently squeeze the squishy.
That quick test helps you decide if it needs more filling.
How Much Stuffing Should You Use?
Too little stuffing makes the squishy feel flat.
Too much stuffing makes it hard and stiff.
Aim for a soft, slightly puffy shape that slowly rises after each squeeze.
Step 8: Shape the Squishy Before Sealing It
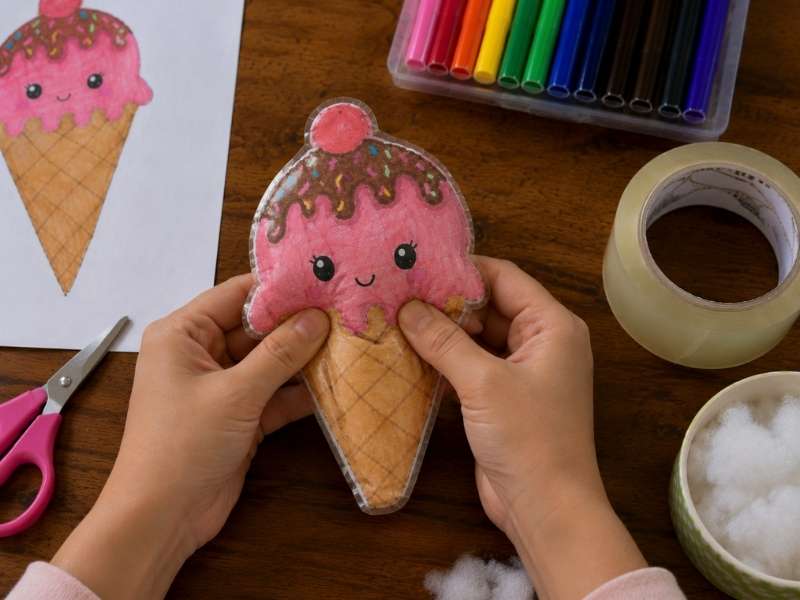
Before closing the opening, spend a minute shaping your paper squishy ice cream.
Move the stuffing around with your fingers.
Spread it evenly from side to side.
Check the scoop.
Look at the cone.
Both sections should feel balanced.
If one side looks thinner, add a little more stuffing.
If one side feels overfilled, remove a small amount.
Making these adjustments now saves time later.
Step 9: Close the Opening
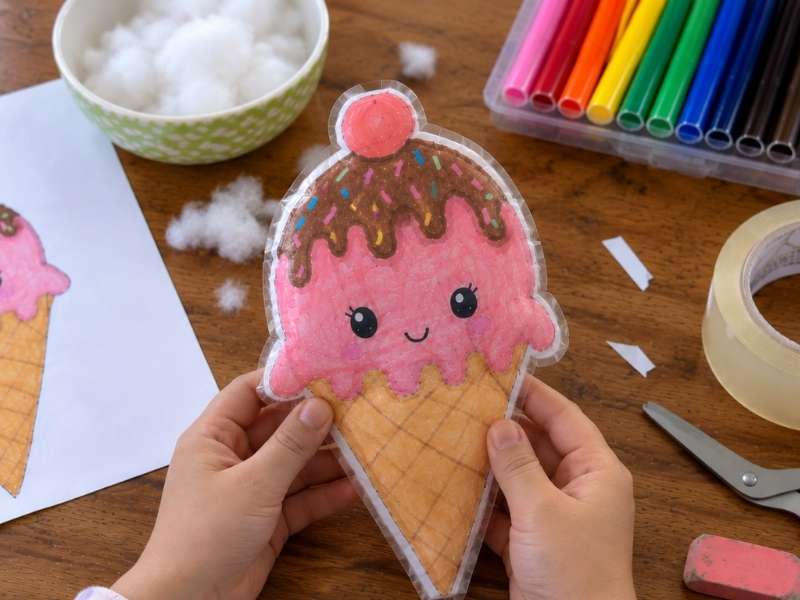
Happy with the shape?
Now seal the remaining opening.
Use one strip of packing tape to close the gap.
Press the tape down firmly.
Run your fingers across the seam several times.
Check every edge to make sure nothing sticks out.
Give your paper squishy ice cream a few gentle squeezes.
If the stuffing stays inside, you are ready for the next step.
Step 10: Test the Squishy
The first squeeze is always the most exciting part.
Press the scoop gently.
Watch how it rises.
Squeeze the cone.
Turn the squishy over.
Check every edge.
A well-made paper squishy ice cream should feel soft without making crinkling noises every time you press it.
If one section feels empty, carefully reopen a small part of the seam and add a little more stuffing.
If it feels too firm, remove a small amount until it feels comfortable to squeeze.
Make Your Paper Squishy Ice Cream Look Even More Real
Small details often make the biggest difference.
You do not need advanced drawing skills.
A few finishing touches can transform a simple craft into something that looks surprisingly realistic.
Add Shading
Use a slightly darker marker around the edges of the scoop.
Blend toward the middle using a lighter color.
The shading creates the illusion of a rounded scoop.
Draw Melted Ice Cream
Add a few drips running over the cone.
Keep every drip a different length.
Natural shapes look more convincing than perfectly matching ones.
Create Texture on the Cone
Draw diagonal lines across the cone.
Then draw another set in the opposite direction.
That simple crisscross pattern creates the classic waffle cone look.
Add Colorful Sprinkles
Sprinkles instantly make the paper squishy ice cream more cheerful.
Use different colors and different angles.
Scatter them instead of lining them up.
The random pattern looks much more realistic.
Add a Cute Face
Many children love kawaii-style squishies.
Draw:
- Smiling eyes
- Rosy cheeks
- Tiny eyebrows
- A happy mouth
Those simple features give your squishy plenty of personality.
If your child enjoys decorating cute paper projects, 19 Unicorn Paper Crafts Kids Can Make in 30 Minutes offers another fun craft filled with colorful designs.
Common Mistakes and How to Fix Them
Almost everyone makes a few mistakes during their first paper squishy ice cream project.
Fortunately, most of them are easy to fix.
The Squishy Feels Flat
Cause:
Not enough stuffing.
Solution:
Open a small section of the seam and add more filling.
The Squishy Feels Too Hard
Cause:
Too much stuffing.
Solution:
Remove a little filling until the squishy feels softer.
The Edges Keep Opening
Cause:
The tape did not overlap enough.
Solution:
Cover the seam with another strip of packing tape.
Press firmly.
The Coloring Looks Streaky
Cause:
Heavy marker strokes.
Solution:
Color lightly in small circles.
Build the color gradually instead of pressing hard.
The Squishy Looks Uneven
Cause:
The stuffing gathered in one area.
Solution:
Massage the filling gently with your fingers until it spreads evenly throughout the squishy
If your family enjoys colorful DIY activities, Fun and Creative Ceramic Painting Ideas That Encourage Creativity in Kids offers another relaxing project that lets children decorate something uniquely their own.
How to Make Your Paper Squishy Ice Cream Last Longer
After spending time creating a paper squishy ice cream, you will probably want to keep it looking as nice as possible. A little care goes a long way, especially if children plan to play with it often.
Keep your squishy in a cool, dry place when it is not in use. Heat can weaken the tape over time, while moisture may cause the paper to wrinkle.
Try not to place heavy books or toys on top of it. Constant pressure can flatten the stuffing and make the squishy lose its soft shape.
If the edges begin lifting after lots of squeezing, add another thin strip of clear packing tape over the seam. That quick repair usually gives the squishy many more play sessions.
Taking a few moments to care for your paper squishy ice cream helps it stay soft, colorful, and fun to squeeze.
Fun Ways Kids Can Play With Paper Squishy Ice Cream
The project does not have to end once the glue and tape are put away. A finished paper squishy ice cream quickly becomes part of imaginative play.
Here are a few fun ideas.
Open a Pretend Ice Cream Shop
Gather several paper squishies and arrange them on a tray.
Let children take turns being the customer and the shop owner.
They can invent flavors, take orders, and serve colorful treats.
Pretend play builds communication skills while encouraging creativity.
Create a Paper Dessert Collection
Why stop with one flavor?
Make chocolate, vanilla, strawberry, mint, rainbow, and cookies-and-cream versions.
Display them together inside a small box or basket.
Children often enjoy collecting their creations just as much as making them.
Use Them During Playdates
Paper squishies make wonderful screen-free activities.
Each child can decorate a different flavor and take it home afterward.
That simple craft keeps everyone busy while giving them a handmade keepsake.
If you are planning a sleepover, 20 DIY Squishy Crafts for Sleepovers Kids Will Love (Step-by-Step Guide) has even more squishy ideas that children can make together.
Add Them to Pretend Kitchens
Many children already have toy kitchens or pretend food sets.
A handmade paper squishy ice cream fits perfectly alongside toy cakes, cookies, and fruit.
The more handmade pieces children add, the more personal their pretend play becomes.
Tips for the Best Results
A few small habits can make every paper squishy ice cream look better.
- Sketch lightly before using markers.
- Color before adding tape.
- Use short pieces of tape around curves.
- Spread the stuffing evenly.
- Leave enough room for the squishy to compress.
- Smooth every seam before adding the next strip.
- Test the squishy before sealing the final opening.
- Decorate after the basic shape looks right.
- Store finished squishies flat when not in use.
These simple tips help beginners achieve much better results on their very first project.
Read this next: The Complete Guide to Summer Kids Crafts Activities for Creative and Curious Kids
Final Thoughts
Making a paper squishy ice cream proves that simple craft supplies can become something children treasure long after the project ends. A few sheets of paper, bright markers, clear tape, and soft stuffing are all it takes to create a toy that children can decorate, collect, and squeeze again and again.
Do not worry if your first squishy is not perfect. Every project teaches a new trick, whether it is adding smoother tape, creating better shading, or finding the right amount of stuffing. Those little improvements make the next paper squishy even more fun to create.
Once you finish your first ice cream, challenge yourself to make an entire dessert collection. Try different flavors, playful faces, colorful toppings, and creative themes until each squishy has its own personality.
If today’s project inspired you to keep crafting, you might also enjoy 35 Easy Painting Ideas for Toddlers That Don’t Create Huge Messes for another relaxing creative activity and for even more hands-on projects that turn ordinary afternoons into unforgettable childhood memories.
Common Questions
What paper works best?
Regular printer paper works well because it folds easily and accepts markers without becoming too thick.
Some crafters also like lightweight cardstock, but thicker paper creates firmer squishies.
What should I use for stuffing?
Polyfill creates the softest result.
Cotton also works well.
Some children use clean plastic shopping bags cut into small pieces, although the squishy may feel firmer.
Can younger children make this craft?
Yes, but an adult should help with cutting and taping.
Older children can complete most of the project on their own.
Why does my paper squishy ice cream feel hard?
Too much stuffing usually causes that problem.
Remove a small amount and reshape the squishy before sealing it again.
Why do the edges keep opening?
Most edge problems happen when the tape does not overlap enough.
Adding another strip of packing tape usually solves the issue.
Can I make different sizes?
Absolutely.
Mini paper squishies fit inside small collections.
Larger squishies create oversized pretend desserts that children love displaying.