Some links on this blog may contain affiliate links. If you make a purchase through one of these links, I may earn a small commission at no extra cost to you. Thank you for supporting Enchanted Kids Moment!
It does not take long for a curious toddler to empty a toy basket, pull every cushion off the sofa, or start exploring things they probably should not touch. Keeping little hands busy can feel like a full-time job, especially on rainy days or during long afternoons at home.
That is why toddler sensory bins have become such a helpful activity. They give children a safe place to scoop, pour, sort, and discover new textures while building important early skills through play. The best part is that you can make one with simple items you already have around the house. If you are looking for more age-appropriate inspiration, you’ll also enjoy my Complete Guide to Choosing Age-Appropriate Activities for Children
A good sensory bin does more than keep toddlers entertained for a few minutes. It encourages focus, supports fine motor development, and satisfies the natural curiosity that young children have every single day. You can also rotate different themes throughout the year alongside the ideas in my The Ultimate Guide to Creating Meaningful Childhood Memories With Kids to keep playtime fresh and exciting.
Making a sensory bin does not need to feel overwhelming or messy. A few thoughtful choices can create an activity that feels fun for toddlers and much easier for adults to manage. Let’s put one together step by step.
Understanding Toddler Sensory Bins Are Worth Making
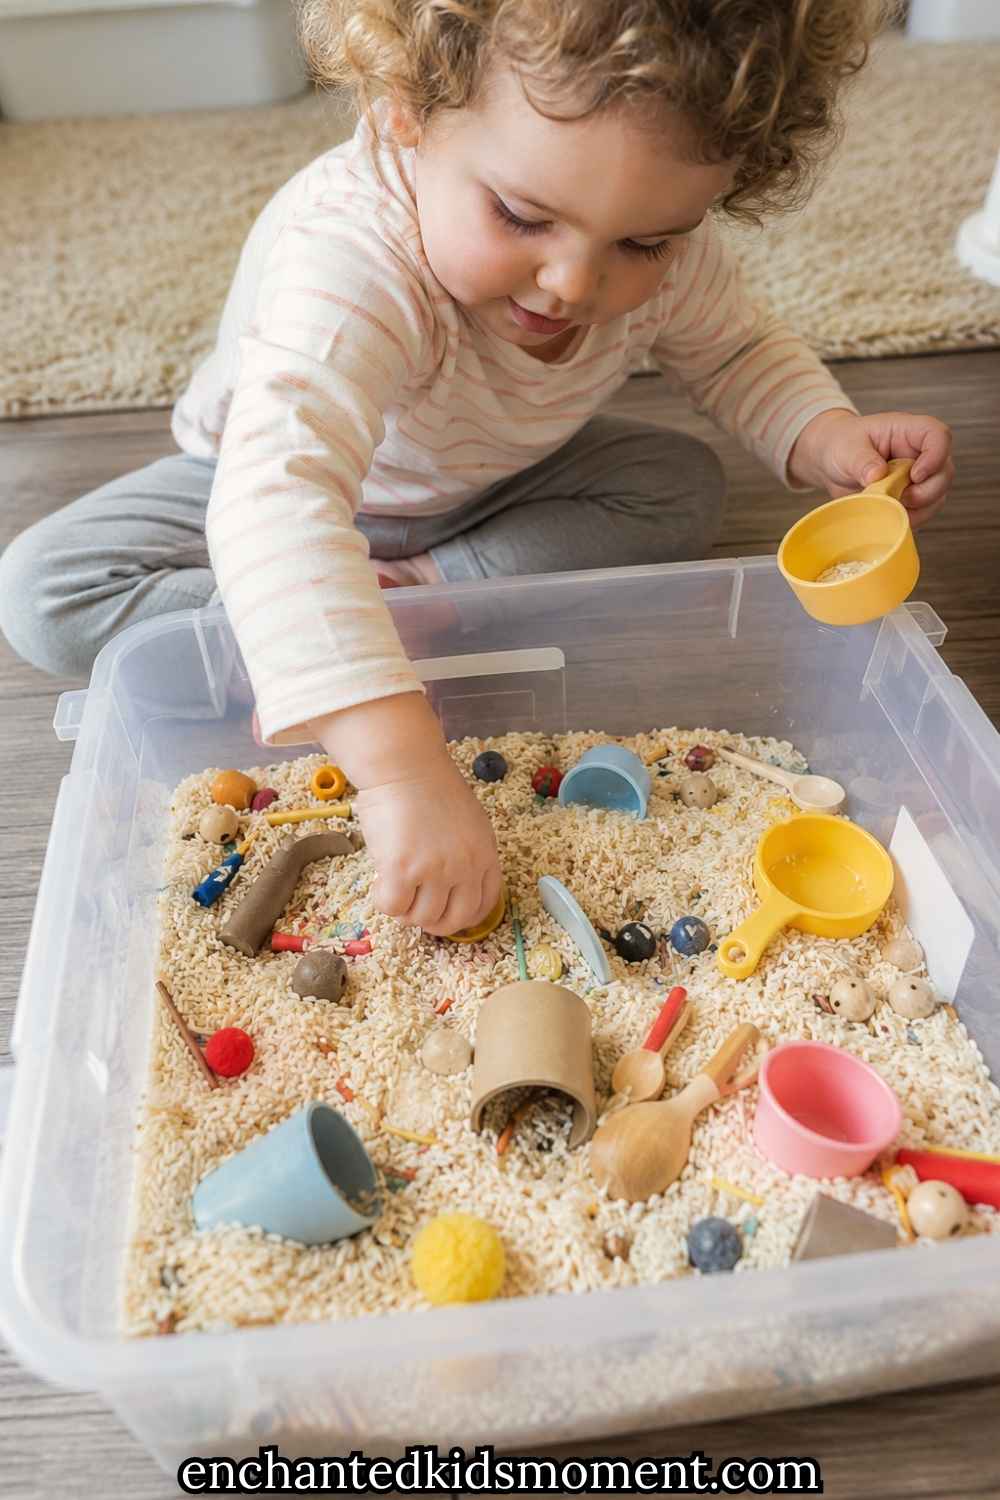
Many toys entertain toddlers for a few minutes before they lose interest. A sensory bin works differently because children stay involved instead of simply watching something happen.
Every handful feels different.
Every scoop creates a new discovery.
Every hidden object becomes a tiny adventure.
That constant exploration helps toddlers learn without realizing they are practicing new skills.
Toddler sensory bins encourage children to use their hands with purpose. Scooping, grabbing, pouring, pinching, and sorting strengthen the small muscles they need later for writing, drawing, buttoning clothes, and holding utensils.
At the same time, sensory play encourages problem-solving.
A toddler may wonder why one object sinks while another stays on top. They might compare rough textures with smooth ones or discover that large containers hold more than small cups. Those little discoveries build confidence because children learn through experience instead of instructions.
Sensory play also creates wonderful opportunities for conversation.
You can ask simple questions like:
- Which one feels soft?
- Can you find the blue scoop?
- What happens if we fill this cup?
- Which container holds more?
Those conversations help toddlers build vocabulary while staying focused on play.
If your child enjoys creative hands-on projects, my 35 Easy Painting Ideas for Toddlers That Don’t Create Huge Messes offers another simple way to encourage learning through art.
How to Make Toddler Sensory Bins Step by Step
Putting together toddler sensory bins does not take much time, but a little planning makes a huge difference. The goal is not to create a picture-perfect activity. The goal is to create an invitation for your toddler to explore, imagine, and discover.
Keep the setup simple during the first few sessions. Once your toddler understands how sensory play works, you can add new materials and themes over time.
Step 1: Choose a Safe and Easy-to-Use Bin
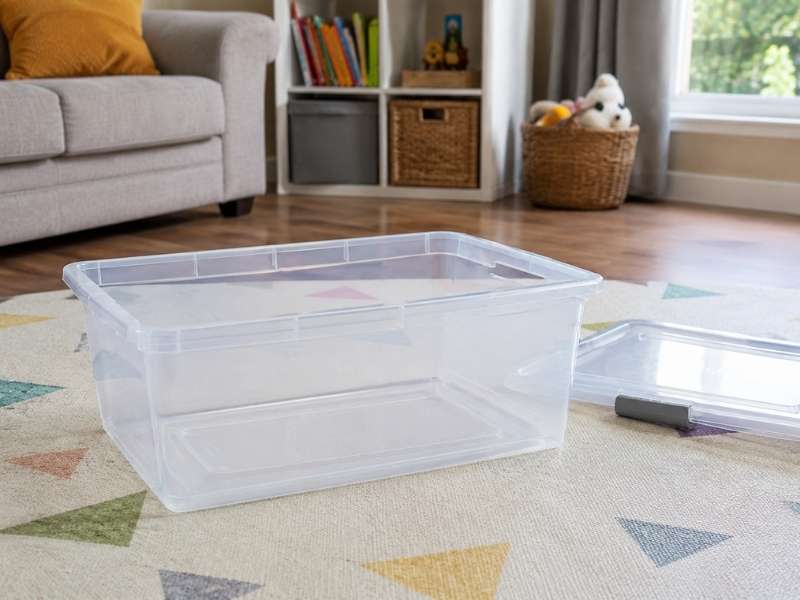
Start with a container that feels comfortable for your toddler to reach into.
A shallow plastic bin usually works best. Your child should be able to touch the bottom without leaning too far forward. Deep containers can make play harder and may lead to more spills.
Look for a bin with:
- Smooth edges
- A wide opening
- A flat, steady base
- Strong plastic
- Enough room for two hands
- A lid for easy storage
Clear bins work well because toddlers can see the materials before play begins. That often builds curiosity right away.
You can also use a plastic dish tub, a large tray, or an under-bed storage container. Use something you already own before buying a new bin.
Place the container on the floor, a low table, or a washable mat. Make sure it cannot slide around easily.
Before each play session, check the bin for cracks or sharp edges.
Step 2: Choose a Simple Theme
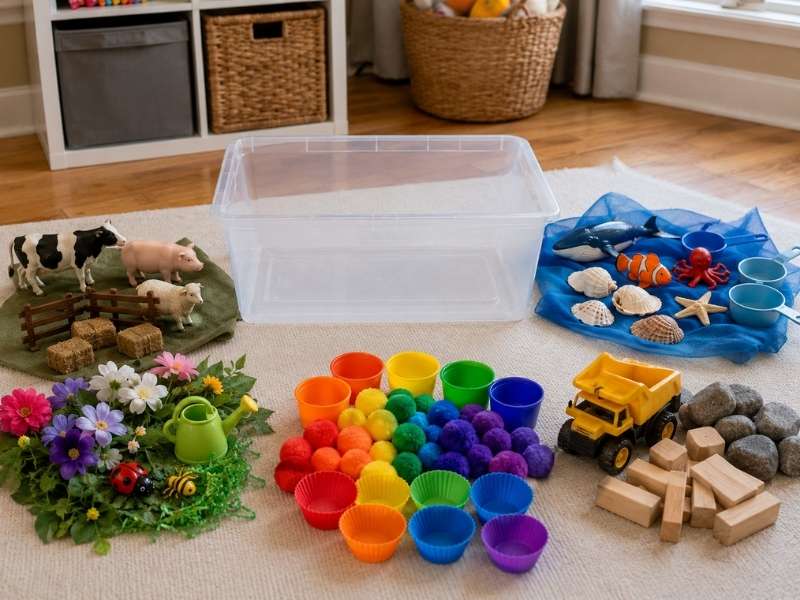
A theme helps you decide which toys, colors, and tools belong inside the bin.
Keep the theme simple. You do not need a perfect setup or matching decorations.
Start with something your toddler already enjoys.
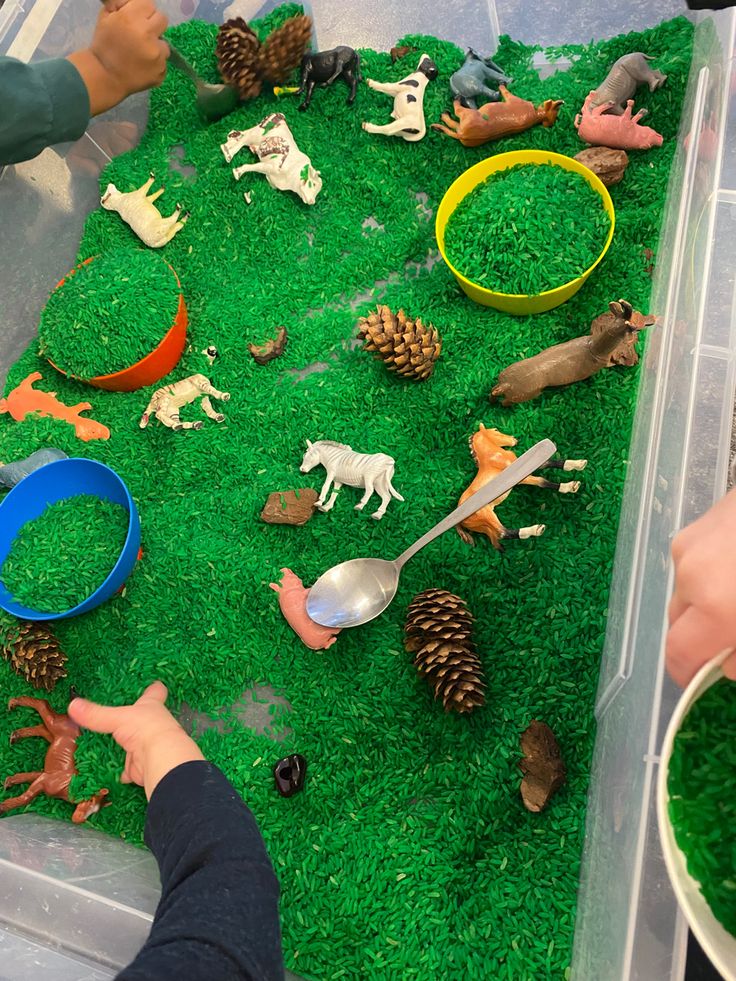
Farm Theme
Add large toy animals, wooden blocks, scoops, and fabric strips.
Your toddler can move the animals, build fences, and make simple farm sounds.
Ocean Theme
Use blue fabric, large shells, toy fish, plastic cups, and measuring spoons.
Avoid small shells that may become choking hazards.
For another ocean activity, try How to Make an Easy Sea Turtle Craft for Kids Using Paper Plates after sensory play.
Construction Theme
Add toy trucks, large wooden blocks, sturdy rocks, and small plastic bowls.
Children can load, carry, dump, and build.
Rainbow Theme
Use large pom-poms, colorful cups, silicone muffin liners, and matching bowls.
This theme works well for simple color sorting.
Garden Theme
Add silk flowers, large plastic insects, green fabric, and toy watering cans.
Toddlers can plant, pick, sort, and arrange the flowers.
Choose one theme at a time. Too many ideas in one bin may make it harder for toddlers to focus.
Step 3: Pick a Safe Base Filler
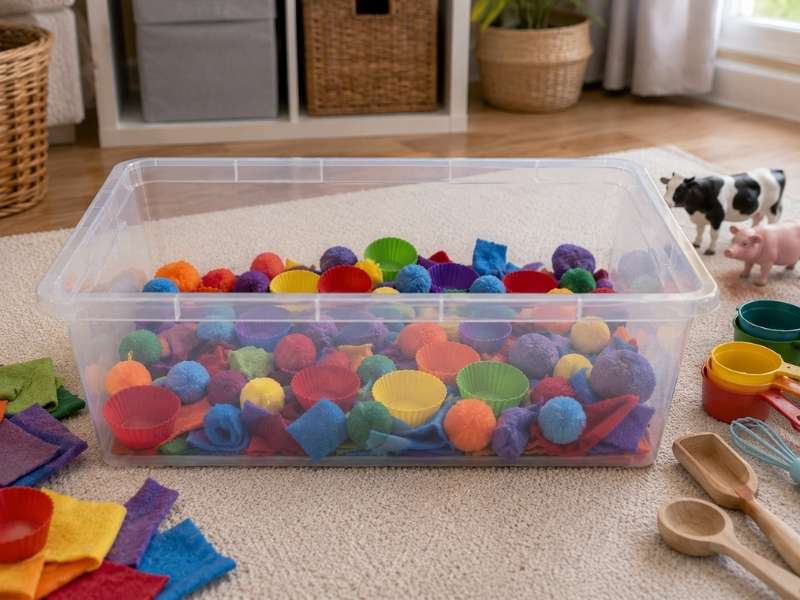
The base filler creates the main texture inside the bin.
For toddlers, choose large materials that feel interesting and remain easy to clean.
Good beginner fillers include:
- Jumbo pom-poms
- Fabric scraps
- Large felt shapes
- Washcloths
- Silicone cupcake liners
- Foam blocks
- Jumbo craft sticks
- Cotton balls
- Large paper strips
Spread a thin layer across the bottom of the bin.
You do not need to fill the container completely. A smaller amount often gives toddlers more space to scoop and move the materials.
Avoid rice, dried beans, beads, popcorn kernels, and other tiny fillers for young toddlers. These items may create choking risks.
Always match the filler to your child’s age and habits.
Step 4: Add Two or Three Simple Tools
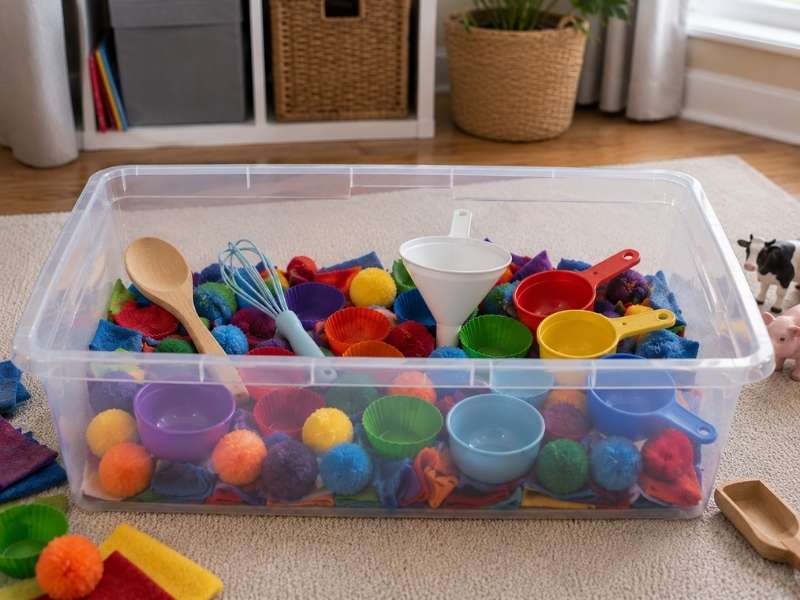
Tools help toddlers scoop, pour, transfer, and explore.
Start with only a few. Too many tools can crowd the bin.
Useful options include:
- Measuring cups
- Large spoons
- Silicone whisks
- Small plastic bowls
- Funnels
- Child-safe tongs
- Muffin tins
- Plastic containers
Place the tools on top of the filler instead of hiding everything.
Your toddler should see several clear ways to begin playing.
A measuring cup may encourage pouring. A bowl may lead to sorting. A whisk may become part of pretend cooking.
Ordinary kitchen tools often keep toddlers interested longer than expensive sensory toys.
Step 5: Add Open-Ended Toys
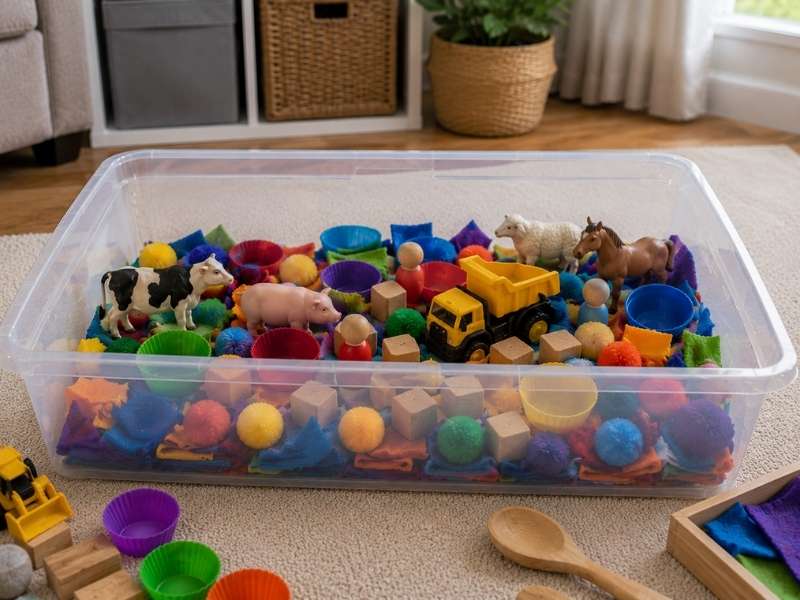
Open-ended toys do not have one fixed purpose.
Children can use them in many different ways, which supports imagination and problem-solving.
Good choices include:
Large Toy Animals
Toddlers can hide, rescue, sort, or move them through the bin.
Toy Vehicles
Trucks and cars work well for loading, dumping, and pretend journeys.
Wooden People
These figures encourage simple stories and conversations.
Building Blocks
Blocks help children stack, balance, and build small spaces.
Plastic Food
Pretend fruit, vegetables, or cupcakes work well in kitchen-themed bins.
Add only three to five toys at first.
You can rotate them later instead of filling the bin all at once.
Step 6: Add One Simple Learning Invitation
Sensory play should still feel like play.
You do not need to turn the bin into a lesson.
Instead, offer one simple question or challenge.
You might ask:
- “Can you find the blue pom-pom?”
- “Which cup holds more?”
- “Can you put the animals in the bowl?”
- “How many trucks can you find?”
- “Which fabric feels soft?”
- “Can you fill this cup?”
Keep your voice relaxed.
If your toddler ignores the question, let them continue exploring. They may already have another idea in mind.
For another fine motor activity, try Fun and Easy Paper Plate Sun and Moon Crafts Kids Can Make Using Everyday Supplies.
Step 7: Introduce the Bin Slowly
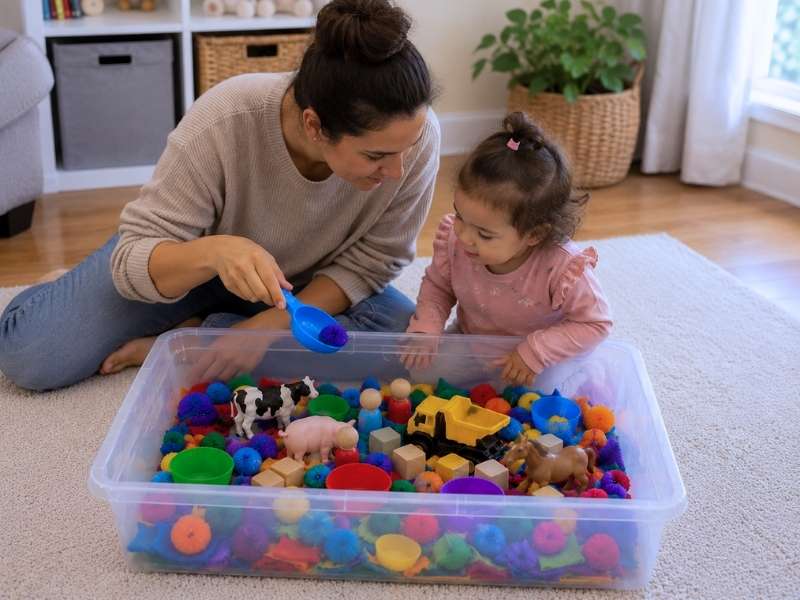
Place the sensory bin in front of your toddler and sit nearby.
Give them time to look at everything before speaking.
Some children start touching the materials straight away. Others watch for a while before joining in.
If your toddler seems unsure, show one simple action.
Scoop a pom-pom into a cup.
Move an animal into a bowl.
Stack two silicone liners.
Then stop and let your toddler take over.
Avoid showing too many actions at once. A short demonstration gives children a starting point without controlling the activity.
Step 8: Let Your Toddler Lead the Play
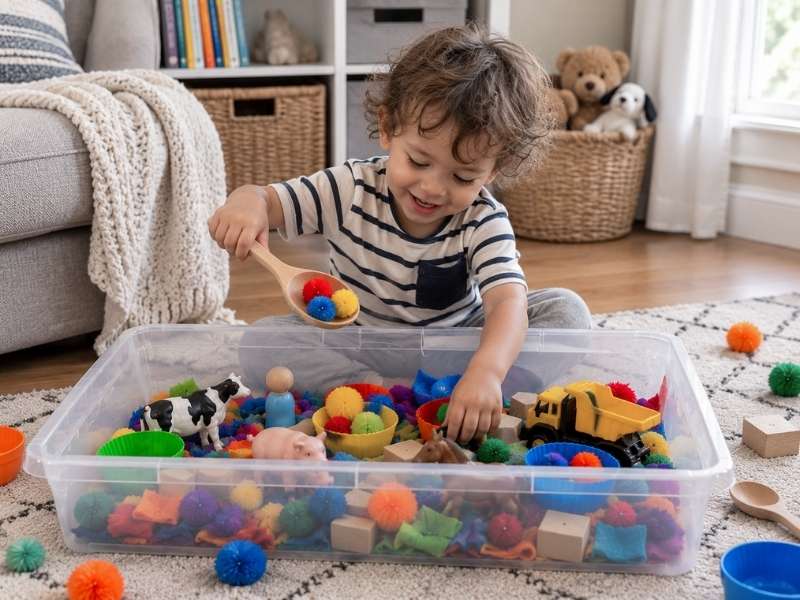
Once your toddler begins exploring, follow their interests.
Some children pour materials from cup to cup.
Others line up toys or sort colors.
A few may spend most of the time touching one texture.
Each type of play supports a different skill.
Pouring develops hand control.
Sorting supports early thinking.
Pretend play encourages language.
Touching new textures builds sensory awareness.
Try not to correct how your toddler uses the materials unless safety becomes a concern.
The bin may not look the way you planned, but your child may discover a better way to play.
Step 9: Watch for Safety During Play
Stay close from beginning to end.
Toddlers can suddenly place objects in their mouths, even when they usually do not.
Remove any broken, cracked, or damaged item immediately.
Watch for materials that begin tearing into smaller pieces.
Keep drinks and snacks away from the sensory bin so toddlers do not confuse play materials with food.
If your child starts throwing everything, reduce the number of items.
A calmer bin often helps them focus again.
Step 10: End With a Simple Cleanup Routine
Give your toddler a short warning before play ends.
You might say, “We will clean up after two more scoops.”
Then invite them to help.
Ask them to:
- Place the toys in a basket
- Stack the cups
- Drop pom-poms back into the bin
- Carry one spoon to the storage box
Do not expect perfect cleanup.
The goal is to help your toddler join the routine.
Once everything is inside, close the lid and store the bin somewhere dry.
Keep the same setup for several days before changing it. Toddlers often enjoy repeating familiar play.
When interest begins to fade, swap one filler, tool, or toy instead of replacing everything.
This playful setup works especially well before birthday celebrations. You can also gather inspiration from How to Plan a Magical Kids Birthday Party From Start to Finish.
Common Toddler Sensory Bin Mistakes
Even simple activities become frustrating when the setup works against you.
Avoid these common mistakes.
Using Too Many Materials
Too many objects overwhelm toddlers.
Start with fewer items.
Add more after your child becomes comfortable.
Choosing Tiny Objects Too Soon
Small materials increase safety risks.
Always match supplies to your toddler’s age.
Expecting Perfect Play
Toddlers learn through experimenting.
Some mess naturally happens.
Prepare the space instead of expecting perfection.
Changing Activities Too Quickly
Many toddlers enjoy repeating the same activity.
Keep favorite toddler sensory bins available for several days before replacing them.
Familiarity builds confidence.
Forgetting to Rotate Themes
Children notice new materials immediately.
Simply changing colors, toys, or tools can make an old sensory bin feel brand new.
Easy Ways to Keep Cleanup Under Control
Many adults avoid sensory play because they imagine a huge mess waiting afterward.
Fortunately, a few simple habits solve most cleanup problems.
Place an old sheet, shower curtain, or washable mat underneath the sensory bin.
Keep one small basket nearby for collecting dropped materials.
Store each sensory bin inside a container with a lid.
Return every scoop, cup, and toy after playtime ends.
Invite toddlers to help.
Even young children enjoy putting pom-poms back into containers or stacking cups together.
Turning cleanup into part of the activity teaches responsibility while keeping the space organized.
If organizing children’s spaces feels like an ongoing challenge, my Toy Storage Ideas That Make Cleanup Easier for Kids shares simple solutions that encourage tidy habits without making cleanup feel like a chore.
How to Keep Toddler Sensory Bins Interesting
Even the best toddler sensory bins can lose their excitement if they stay exactly the same for weeks. The good news is that you do not need to buy new supplies every month. Small changes often make a bigger impact than completely starting over.
Try changing just one or two elements each time.
Swap the scoops for tongs.
Replace toy animals with construction vehicles.
Introduce a different color theme.
Add new containers for pouring and sorting.
These little updates encourage toddlers to explore the same materials in new ways. Children often notice those changes immediately and begin experimenting without any prompting.
You can also rotate toddler sensory bins based on your child’s current interests. A toddler who loves dinosaurs today may become fascinated with ocean animals next month. Following those interests keeps sensory play fresh and meaningful.
How Toddler Sensory Bins Support Early Development
Parents often notice that toddler sensory bins keep children busy. What many do not realize is how much learning happens during those quiet moments of play.
Every scoop, squeeze, and pour helps build important skills.
Fine Motor Skills
Tiny hands become stronger through repeated movement.
Picking up pom-poms with tongs strengthens finger muscles.
Pouring water from one cup to another improves hand control.
Stacking objects develops coordination.
These everyday movements prepare children for holding crayons, using scissors, and eventually writing.
Language Development
Sensory play creates natural opportunities for conversation.
Talk about what your toddler sees.
Describe different textures.
Name colors.
Count objects together.
Ask simple questions that encourage thinking.
Those small conversations introduce new words without interrupting play.
Problem-Solving Skills
Toddlers love experimenting.
They discover which container holds more.
They compare sizes.
They test different ways to stack objects.
They figure out how to move materials from one place to another.
Each little discovery builds confidence.
Creativity
Open-ended activities encourage imagination.
A measuring cup suddenly becomes a boat.
A bowl becomes a treasure chest.
Toy animals begin exploring imaginary forests.
Nothing limits the story except your toddler’s imagination.
Creative play often continues long after the sensory bin gets packed away.
If your child enjoys creating with everyday materials, my 25 Fun Bluey Crafts Kids Will Be Excited to Make offers another playful way to encourage imagination.
How to Adapt Toddler Sensory Bins as Your Child Grows
Children change quickly during the toddler years.
The sensory bin that feels exciting today may seem too simple six months from now.
Instead of replacing everything, make small adjustments that match your child’s development.
Younger Toddlers (12–24 Months)
Choose large, easy-to-hold materials.
Keep the number of items low.
Focus on touching, scooping, and exploring.
Stay close throughout the activity.
Older Toddlers (2–3 Years)
Introduce simple sorting games.
Add matching colors.
Encourage pretend play.
Include containers of different sizes.
Offer child-safe tongs.
These additions create new challenges without making the activity frustrating.
Preschoolers
Preschoolers enjoy more detailed sensory play.
Create treasure hunts.
Hide alphabet letters.
Add counting activities.
Build simple stories around the theme.
As children grow, toddler sensory bins naturally become preschool sensory bins with only a few small changes.
If your child seems ready for more challenging projects, the ideas in The Complete Guide to Choosing Age-Appropriate Activities for Children can help you decide what to introduce next.
Tips for Making Sensory Play Part of Your Weekly Routine
Life becomes busy.
That makes simple activities even more valuable.
Instead of treating sensory play as an occasional event, make it part of your weekly rhythm.
Prepare one sensory bin on Sunday.
Store it with a lid.
Bring it out after naps, during rainy afternoons, or whenever your toddler needs a quiet activity.
Keeping everything together saves time and reduces stress.
You can even build a small collection of seasonal toddler sensory bins that rotate throughout the year.
That approach keeps play exciting without requiring constant preparation.
Some families enjoy pairing sensory play with crafts. After a sensory session, children often enjoy creating something with their hands. My The Complete Guide to Summer Kids Crafts Activities for Creative and Curious Kids offers plenty of ideas to continue the fun.
Final Thoughts
Keeping a toddler entertained does not require expensive toys or elaborate activities. The simplest ideas often become the ones children remember most.
Toddler sensory bins create opportunities for learning, creativity, and discovery every single time your child reaches inside. They encourage curiosity, strengthen important skills, and transform everyday objects into exciting adventures.
The best part is that you can start with supplies already sitting in your home. A simple container, a few safe materials, and a little imagination can turn an ordinary afternoon into meaningful play.
As your toddler grows, your sensory bins can grow too. Add new themes, introduce different tools, and follow your child’s interests along the way. Those small changes keep every activity fresh while supporting development through hands-on exploration.
Most importantly, enjoy the process together. Some days will look neat, while others will leave pom-poms scattered across the floor. Those little moments of discovery, laughter, and curiosity often become the memories that last the longest.
If you enjoyed creating these toddler sensory bins, you might also love exploring How to Set Up a Fun Backyard Water Play Station With Kids for warm-weather fun or The Ultimate Guide to Creating Meaningful Childhood Memories With Kids for more simple ways to make everyday moments feel a little more magical.