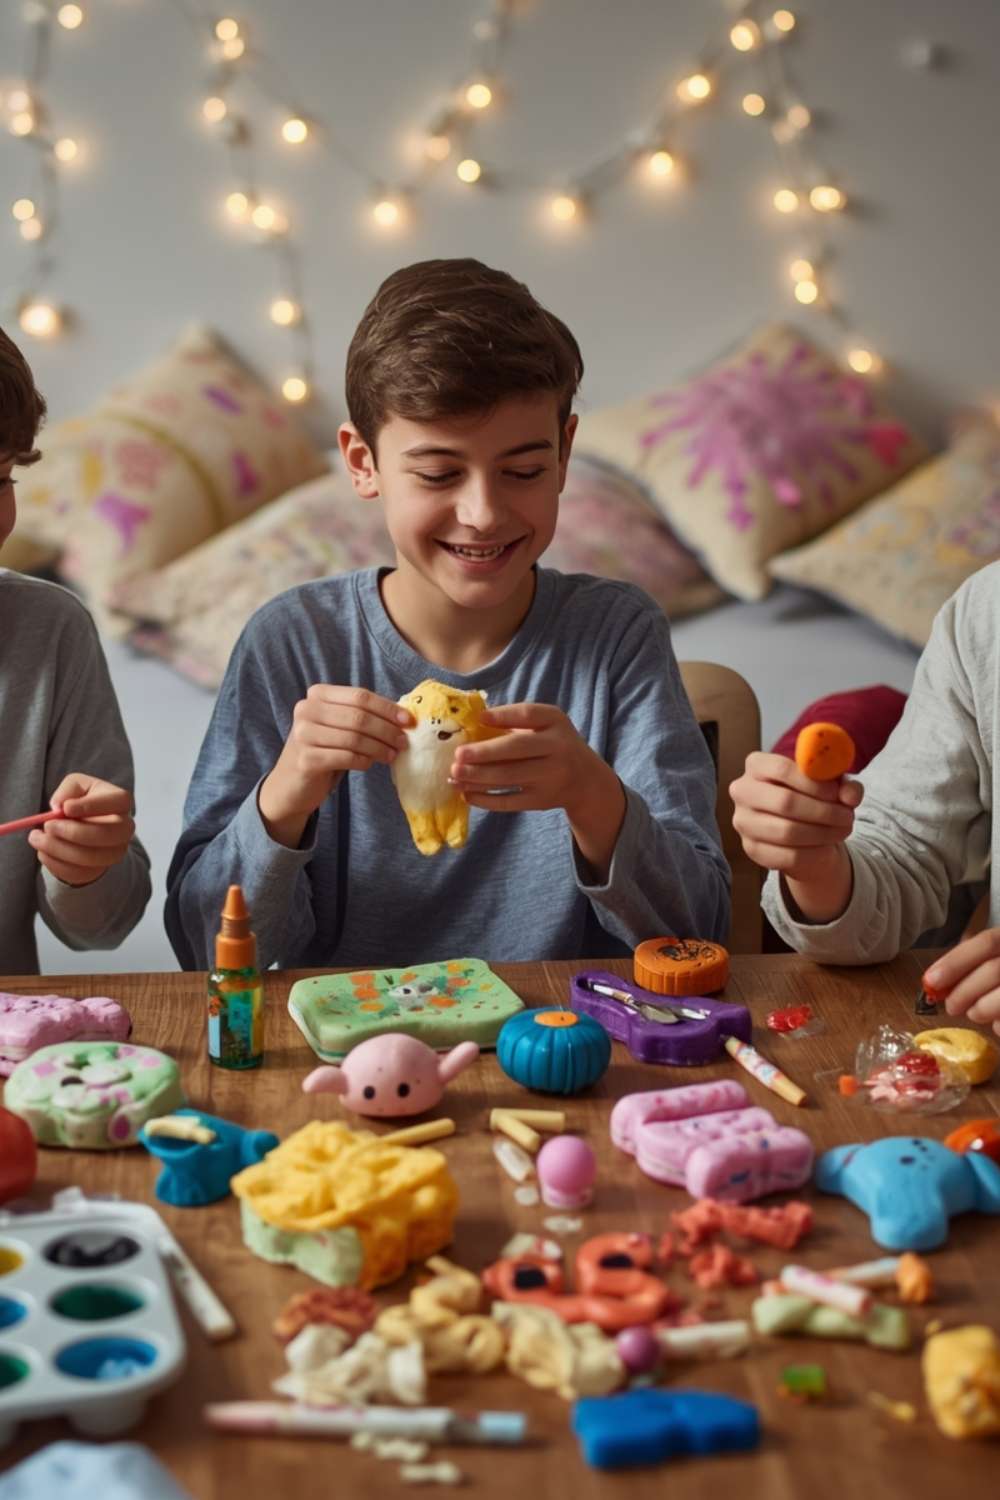
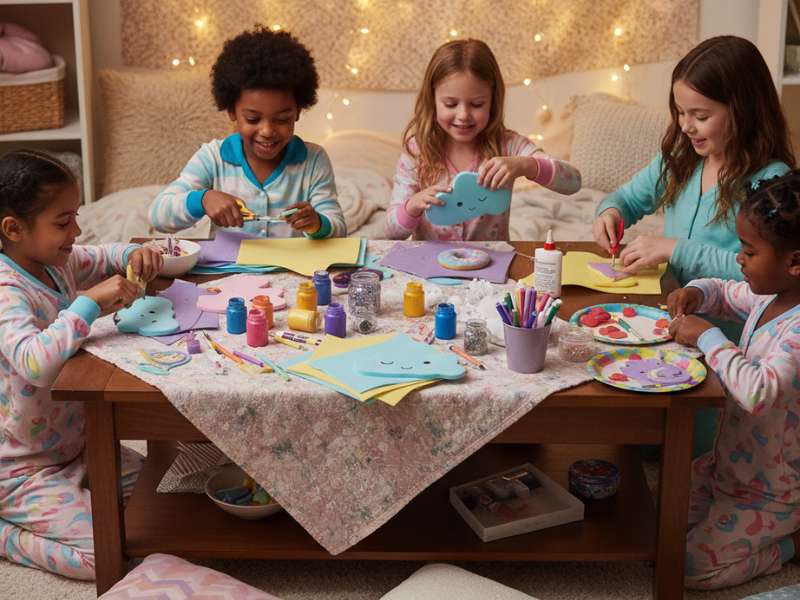
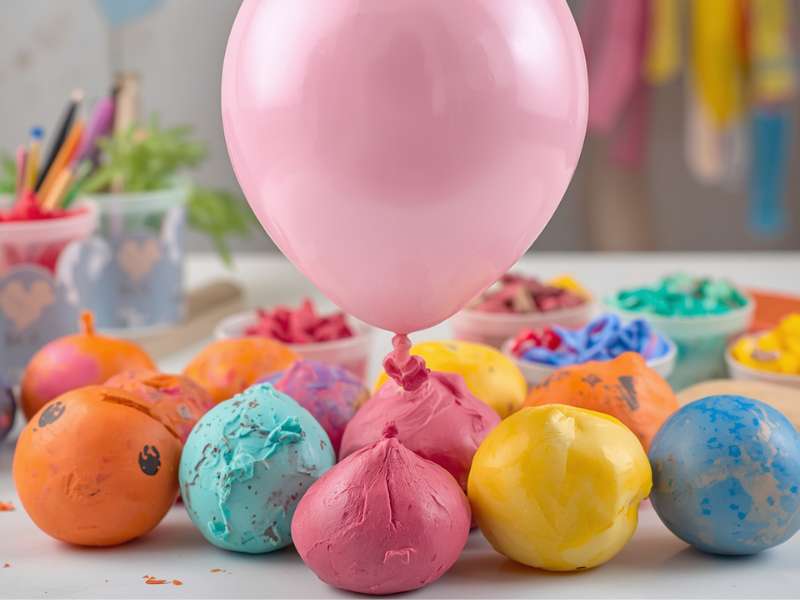
One child started squeezing a soft toy while everyone else tried to decide what to do next. Within minutes, the whole room wanted one too. Instead of searching for another game, we grabbed a few simple craft supplies and made our own. Before long, every child was busy decorating colorful squishies, comparing designs, and laughing over the funny faces they had created. It quickly became the highlight of the entire sleepover.
That moment reminded me why I love DIY squishy crafts. They are fun, easy to make, and perfect for bringing children together. The best DIY squishy crafts keep little hands busy while encouraging creativity, imagination, and sensory play. Even better, children leave with something they made themselves instead of another store-bought party favor.
One of my favorite things about these crafts is that no two squishies ever look the same. One child might create a smiling cupcake, while another designs a sleepy cloud, a rainbow, or a silly monster. Watching each idea come to life is part of the fun, and those little moments often become the childhood memories kids treasure most. If your children enjoy simple creative projects, you’ll also love Easy Rock Painting Ideas for Kids (No Experience Needed!), where everyday materials become colorful works of art.
Grab your craft supplies, gather everyone around the table, and get ready for a sleepover activity that fills the room with creativity, laughter, and handmade keepsakes children will be excited to take home.
You may also like: Easy summer crafts for kids
Why DIY Squishy Crafts Are the Ultimate Sleepover Activity
Before jumping into these 20 DIY squishy crafts, it helps to understand why they make such a perfect sleepover activity. They do much more than keep children busy for a few minutes. They create a calming moment in the middle of all the excitement, laughter, and endless energy that often comes with a sleepover.
I have always noticed how children become completely focused when their hands are busy creating something soft, colorful, and fun. Squishing, shaping, decorating, and playing with different textures allows children to slow down, express their creativity, and enjoy a relaxing sensory experience. This quiet focus can be especially helpful after hours of games, movies, and sugary treats.
Check this guide: Mess-free Father’s Day crafts with toddlers
Another reason I love DIY squishy crafts is the sense of pride they give children. Every child gets to leave the sleepover with something they designed themselves. They compare their creations, share ideas, laugh together, and celebrate their unique designs. These small moments often become the memories they talk about long after the sleepover ends.
One of the best things about DIY squishy crafts is how easily they work for different ages. Younger children can enjoy simple balloon or sponge squishies, while older kids can experiment with more detailed designs and techniques. Every child can join the fun at their own pace, making DIY squishy crafts a stress-free activity that keeps the whole group engaged.
Supplies to Stock Before the Sleepover
Gathering supplies in advance is the single most important preparation step for running DIY squishy crafts with a group. Mid-activity supply hunting destroys momentum and invites chaos. Stock the following core supplies and you will have everything needed for the majority of the 20 projects in this post.
Core DIY Squishy Crafts supplies:
- Balloons in assorted colors round, standard latex balloons work for the majority of balloon-based squishies
- Plain flour, cornstarch, and baking soda for fillings
- Hair conditioner, shaving cream, and dish soap for slime and foam bases
- White school glue and clear PVA glue
- Borax powder or contact lens solution for slime activators
- Memory foam cut from inexpensive foam sheets or repurposed from old memory foam products
- Makeup sponges and kitchen sponges in various shapes and sizes
- Craft foam sheets in assorted colors
- Acrylic paint and fabric paint for decorating
- Fine-tipped permanent markers for detailing
- Clear nail polish or glossy Mod Podge for sealing
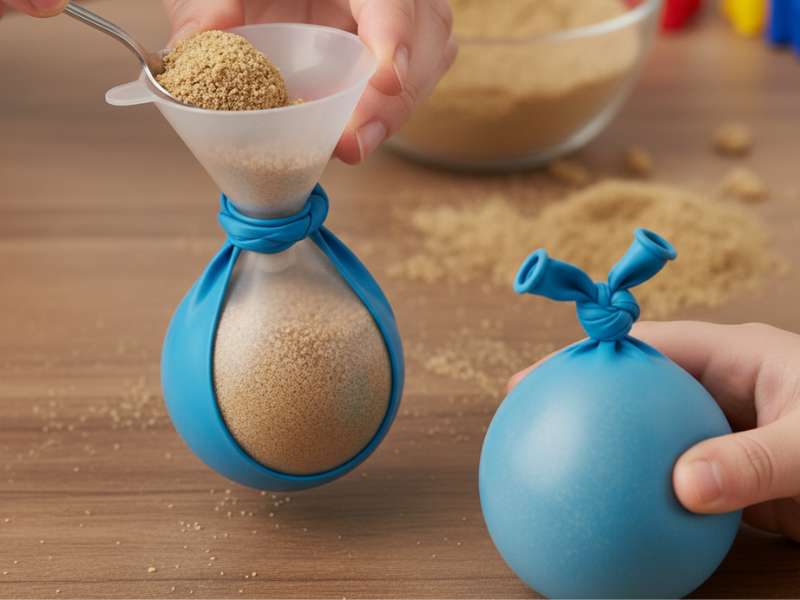
- A funnel for filling balloons without mess
Tools and setup:
- Plastic tablecloths for easy cleanup
- Small mixing bowls one per child
- Measuring spoons
- Plastic zip bags for storing finished squishies
- Wet wipes and paper towels in large supply
- Permanent marker labels so each child can identify their own squishies
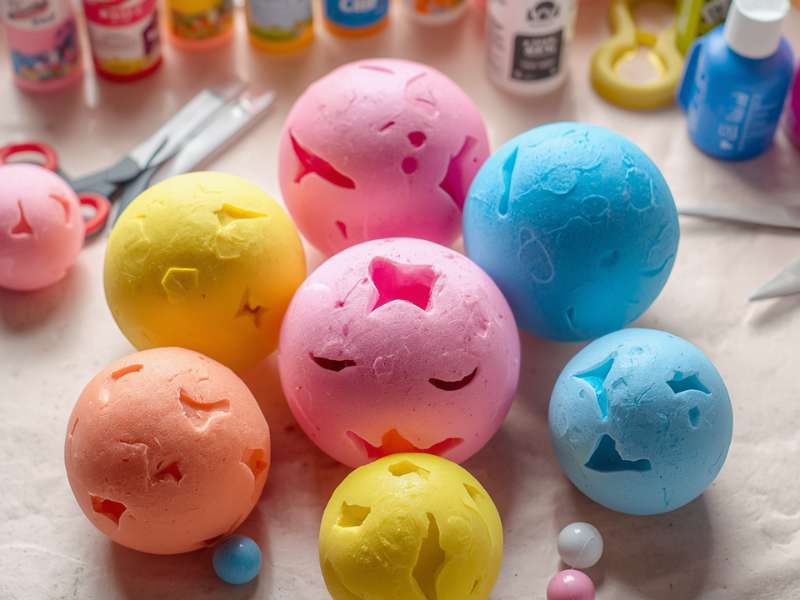
DIY Squishy Crafts for Sleepovers Kids Will Love
Category 1: Balloon Squishies (Ages 6 and Up)
Balloon squishies are the entry point for every beginner squishy maker and they remain beloved even by experienced crafters because the satisfying weight and slow-squish texture of a well-filled balloon squishy is genuinely addictive to squeeze.
Craft 1: Classic Flour Stress Ball DIY Squishy Crafts
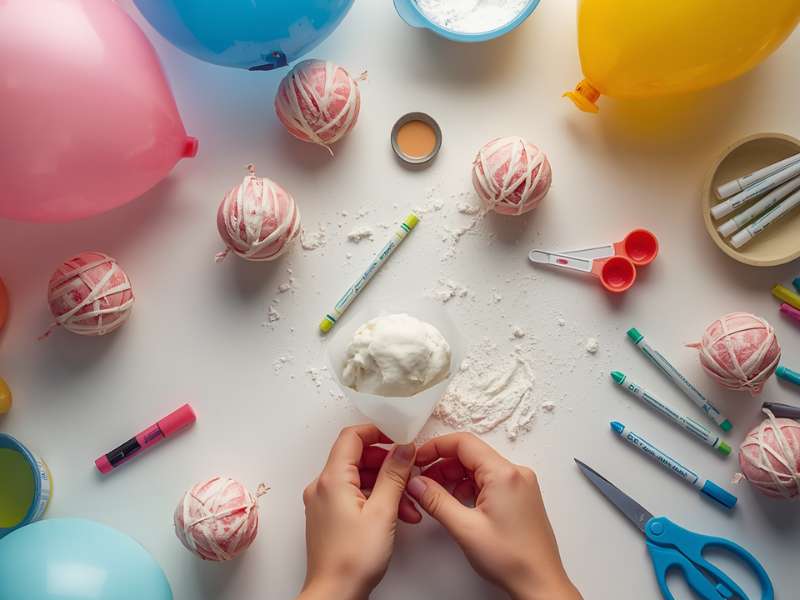
Supplies: Round latex balloon, plain flour, funnel, permanent marker
Steps: Stretch the balloon opening over the narrow end of a funnel. Spoon flour slowly into the funnel, using a pencil to push it down into the balloon. Continue filling until the balloon is approximately the size of a tennis ball firm but still squeezable. Remove the funnel, press out any excess air, and tie the balloon neck in a tight double knot. Trim the excess neck close to the knot. Use a permanent marker to draw a face or pattern on the surface. Squeeze to test the texture and adjust filling by adding or removing flour before tying if needed.
Bookmark this guide: 31 Beautiful Balloon Decoration Ideas for Kids’ Parties That Will Absolutely Wow Every Guest
Pro tip for groups: Pre-measure flour portions in small cups so every child has exactly the right amount ready to go. This eliminates mess and speeds up the filling process significantly.
Craft 2: Cornstarch Oobleck Balloon DIY Squishy Crafts
Supplies: Round latex balloon, cornstarch, water, funnel, bowl
Steps: Mix two parts cornstarch with one part water in a bowl to create oobleck — a non-Newtonian fluid that feels solid when squeezed and liquid when released. Spoon the mixture into the balloon using a funnel, filling to approximately tennis ball size. Tie off tightly. When squeezed firmly, the oobleck inside solidifies. When pressure releases, it flows again. The sensation is unlike any other squishy and produces genuine amazement in every child who tries it.
Age note: This craft works best for children aged 7 and up who can understand that the balloon must not be squeezed too hard during the filling process.
Craft 3: Sand-Filled Kinetic DIY Squishy Crafts
Supplies: Round latex balloon, kinetic sand, funnel
Steps: Fill the balloon with kinetic sand using a funnel. Kinetic sand requires slow, patient filling as it does not pour as freely as regular flour. Fill to golf ball size for a dense, satisfying squeeze. Double-balloon the squishy by stretching a second balloon over the first for extra durability. Tie both layers securely. The kinetic sand filling creates a dense, moldable squeeze that holds its shape briefly before slowly flowing back endlessly satisfying for kids who love tactile sensory play.
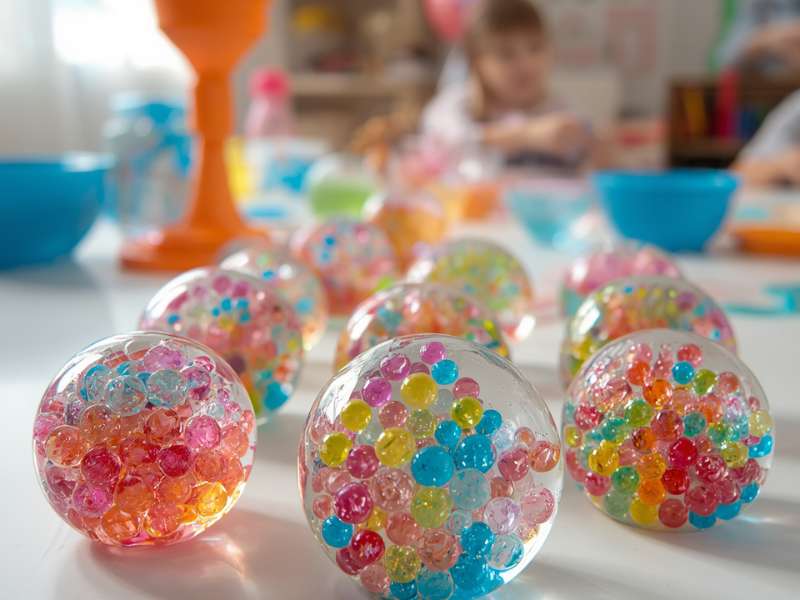
Craft 4: Water Bead DIY Squishy Crafts
Supplies: Round latex balloon, pre-soaked water beads, funnel
Steps: Soak water beads according to package directions six to eight hours before the sleepover — they expand from tiny hard pellets to large, gel-like spheres. Funnel soaked water beads into a balloon, filling to approximately golf ball size. Double-balloon for durability and tie securely. The individual water beads create a unique clicking, rolling sensation when squeezed that children find completely fascinating and deeply satisfying.
Craft 5: Playdough Balloon DIY Squishy Crafts
Supplies: Round latex balloon, store-bought or homemade playdough, funnel
Steps: Break playdough into small pieces and push through a funnel into the balloon using a pencil or chopstick. Fill to tennis ball size, ensuring no large air pockets remain inside the balloon. Tie securely and double-balloon for extra durability. The playdough filling creates a malleable, shapeable squishy that holds any form it is squeezed into before very slowly returning to a round shape — a slower and more satisfying squish than flour-filled versions.
Crafts ideas for kids: 25 Simple Father’s Day Cards Kids Can Make in 10 Minutes
Category 2: Foam and Sponge DIY Squishy Crafts (Ages 7 and Up)
Foam and sponge squishies replicate the slow-rising texture of commercial squishies — the kind that kids spend hours watching on YouTube. Making them at home produces results that are genuinely comparable to store-bought versions and allows for complete creative customization.
Craft 6: Makeup Sponge Food DIY Squishy Crafts
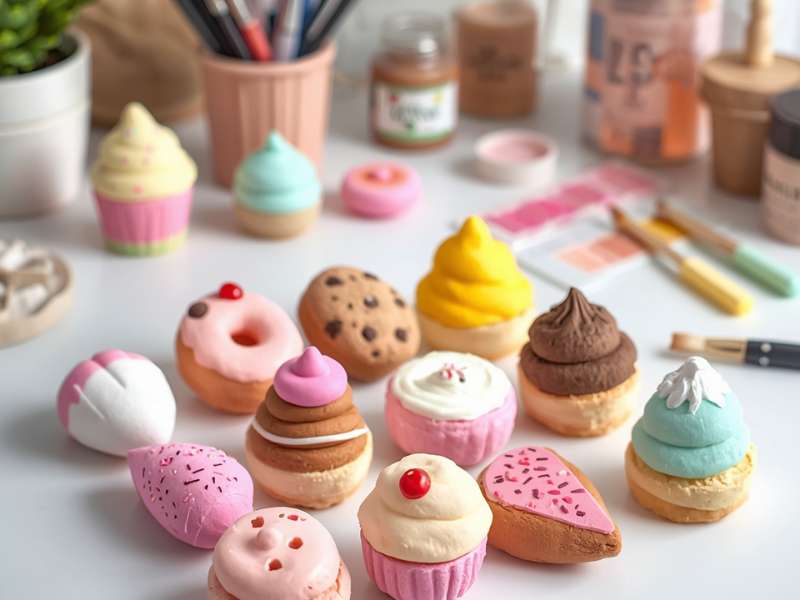
Supplies: Teardrop or round makeup sponge, acrylic paint, fine permanent marker, clear nail polish or glossy Mod Podge
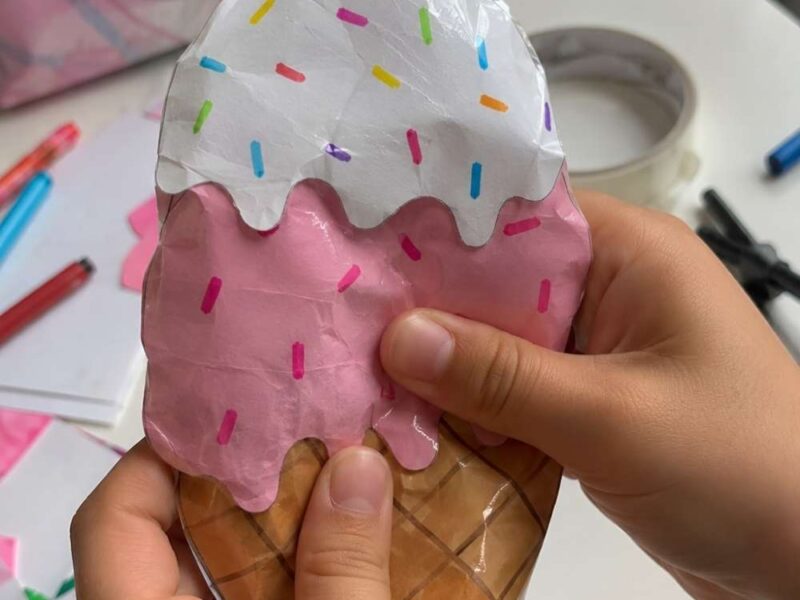
Steps: Start with a dry, clean makeup sponge in your desired shape — teardrop sponges become strawberries or ice cream cones, round sponges become donuts or cakes. Paint the base coat in your chosen food color — bright red for a strawberry, pink for a donut, yellow for a lemon. Allow to dry completely. Add detail layers — green leaves and white seeds for the strawberry, brown drizzle and sprinkles for the donut. Use a fine permanent marker to add outlines, shadows, and tiny details that make the squishy look professional and polished. Seal with two coats of clear nail polish or glossy Mod Podge for a smooth, slightly shiny surface that mimics the feel of commercial squishies.
Pro tip: Have reference photos of the finished designs printed or displayed on a screen so kids can follow along while adding details.
Craft 7: Memory Foam Slow-Rise DIY Squishy Crafts
Supplies: Memory foam sheet cut into desired shapes, scissors, acrylic paint, permanent markers, clear sealer
Steps: Cut memory foam into simple shapes — stars, hearts, clouds, cats, and simple food shapes all work beautifully. Memory foam cuts cleanly with sharp scissors and naturally produces the slow-rise effect when squeezed. Paint the cut shape with acrylic paint in layers, allowing each layer to dry before adding the next. Add details with permanent markers. Seal with glossy Mod Podge. The natural memory foam slow-rise is identical to commercial squishies — children are always genuinely surprised that something they made at home feels exactly like a purchased squishy.
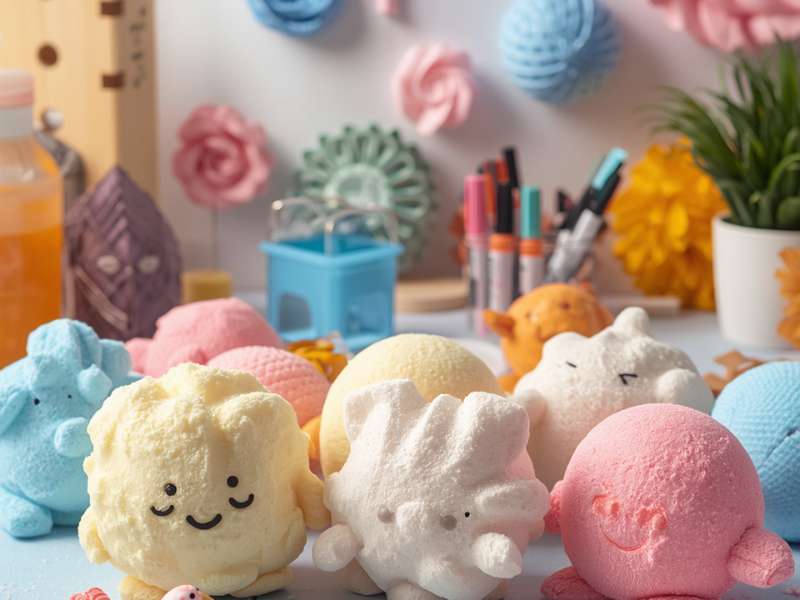
Craft 8: Kitchen Sponge Animal DIY Squishy Crafts
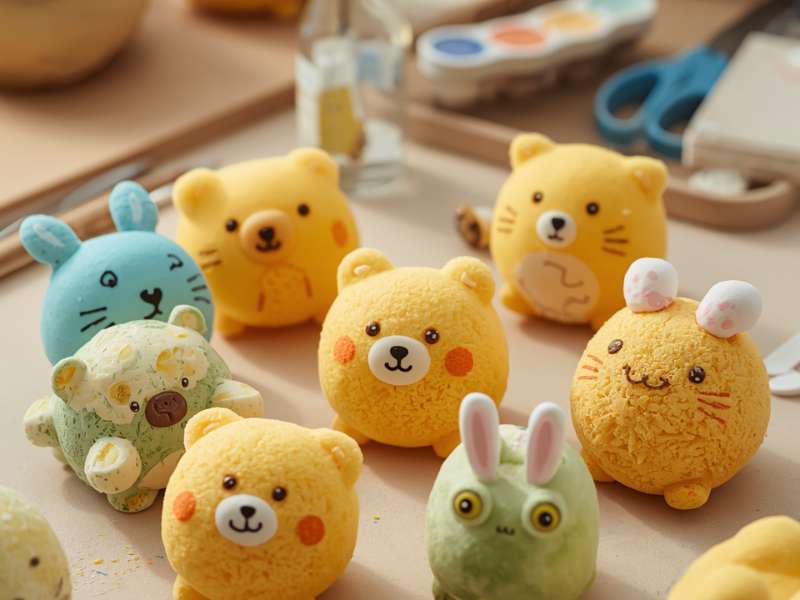
Supplies: Plain kitchen sponge, scissors, acrylic paint, permanent markers, hot glue, craft foam scraps
Steps: Cut a kitchen sponge into a simple animal body shape a cat, bear, bunny, or pig all work well. Cut small ears, feet, and tails from craft foam scraps and hot glue them to the sponge body. Paint the main body in your chosen animal color yellow for a bear, pink for a pig, white for a bunny. Allow to dry. Add facial features — eyes, nose, mouth, whiskers with a fine permanent marker. Seal with clear nail polish if desired. Kitchen sponges produce a slightly firmer squish than makeup sponges but compress fully and spring back satisfyingly.
Craft 9: Foam Sheet Sandwich DIY Squishy Crafts
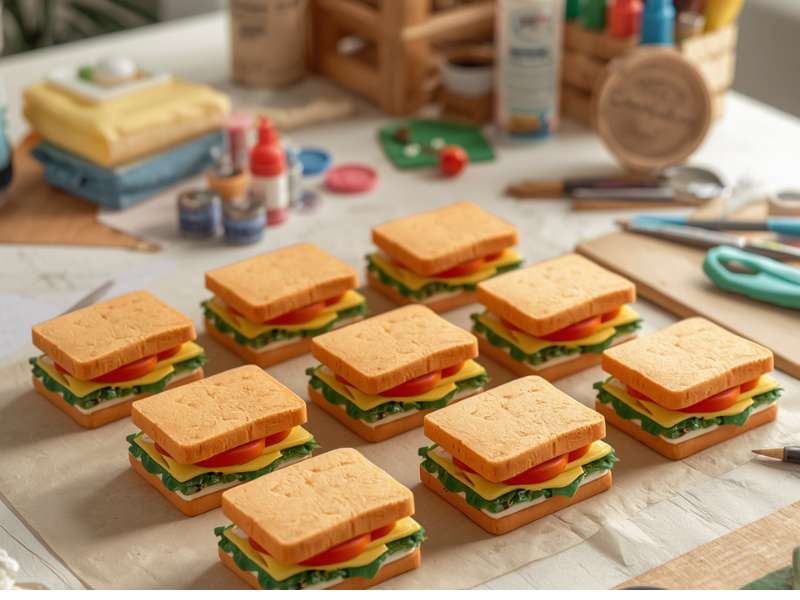
Supplies: Craft foam sheets in multiple colors, scissors, hot glue, permanent markers
Steps: Cut identical oval shapes from tan or beige craft foam for the bread layers. Cut irregular shapes from green, red, yellow, and pink foam for the lettuce, tomato, cheese, and meat layers. Stack the layers in sandwich order and hot glue along the curved edges, leaving a small gap for squeezing. The layered foam creates a satisfying compress when squeezed from top to bottom and springs back immediately when released. Draw sesame seeds on the top bread layer with a brown permanent marker for a realistic finishing touch.
Craft 10: Foam Ball DIY Squishy Crafts
Supplies: Craft foam sheet, scissors, hot glue, acrylic paint
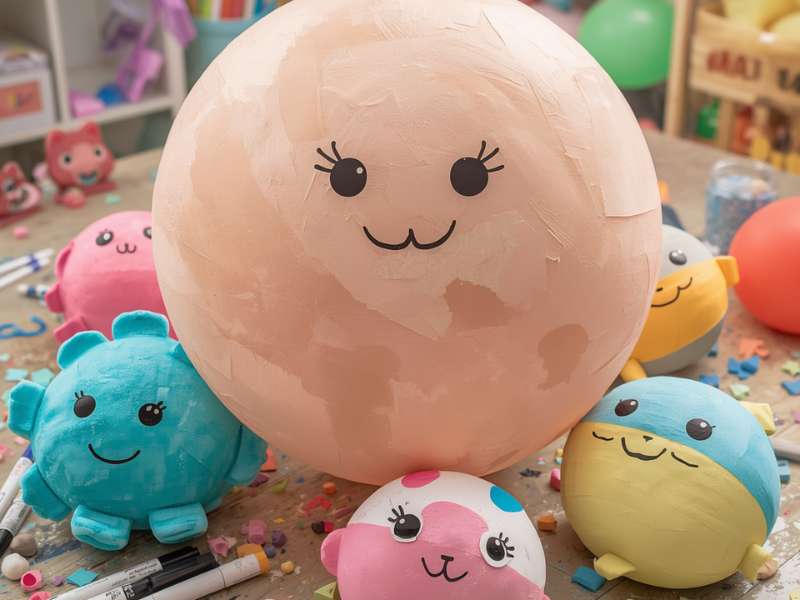
Steps: Cut two identical large circle shapes from craft foam. Hot glue around the edge, leaving a small gap. Stuff the inside loosely with small scraps of foam before sealing the gap completely. The foam-stuffed interior creates a soft, light squish with good rebound. Paint the outside in bold colors a soccer ball, a watermelon, a planet, or a simple emoji face. Seal with clear nail polish once completely dry.
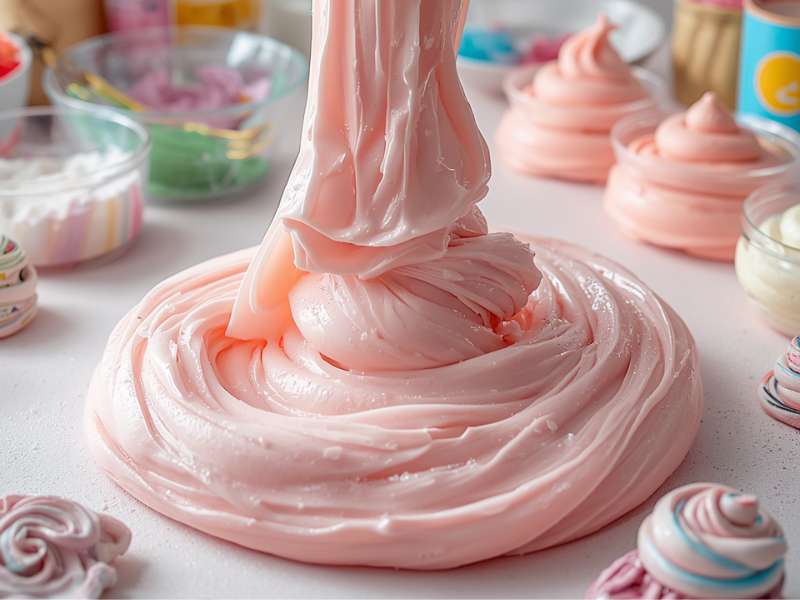
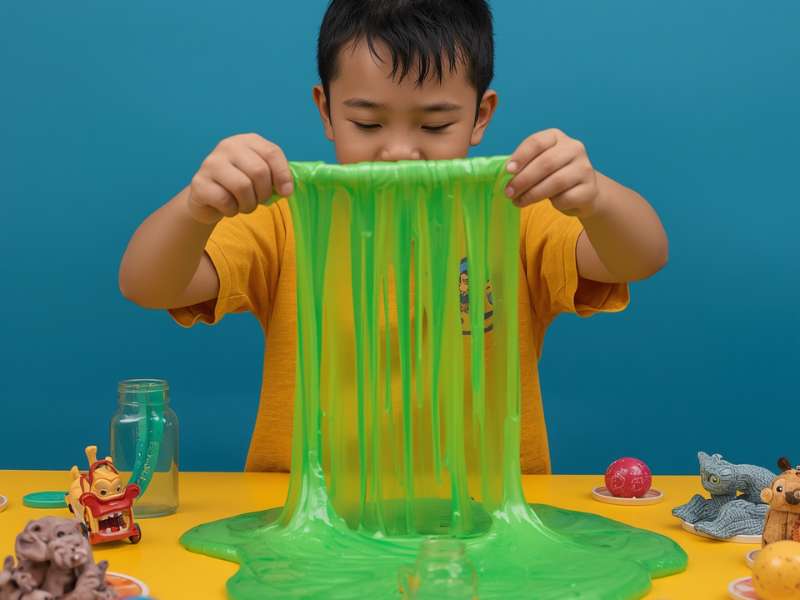
Category 3: Slime-Based Squishies (Ages 8 and Up)
Slime-based squishes are the most interactive and most dramatic category they stretch, flow, bubble, and transform in real time, which makes the making process just as entertaining as the finished product. These projects work best with older children who can follow multi-step instructions and handle sticky, wet materials with reasonable care.
Pin this for later: Father’s Day Rock Painting Ideas for Toddlers, Kids & Tweens
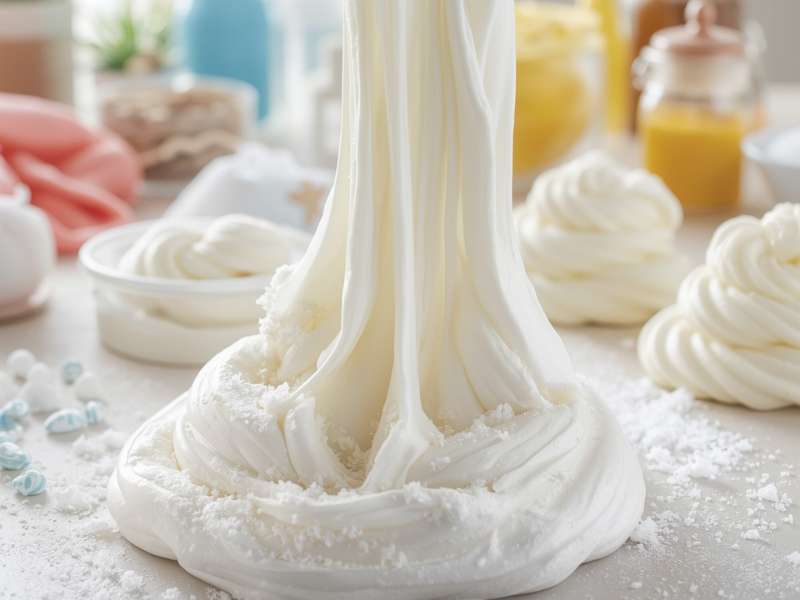
Craft 11: Basic Fluffy Slime DIY Squishy Crafts
Supplies: White school glue, shaving cream, contact lens solution, food coloring, glitter
Steps: Pour half a cup of white school glue into a bowl. Add two cups of shaving cream and mix thoroughly — the mixture will become light and fluffy. Go in with the food coloring and glitter, then mix again. Add contact lens solution one tablespoon at a time, mixing after each addition, until the slime pulls away from the sides of the bowl cleanly and no longer sticks to fingers. Knead for two to three minutes until smooth and elastic. Store in an airtight container. Fluffy slime is the gateway squishy craft — every child who makes it immediately wants to make three more variations.
Craft 12: Butter Slime DIY Squishy Crafts
Supplies: White school glue, contact lens solution, Model Magic air-dry clay, food coloring
Steps: Make a basic slime base by mixing half a cup of white glue with contact lens solution until it reaches a clean, non-sticky consistency. Break off a golf ball-sized piece of Model Magic clay and knead it thoroughly into the slime base. The clay transforms the texture from stretchy to smooth, spreadable, and buttery. Add food coloring in soft, muted tones pastel yellow, soft peach, or dusty rose all produce the most authentic butter slime aesthetic. Butter slime spreads and smooths satisfyingly and is universally described by kids as deeply calming to play with.
Craft 13: Crunchy Slime DIY Squishy Crafts
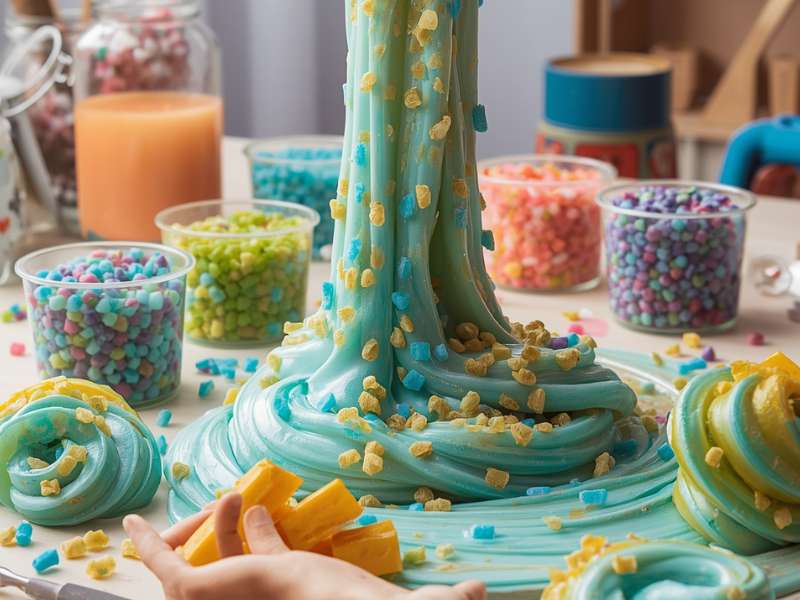
Supplies: White school glue, contact lens solution, foam beads, food coloring
Steps: Make a basic clear or white slime base. Add a generous handful of foam beads small, round polystyrene beads available at craft stores and fold them thoroughly into the slime until evenly distributed. The foam beads create an audible and tactile crunch with every squeeze and stretch that children find completely addictive. Tint the slime in a transparent color light blue, soft green, or clear so the white foam beads remain visible through the slime.
Craft 14: Magnetic Slime DIY Squishy Crafts
Supplies: White school glue, contact lens solution, iron powder or black ferrite powder, strong neodymium magnet
Steps: Make a basic slime base tinted with color of choice or with food coloring. Add iron powder gradually while kneading until the slime is uniformly and slightly heavy. Hold a strong neodymium magnet near but not touching the slime and watch it dramatically reach toward the magnet, stretching and flowing against gravity. This slime is more of a science demonstration than a traditional squishy, but it produces the most dramatic reaction of any project on this list. Older kids aged 9 and up find it genuinely mind-blowing.
Craft 15: Cloud Slime DIY Squishy Crafts
Supplies: White school glue, contact lens solution, instant snow powder, white food coloring
Steps: Make a white slime base using white school glue and contact lens solution. Prepare instant snow powder according to package directions it expands dramatically when water is added and produces a cold, fluffy, powder-like texture. Fold the prepared instant snow into the white slime base gradually until the mixture reaches a light, drapey, cloud-like consistency that falls and flows slowly like a thick cloud. Cloud slime is currently one of the most popular squishy trends among children aged 7 to 12 and making it at home produces results that genuinely rival commercial versions.
Category 4: Unique and Creative DIY Squishy Crafts (Ages 8 and Up)
These final five projects push beyond the standard squishy categories into genuinely creative territory. They take slightly more time and produce squishes that are truly one-of-a-kind the kind that every child at the sleepover immediately wants to trade for.
Save this for later: Fun and Creative Ceramic Painting Ideas That Encourage Creativity in Kids
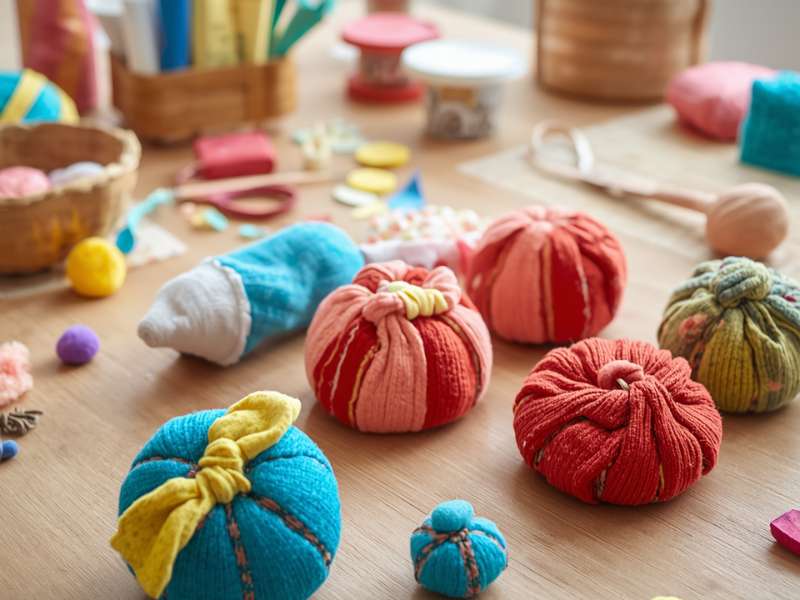
Craft 16: Fabric-Covered Bean Bag DIY Squishy Crafts

Supplies: Soft stretchy fabric, needle and thread or fabric glue, dried lentils or rice, scissors
Steps: Cut two identical circles approximately four inches in diameter from soft stretchy fabric. Sew or glue around the edge leaving a two-inch gap for filling. Pour dried lentils or rice through the gap until the bag is approximately three-quarters full. Sew or glue the gap closed. The stretchy fabric and lentil filling create a weighted, satisfying squeeze with a completely different tactile quality from balloon or foam squishies. Decorate the outside with fabric paint or permanent markers.
Craft 17: Gel-Filled Sensory DIY Squishy Crafts

Supplies: Thick zip-lock bag, hair gel, food coloring, strong packing tape, duct tape for edges
Steps: Fill a thick zip-lock bag approximately halfway with clear hair gel. Add food coloring and glitter and seal the bag. Press out any excess air before sealing. Reinforce all edges with strips of duct tape to prevent leaks. The gel-filled bag creates a smooth, flowing sensory squishy that moves and shimmers when manipulated. Add small plastic sequins, foam shapes, or miniature figurines inside the gel before sealing for a sensory discovery element that children find endlessly entertaining.
Craft 18: Sock Stress Ball DIY Squishy Crafts
Supplies: Balloon, flour or rice, clean sock, scissors, rubber band
Steps: Fill a balloon with flour using a funnel, tie securely, and trim the neck. Stretch the tied balloon into the toe section of a clean sock. Cut the sock to approximately three inches beyond the balloon. Tie or rubber-band the open sock end securely. The fabric exterior creates a completely different tactile experience from bare latex softer, warmer, and more comfortable to squeeze for extended periods. Decorate the sock exterior with fabric paint or permanent markers. These sock stress balls are the most durable squishy on this entire list and genuinely withstand the roughest sleepover use.
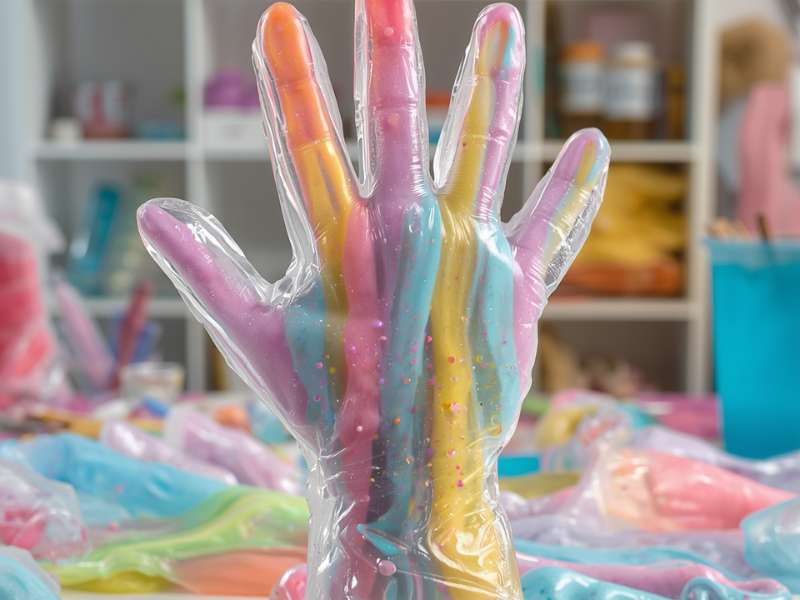
Craft 19: Slime-Filled Glove DIY Squishy Crafts
Supplies: Disposable rubber or latex glove, fluffy slime, rubber band
Steps: Make a batch of fluffy slime in your chosen color. Spoon the slime carefully into a disposable rubber glove, filling each finger and the palm section until the glove is approximately two-thirds full. Squeeze out excess air and secure the open end with a rubber band. The glove shape — five distinct finger sections plus a palm creates a completely unique DIY squishy crafts experience. Squeezing the palm pushes slime into the fingers, which extend outward. Squeezing the fingers pushes slime back into the palm. Children describe this sensation with the kind of enthusiastic vocabulary that is best left off a family blog.
Craft 20: DIY Jumbo Squishy Crafts
Supplies: Large round balloon, memory foam scraps, flour, funnel, acrylic paint, permanent markers
Steps: Fill a large round balloon with a combination of flour and small memory foam scraps using a funnel, alternating between the two materials to create a varied internal texture. Fill to approximately grapefruit size. Double-balloon for durability and tie securely. Paint the exterior of the finished balloon with acrylic paint the paint adheres to latex and dries flexible. Add detail with permanent markers once the paint is fully dry. The jumbo size and mixed filling create a squishy unlike any other on this list large enough to truly palm-squeeze, with an unpredictable internal texture that feels different with every grip.
How to Run DIY Squishy Crafts at a Sleepover
Running DIY squishy crafts smoothly with a group of excited children requires a little organization before the evening starts. These practical tips make the difference between a chaotic craft session and a genuinely wonderful one.
Set up individual workstations for each child before they arrive. Place a plastic tablecloth section, a set of pre-measured supplies, and a small bowl at each spot. Labeling each station with the child’s name immediately gives them ownership of their space and reduces territorial disputes over supplies.
Run the projects in order from simplest to most complex. Start with a balloon stress ball it takes five minutes, requires no drying time, and produces an immediately satisfying result that builds excitement and confidence for the more complex projects. Move through foam squishies next, then slime projects last. Slime requires the most supervision and produces the most mess, so keeping it until the group is settled and focused prevents chaos.
Set clear and simple ground rules before beginning. Slime stays in the bowl until it is fully made. Balloons are not stretched beyond their filling. Every child labels their finished squishies immediately with a permanent marker. These three rules, stated cheerfully before starting, prevent the majority of sleepover craft incidents.
Plan for cleanup time. Slime-based projects require proper cleanup disposable gloves, paper towels, and sealed zip bags for each child’s finished slime prevent sticky fingers from spreading across every surface of your home. Build 15 minutes of cleanup time into your craft session schedule and make it part of the activity rather than an afterthought.
Sleepover DIY Squishy Crafts Party Favor Ideas
Every child at the sleepover should go home with their finished squishies displayed beautifully — not stuffed into a grocery bag. A small, thoughtfully presented take-home package transforms the craft activity into a genuine party favor experience that children talk about for weeks.
Place each child’s finished squishies into a clear zip-lock favor bag. Add a small label reading “Made at [Child’s Name]’s Sleepover Party” with the date. Tie the bag with a ribbon in the sleepover’s theme color. Stack the labeled bags in a small basket by the front door so every child remembers to take their squishies home in the morning rush.
Consider adding a small printed recipe card to each favor bag — a simple index card with the fluffy slime recipe written out so children can recreate their favorite squishy at home. This additional touch costs nothing and produces enormous excitement because children love the idea of making more squishies independently after the sleepover.
Frequently Asked Questions: DIY Squishy Crafts for Sleepovers
What age is best for DIY squishy crafts at a sleepover?
DIY squishy crafts work beautifully for children aged 6 to 12. Children aged 6 to 8 excel at balloon squishies and foam sponge projects. Children aged 8 to 12 are ready for slime-based projects and more detailed foam squishies. Running two or three different projects simultaneously allows mixed-age groups to each find their most appropriate and engaging activity level.
How do I prevent slime from making a huge mess at a sleepover?
Plastic tablecloths at every workstation, individual pre-measured supplies in small bowls, disposable gloves for every child, and a clear rule that slime stays in the bowl until fully made combine to keep slime mess entirely manageable. Keep a roll of paper towels and a pack of wet wipes at every station. Accept that some mess is part of the experience and focus your cleanup energy on the end of the session rather than during it.
How long do homemade DIY Squishy Crafts last?
Balloon-based squishies last several weeks to several months with normal use. Foam and sponge squishies last indefinitely. Slime lasts one to two weeks when stored in an airtight container in the refrigerator. Gel-filled sensory bags last as long as the zip-lock seal remains intact — typically several months with careful use.
Can I prepare DIY squishy crafts supplies in advance for a group?
Absolutely — and doing so makes the sleepover craft session run significantly more smoothly. Pre-measure all flour, cornstarch, glue, and shaving cream portions into individual labeled cups or bowls. Pre-cut foam shapes and memory foam pieces. Pre-soak water beads. Pre-mix instant snow powder. The more preparation you complete before children arrive, the more time and energy you have available for supporting and enjoying the craft session itself.
What is the easiest DIY squishy crafts for a large sleepover group?
The classic flour stress ball is the easiest squishy craft for a large group it requires three supplies, takes five minutes, produces zero drying time, and works for every age from 6 to 12. It is the perfect opening craft that settles the group, builds confidence, and generates immediate excitement before moving on to more complex projects.
Are the supplies for DIY squishy crafts safe for children?
All supplies listed in this post are safe for children when used as directed and with appropriate adult supervision. Borax is used in small quantities in some slime recipes contact lens solution is a completely borax-free alternative that produces equally good results and is recommended for younger children. Keep iron powder from the magnetic slime project stored safely away from young children when not in use. Always check individual supply packaging for age recommendations and allergen information before the sleepover.
How many DIY squishy crafts should I plan for a sleepover?
For a standard sleepover activity session of two to three hours, plan for three to four projects from this list one balloon squishy, one foam squishy, one slime project, and one creative squishy. This variety covers multiple sensory experiences, skill levels, and techniques while leaving enough time for each project to be completed without rushing. Having two or three backup projects from this list available ensures you always have an activity ready if the group finishes faster than expected.
The Best Sleepover Night Starts Right Here
You walked into this post looking for a way to channel sleepover energy into something creative, calming, and genuinely memorable and you now have 20 complete DIY squishy crafts to choose from, with full step-by-step instructions, supply lists, age recommendations, and practical group management tips.
The children at your sleepover will make things with their hands. They will compare their squishies and trade techniques. They will squeeze and stretch and knead their way from chaotic Friday night energy into the calm, satisfied glow that makes bedtime possible. And every single one of them will go home the next morning clutching a bag of squishies they made themselves, ready to tell their parents exactly how they did it.
Here are your action steps to get the sleepover squishy station ready:
- Choose four projects from this list that match your group’s age range and your available supplies
- Gather and pre-measure all supplies at least one day before the sleepover
- Set up individual labeled workstations with plastic tablecloths before children arrive
- Run projects in order from simplest to most complex — balloon first, slime last
- Build 15 minutes of cleanup time into the craft session schedule
- Package each child’s finished squishies into a clear favor bag with a label and ribbon
- Include a printed slime recipe card in every favor bag so children can make more at home
Which of these 20 DIY squishy crafts is your group making first? Drop it in the comments below and if this post helped you plan the most epic sleepover ever, save it to your Pinterest boards so other parents can find it when they need it most.