Planning a kids’ party often comes with one big challenge and that is creating decorations that look amazing without spending days making them. The good news is that a DIY paper flower backdrop can completely transform your party space while taking far less time than you might expect.
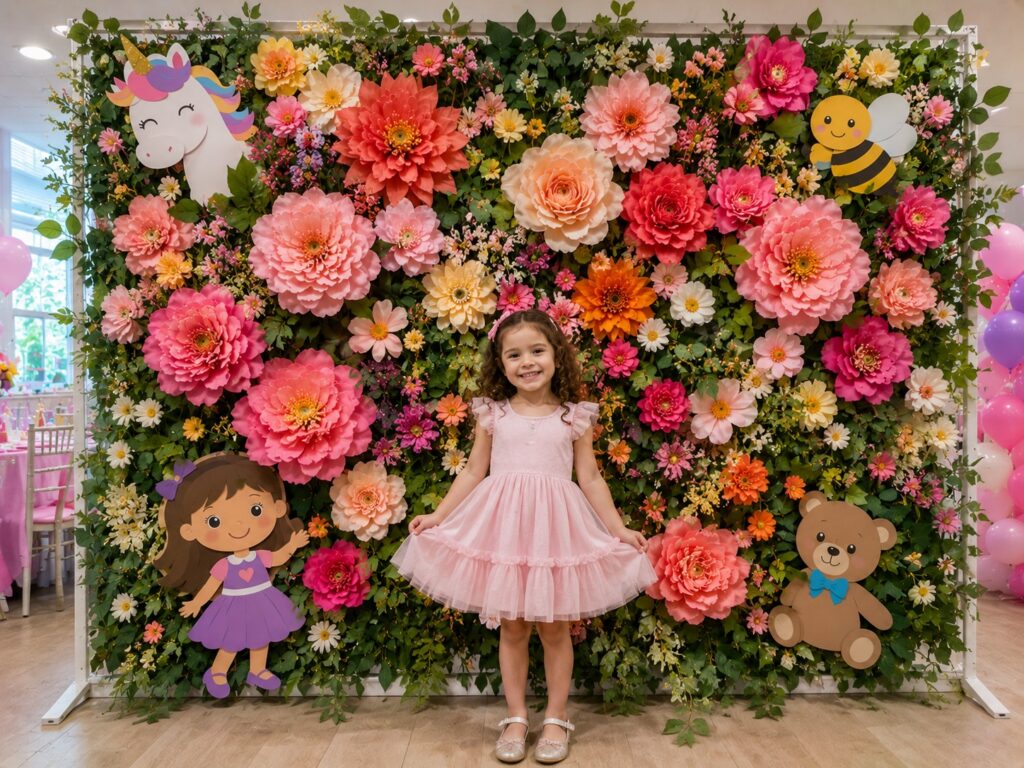
Whether you’re decorating for a birthday party, baby celebration, graduation, or themed event, a beautiful paper flower backdrop instantly creates a photo-worthy focal point. It adds color, texture, and personality to the celebration while helping ordinary spaces feel much more festive. If you’re currently planning a birthday celebration, you may also find inspiration from birthday party themes for girls that pair beautifully with floral decorations.
The best part is that you do not need advanced crafting skills to create something stunning. With a few simple supplies and some easy folding techniques, you can build a backdrop that guests will think came from a professional party planner. Many parents even combine paper flowers with balloon decoration ideas to create a layered and eye-catching display.
In this tutorial, you’ll learn exactly how to make a gorgeous DIY paper flower backdrop for a kids’ party in under an hour, along with helpful tips for choosing colors, arranging flowers, and creating a setup that looks beautiful in photos.
Why a DIY Paper Flower Backdrop Is Perfect for Kids’ Parties
A beautiful party backdrop can completely change the look of a celebration. It helps create a focal point while making photos look more polished and memorable. That is why so many parents love using a DIY paper flower backdrop for birthdays, baby showers, graduations, and other special occasions.
Unlike many party decorations, paper flowers offer incredible flexibility. You can customize the colors, sizes, and designs to match almost any theme. As a result, a DIY paper flower backdrop works for both simple gatherings and larger celebrations.
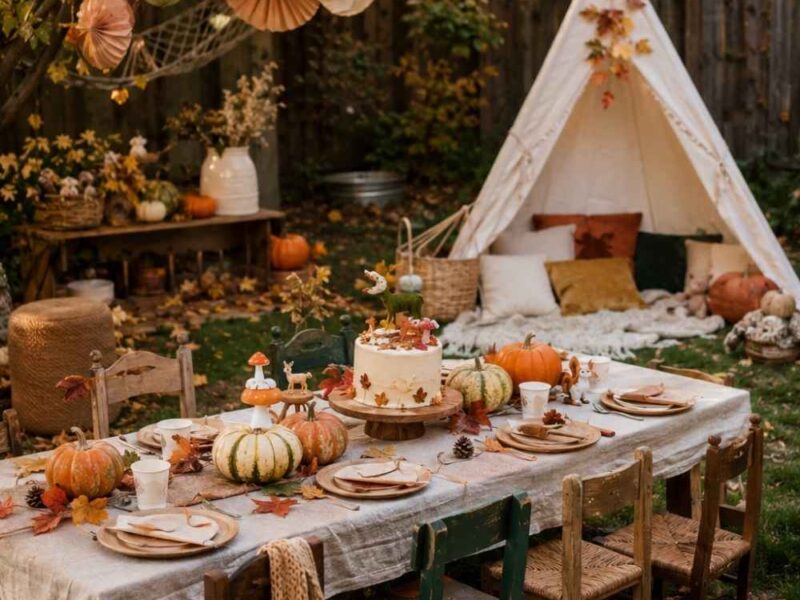
Another advantage involves versatility. You can place the backdrop behind a dessert table, gift station, photo booth, or cake display. It instantly adds texture and visual interest without overwhelming the space.
Many parents who plan first birthday themes love using paper flowers because they create a soft and timeless look in photos.
The best part is that you can complete a DIY paper flower backdrop in less time than many people expect. With a little preparation and a clear design plan, you can create a stunning display in under an hour.
Gather Your Supplies Before You Start
Preparation makes every project easier. Therefore, gather all materials before creating your DIY paper flower backdrop.
You will need colored cardstock or craft paper. Tissue paper also works for certain flower styles. Scissors, glue, double-sided tape, and a ruler help make the process smoother.
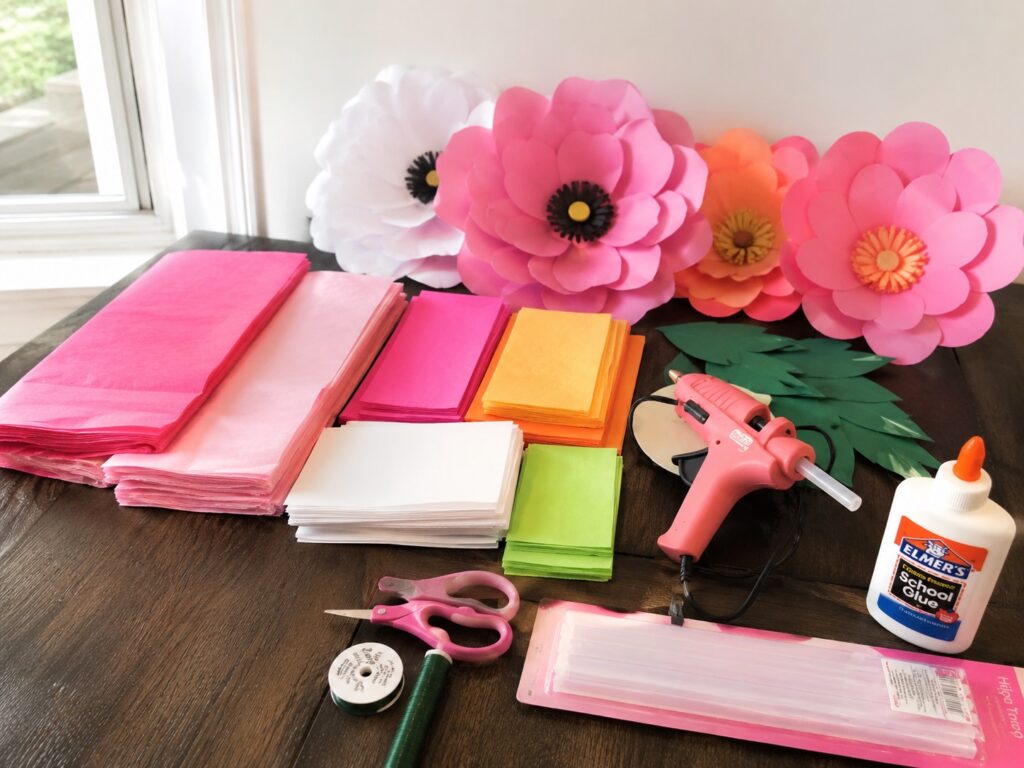
A pencil allows you to sketch petal shapes before cutting. Meanwhile, a hot glue gun can speed up assembly if you feel comfortable using one.
Choose a sturdy backing surface as well. Foam boards, poster boards, and lightweight display panels work particularly well.
Having everything within reach helps you focus on creating your DIY paper flower backdrop instead of searching for supplies midway through the project.
Choose Paper That Holds Its Shape
The type of paper you select affects the final appearance of your DIY paper flower backdrop.
Thin paper often bends too easily. On the other hand, very thick paper may become difficult to shape.
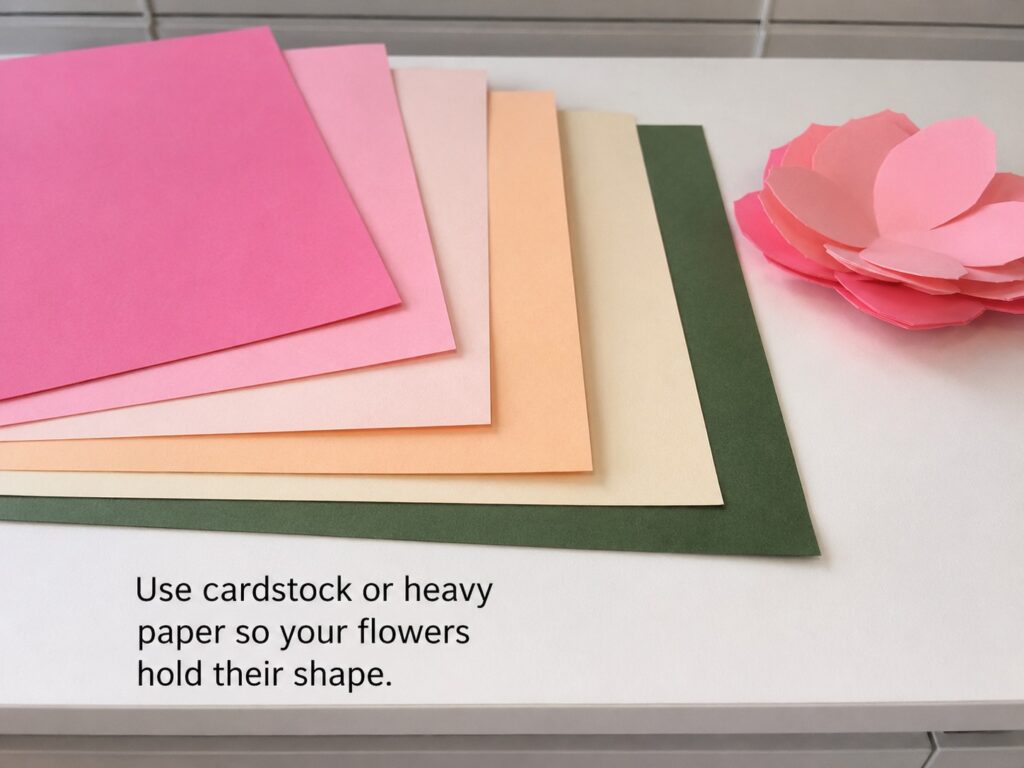
Medium-weight cardstock usually provides the best balance. It holds curved petals while remaining easy to cut and manipulate.
Tissue paper creates softer flowers with a delicate appearance. Many parents combine both materials to add variety and dimension.
If you enjoy creative projects, inspiration from summer crafts for kids can help you experiment with different materials and techniques.
Before cutting large quantities, test one flower first. This simple step helps you determine whether the paper creates the desired effect.
Pick a Color Palette That Matches Your Theme
Color selection plays a major role in the success of your DIY paper flower backdrop.
A coordinated color palette helps the finished design look intentional and professional.
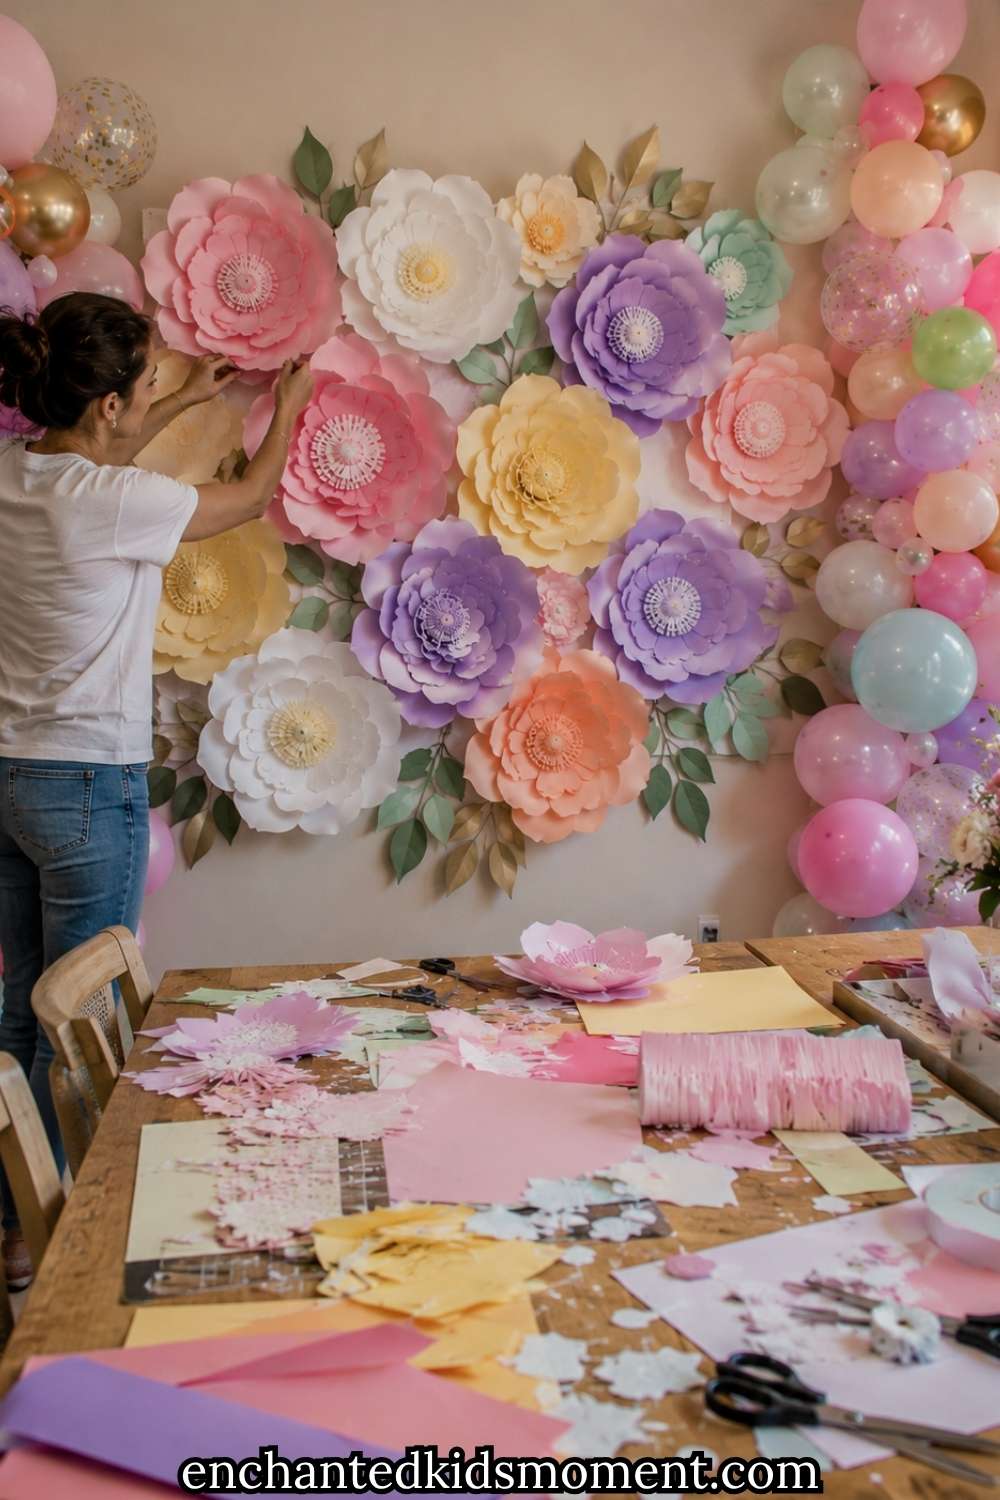
Pastel shades remain popular for baby celebrations. Soft pink, lavender, cream, mint, and light blue create a gentle atmosphere.
Bright colors work beautifully for children’s birthdays. Yellow, coral, turquoise, and hot pink add energy and excitement.
Some parents use inspiration from birthday party themes for girls when selecting color combinations for floral backdrops.
Limiting your palette to three or four colors often produces the best results.
Too many competing shades can make the backdrop appear cluttered. Simpler color schemes usually photograph better.
Decide Where the Backdrop Will Go
Before making flowers, determine where your DIY paper flower backdrop will appear.
The location affects both the size and layout of the finished design.
A dessert table backdrop requires different dimensions than a photo booth backdrop. Likewise, a cake table display may need fewer flowers than a larger wall installation.
Measure the available space carefully.
Accurate measurements prevent unnecessary work later. They also help you estimate how many flowers you need.
Parents planning a cake smash setup often create smaller paper flower backdrops that fit perfectly behind a highchair or cake stand.
Planning ahead helps ensure the backdrop looks balanced once assembled.
Sketch a Simple Design Layout
Many people skip this step. However, a quick sketch can improve your DIY paper flower backdrop dramatically.
You do not need artistic skills. A basic drawing works perfectly.
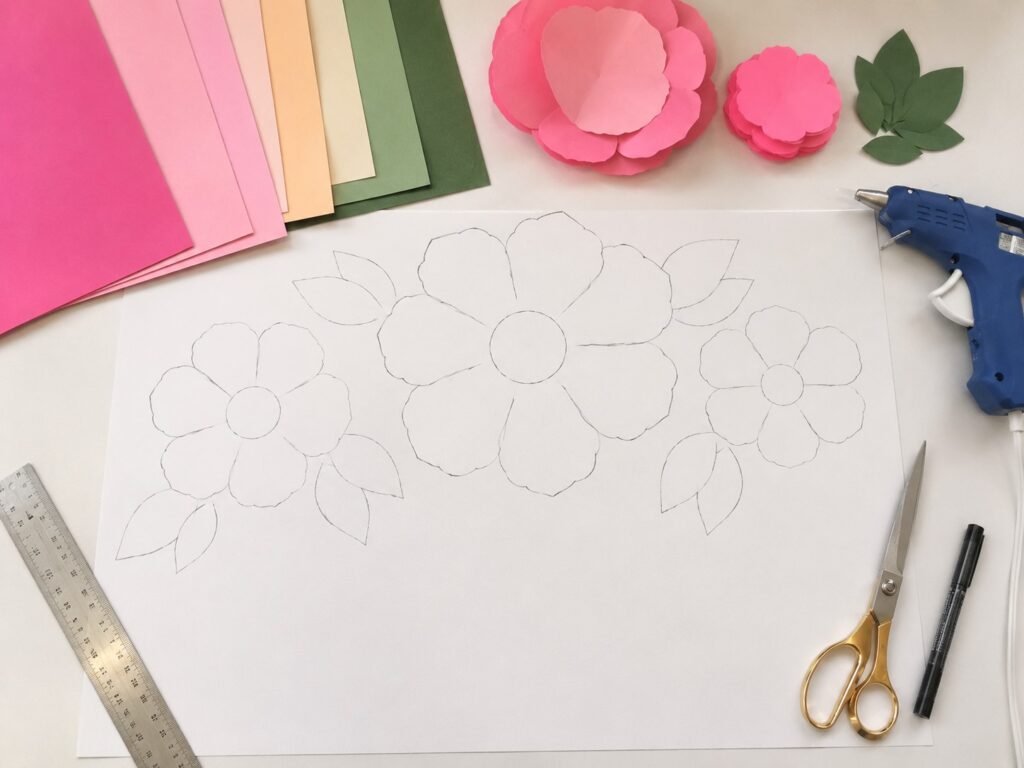
Mark where larger flowers will sit. Then fill surrounding spaces with medium and smaller flowers.
This approach creates visual balance throughout the display.
Large flowers naturally attract attention. Therefore, position them first before adding smaller decorative elements.
A rough plan saves time and reduces mistakes during assembly.
Create Large Statement Flowers
Large flowers often become the stars of a DIY paper flower backdrop.
They draw attention immediately and establish the overall design.
Begin by cutting several large petal shapes from cardstock. Each petal should look similar but not necessarily identical.
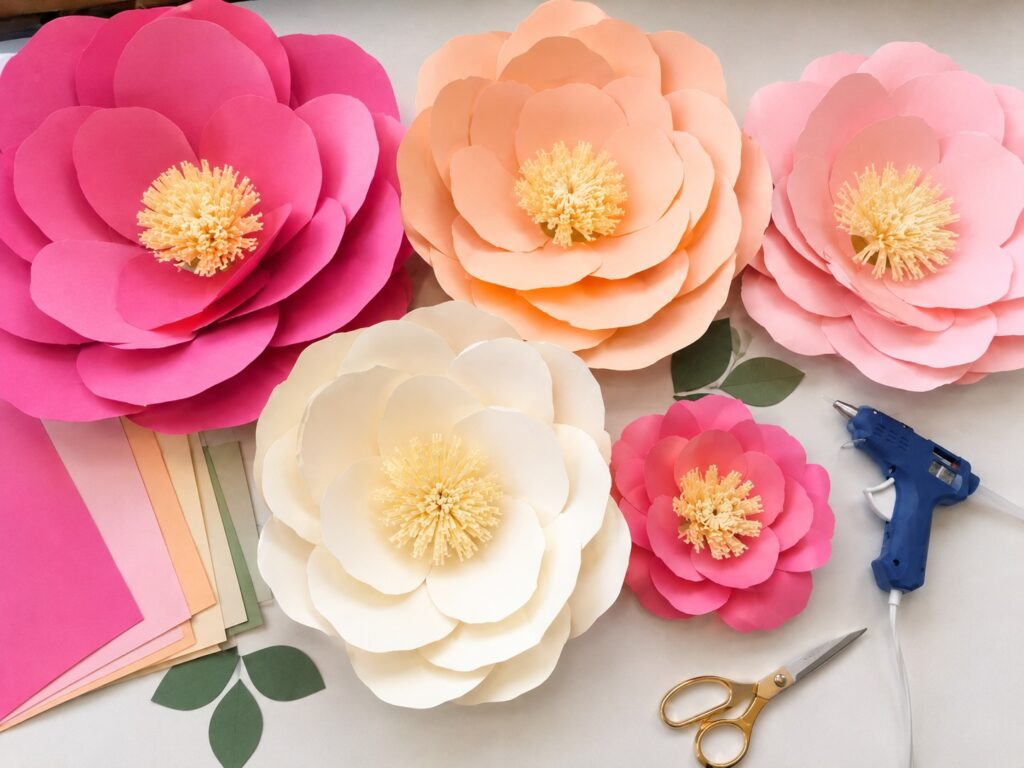
Slight variations often create a more natural appearance.
Gently curl each petal using a pencil or marker. This simple technique adds depth and dimension.
Glue petals together in overlapping layers.
Continue building until the flower reaches your desired size.
Many themed celebrations use oversized flowers as focal points. For example, decorations inspired by fairy birthday party ideas often feature large, whimsical blooms.
Large flowers create dramatic impact while reducing the number of decorations needed.
Add Medium Flowers for Balance
Once you finish the statement flowers, begin creating medium-sized flowers.
These flowers help connect the larger elements within your DIY paper flower backdrop.
Use the same construction process but reduce the petal size slightly.
Medium flowers fill empty areas while adding variety to the overall design.
Avoid making every flower identical.
Different sizes create movement and visual interest across the backdrop.
This layered effect often makes handmade decorations appear more professional.
The combination of large and medium flowers creates depth that looks beautiful in photographs.
Include Small Flowers and Details
Small flowers complete the design of your DIY paper flower backdrop.
They fill gaps and create a fuller appearance.

Without smaller elements, some areas may appear unfinished.
Simple five-petal flowers work particularly well.
You can also add leaves, paper greenery, or decorative accents.
These details help break up large sections of color.
Many parents use ideas from unicorn birthday party ideas to create playful floral arrangements featuring colorful accents and whimsical details.
Small additions often have a surprisingly large impact on the finished backdrop.
Mix Flower Shapes for a More Natural Look
Nature rarely creates identical flowers. Therefore, your DIY paper flower backdrop should include variety as well.
Experiment with different petal shapes and flower styles.
Some flowers can feature pointed petals. Others can use rounded edges.
Mixing styles prevents the design from looking repetitive.
You can also vary the flower centers.
Buttons, rolled paper centers, and layered circles all work beautifully.
This variety creates a richer and more interesting display.
Guests often assume professionally designed backdrops include multiple flower styles.
Fortunately, you can achieve the same effect with simple adjustments.
Add Texture Through Layering
Texture makes a DIY paper flower backdrop stand out.
Flat decorations often look less impressive in photographs.
Layering petals creates shadows and depth. These details help flowers appear more realistic.
Try adding extra petal layers to selected flowers.
You can also combine cardstock with tissue paper.
Many party planners use techniques similar to those found in a tissue paper pom pom backdrop to create additional texture and softness.
The goal involves creating visual interest from different viewing angles.
Layered flowers help achieve that effect beautifully.
Keep the Design Kid-Friendly

Children’s parties should feel fun and welcoming. Therefore, your DIY paper flower backdrop should reflect that atmosphere.
Choose colors that feel cheerful and inviting.
Avoid making the design overly formal.
Playful details often work best.
For younger children, consider incorporating elements inspired by Bluey birthday party ideas to make the backdrop feel even more engaging.
Remember that children will interact with the party space differently than adults.
Simple, colorful designs usually create the strongest impact.
Most importantly, focus on creating something that brings joy rather than perfection.
A handmade backdrop filled with personality often becomes the most memorable decoration at the entire celebration.
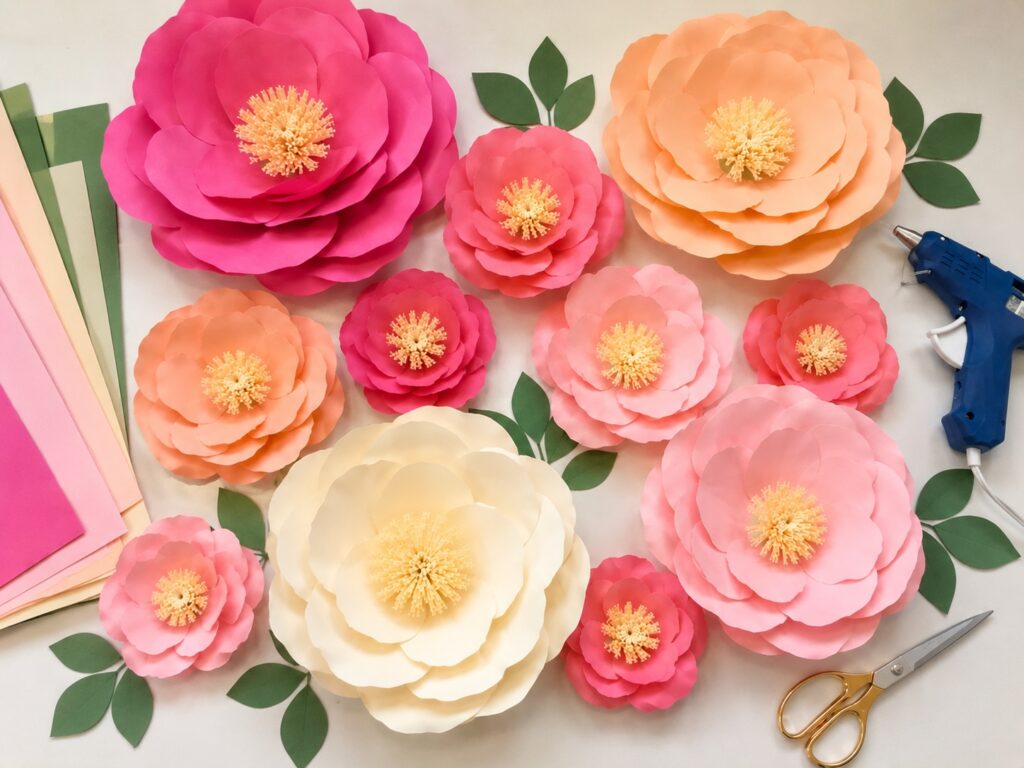
Assemble Your DIY Paper Flower Backdrop
Now that your flowers are ready, it is time to assemble your DIY paper flower backdrop.
Start by placing the largest flowers on your backing surface first. These flowers create the foundation of the design and help establish visual balance.
Avoid attaching everything immediately. Instead, arrange the flowers loosely and step back several times. This approach helps you spot uneven areas before making anything permanent.
Once you feel happy with the layout, secure the large flowers in place. Then begin adding medium flowers around them.
Continue filling empty spaces gradually. This method creates a more natural appearance and prevents overcrowding.
Many parents use a similar layering technique when creating a balloon garland because it helps decorations look fuller and more polished.
Work slowly and trust the process. Small adjustments often make a significant difference.
Create Depth With Overlapping Flowers
One of the biggest advantages of a DIY paper flower backdrop involves the ability to create depth.
Flat decorations can look one-dimensional in photos. Therefore, overlapping flowers helps create a more professional appearance.
Allow some petals to extend over neighboring flowers. This layering effect adds movement and texture throughout the design.
Position certain flowers slightly forward while keeping others recessed. The variation creates visual interest from different angles.
Large events often use this technique because it helps displays look more expensive and detailed.
Fortunately, you can achieve the same result with simple materials and a little patience.
Fill Empty Spaces Carefully
As you continue building your DIY paper flower backdrop, small gaps will begin to appear.
Not every space needs to disappear completely. However, large empty sections can make the display feel unfinished.
Use small flowers, leaves, or paper accents to fill those areas.
Focus on balance rather than symmetry.
Natural flower arrangements rarely appear perfectly even. Therefore, slight variations often improve the overall look.
If one side feels heavier than the other, add a few accents to restore balance.
This approach keeps the backdrop visually pleasing without making it appear overly structured.
Add Leaves and Greenery
Greenery brings life to a DIY paper flower backdrop.
Flowers alone look beautiful. However, leaves often make the arrangement feel more complete.
Cut simple leaf shapes from green cardstock. Then tuck them behind flowers throughout the display.
Vary the sizes and shades of green whenever possible.
This technique creates contrast while helping flower colors stand out.
You do not need dozens of leaves. A few carefully placed accents often produce the best effect.
Greenery also helps connect separate clusters of flowers into one cohesive design.
Incorporate Additional Decorations
Although flowers remain the star of the show, extra decorations can elevate your DIY paper flower backdrop even further.
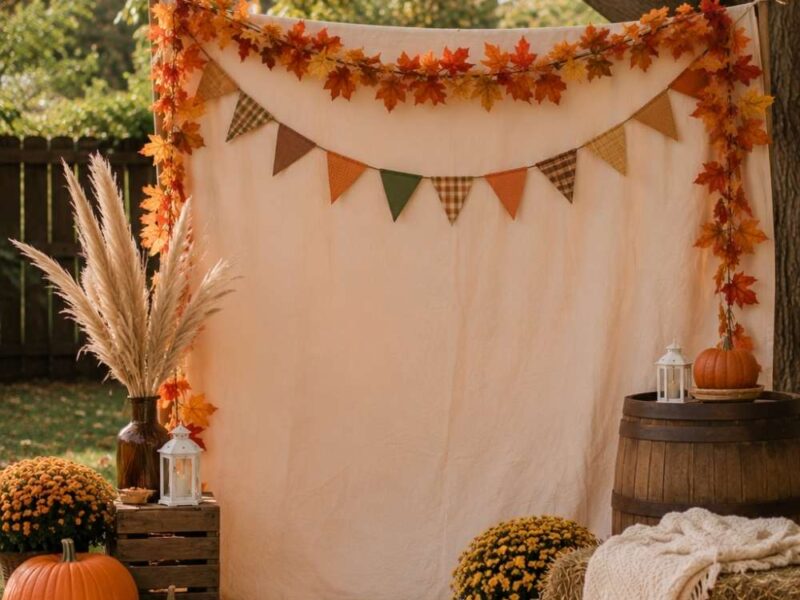
Consider adding banners, signs, or decorative cutouts that match your party theme.
Keep these additions simple. Too many decorative elements can distract from the flowers.
Many families pair floral backdrops with creative displays inspired by balloon arch designs to create an eye-catching focal point.
The combination of flowers and balloons works especially well for birthday celebrations.
When adding extras, always maintain visual balance throughout the backdrop.
Match the Backdrop to the Party Theme
A successful DIY paper flower backdrop should complement the rest of the celebration.
Think about your party theme before finalizing colors and decorative elements.
Princess parties often look beautiful with soft pink and gold flowers.
Woodland themes pair nicely with greenery and earth tones.
Many parents planning birthday party themes for boys choose bold colors and simple floral arrangements that feel playful rather than overly delicate.
Matching the backdrop to the overall celebration creates a more cohesive and memorable event.
Guests notice these details, even if they cannot explain why everything feels coordinated.
Use the Backdrop as a Photo Booth
One of the best ways to use a DIY paper flower backdrop involves turning it into a photo station.
Children love posing for pictures during parties. Parents also appreciate having a designated area for photographs.
Place the backdrop against a clean wall and leave enough open space in front.
Add a few simple props if desired.
Avoid overcrowding the area with furniture or decorations.
The flowers should remain the main attraction.
Throughout the celebration, guests will naturally gather near the backdrop to take pictures.
As a result, your hard work receives plenty of attention.
Position the Backdrop Near Natural Light
Lighting can dramatically affect how your DIY paper flower backdrop appears in photographs.
Natural light often produces the best results.
If possible, position the backdrop near windows or outdoor spaces with indirect sunlight.
Soft lighting helps showcase the texture and colors of the flowers.
Avoid placing the backdrop under harsh overhead lighting.
Strong shadows can reduce the visual impact of the design.
Testing the location before the party begins helps ensure everything looks beautiful throughout the event.
Avoid Common Mistakes
Several common mistakes can affect a DIY paper flower backdrop.
The first involves making every flower the same size.
Uniform flowers often create a flat appearance. Instead, use multiple sizes for better visual interest.
Another mistake involves choosing too many colors.
A limited palette usually creates a cleaner and more professional design.
Some crafters also rush the layout process.
Taking time to arrange flowers before attaching them often improves the final result significantly.
Patience remains one of the most valuable tools during this project.
Make the Backdrop Work for Different Celebrations
One reason many people love a DIY paper flower backdrop involves its versatility.
The same basic design can work for many occasions.
Soft pastel flowers fit baby celebrations beautifully.
Bright colors suit children’s birthdays perfectly.
Some parents create floral displays for milestone events inspired by kindergarten graduation party ideas because they photograph so well.
Others adapt the backdrop for seasonal celebrations and family gatherings.
Small adjustments can completely transform the overall look.
Turn It Into a Seasonal Decoration
Your DIY paper flower backdrop does not need to remain limited to one event.
With a few modifications, you can adapt it for different seasons.
Spring backdrops often feature pastel flowers and greenery.
Summer designs typically include brighter shades and playful accents.
Many families create colorful arrangements inspired by 4th of July party ideas during summer celebrations.
Autumn versions can incorporate warm oranges, reds, and yellows.
Winter themes often use white flowers and metallic accents.
Seasonal updates help you get more value from your creative efforts.
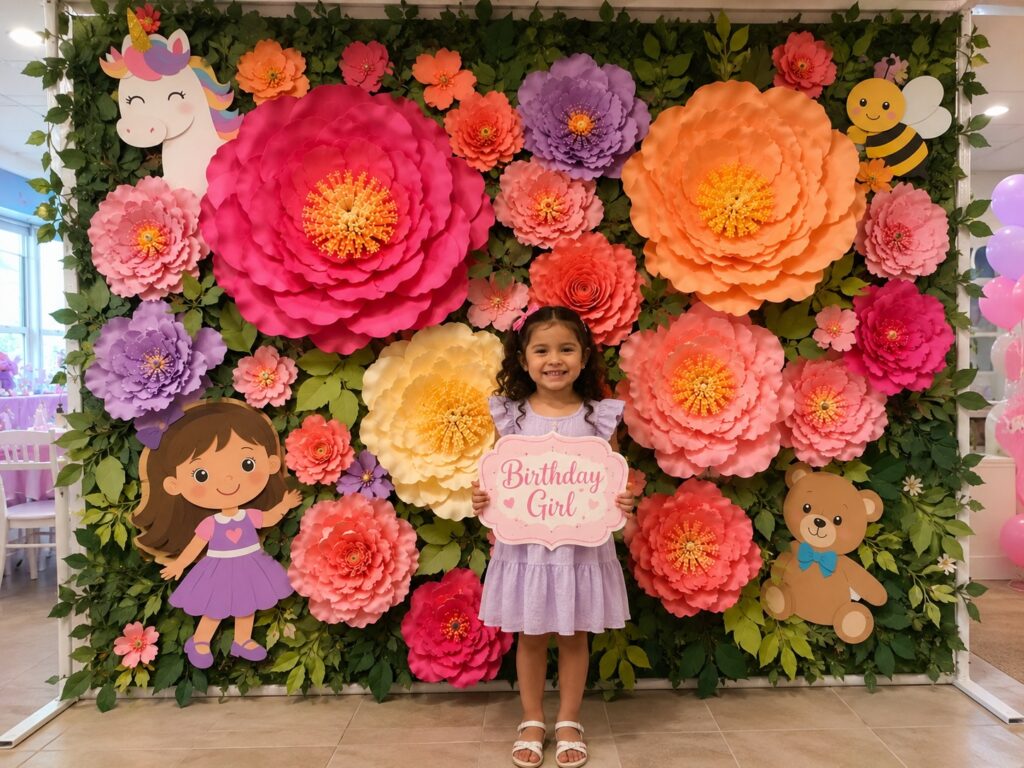
Add Handmade Personal Touches
Personal details make a DIY paper flower backdrop feel truly special.
Custom signs featuring names or messages work beautifully.
Children also enjoy helping with simple decorative elements.
Creative families sometimes include decorations inspired by ceramic painting ideas to add unique handmade touches.
Personalized details help the backdrop feel meaningful rather than generic.
Guests often notice these small additions immediately.
Most importantly, they help create lasting memories.
Get Kids Involved
Creating a DIY paper flower backdrop can become a fun family activity.
Older children often enjoy cutting petals and assembling flowers.
Younger children can help choose colors and organize supplies.
Simple projects inspired by rock painting ideas often encourage children to become excited about crafting.
Working together turns the decorating process into part of the celebration.
Children also feel proud when they see their contributions displayed at the party.
The experience becomes just as meaningful as the finished decoration.
Store Flowers for Future Parties
After the celebration ends, do not throw away your flowers immediately.
Many paper flowers can last through multiple events.
Store them carefully in large containers or flat boxes.
Protect delicate petals from bending whenever possible.
Reusable flowers save time during future celebrations.
You can even combine old flowers with new decorations to create entirely different designs.
This approach keeps your crafting efforts useful long after the first party ends.
Final Thoughts
A beautiful DIY paper flower backdrop can completely transform a kids’ party without requiring complicated tools or advanced crafting skills.
With the right paper, a simple color palette, and thoughtful planning, you can create a decoration that looks stunning in photos and impresses guests.
Remember to focus on balance, layering, and variety. These three elements make the biggest difference in the final result.
Whether you use your backdrop behind a dessert table, photo booth, or gift station, it will instantly elevate the celebration.
For even more party inspiration, many parents combine floral backdrops with Dollar Tree crafts, creative details inspired by DIY squishy crafts, or colorful displays.
The best part about a DIY paper flower backdrop is that it reflects your creativity. Every flower adds personality, and every detail helps create a celebration that feels special and memorable.
Frequently Asked Questions
What paper works best for a DIY paper flower backdrop?
Medium-weight cardstock usually works best. It holds its shape well while remaining easy to cut and assemble.
How many flowers do I need for a DIY paper flower backdrop?
The number depends on the size of the backdrop. Most small party displays require a mix of large, medium, and small flowers.
Can I make a DIY paper flower backdrop in under an hour?
Yes. Preparing supplies beforehand and using simple flower designs can significantly reduce assembly time.
How do I attach flowers to the backdrop?
Most crafters use glue, double-sided tape, or removable adhesive strips depending on the backing material.
Can I reuse my DIY paper flower backdrop?
Absolutely. Careful storage allows many paper flowers to remain usable for future celebrations and events.