Some links on this blog may contain affiliate links. If you make a purchase through one of these links, I may earn a small commission at no extra cost to you. Thank you for supporting Enchanted Kids Moment!
I still think there is something magical about walking into a party and seeing a beautiful, fluffy balloon arch in your child’s favorite colors. It instantly transforms an ordinary space into a celebration filled with excitement and wonder. The best part is knowing you created that stunning party centerpiece yourself.
If you have ever wondered how to make a balloon arch and thought it was too difficult, I am here to show you that it can actually be simple and fun. You do not need professional party-planning skills, expensive equipment, or complicated techniques. With a few balloons, some basic supplies, and a little creativity, you can create a gorgeous balloon arch that looks like it came straight from a party designer.
You can also check out this guide on how to make a balloon garland.
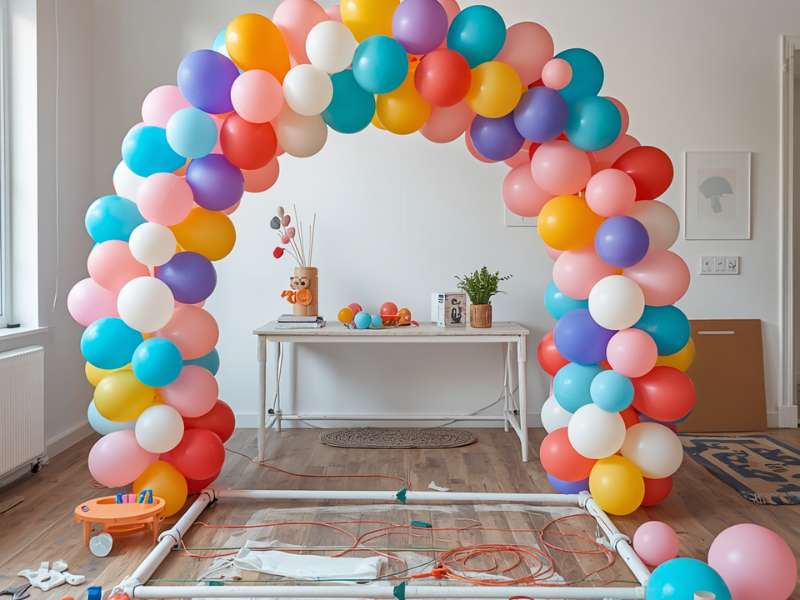
Balloon arches have become every kid party’s best friend, and it’s easy to see why! They’re colorful, they’re magical, and they make kids (and honestly, adults too ) squeal with excitement the moment they see them. Whether it’s a birthday bash, a baby shower, or a fun themed party, a balloon arch turns any regular room into a wow-worthy celebration space.
By the time you finish reading this, you’ll know exactly how to build a stunning balloon arch from scratch, from picking your balloons to putting on the finishing touches. We’ll keep it simple, step-by-step, and super fun.
Ready to make some balloon magic? Let’s go!
What You Need On How to Make a Balloon Arch
Before you learn how to make a balloon arch, gather your supplies. You need everything ready before you start inflating.
Read this balloon décor ideas: 31 Beautiful Balloon Decoration Ideas for Kids’ Parties That Will Absolutely Wow Every Guest
Supply list:
- 100–150 latex balloons in your chosen colors (11-inch size)
- 1 balloon decorating strip (also called a balloon tape strip)
- 1 hand pump or electric balloon pump
- Fishing line or clear string
- Command hooks or nails for wall mounting
- Scissors
- Optional: foil balloons, greenery, or flowers for styling
How to make a Balloon Arch (Step by step Guide)
Choose Your Balloon Arch Color Palette
Picking your colors is the most important step before you learn how to make a balloon arch.
Popular kids party balloon arch palettes:
- Pink, white, gold, and lavender — perfect for unicorn or princess parties
- Blue, green, and yellow — great for dinosaur or jungle themes
- Red, white, and blue — ideal for 4th of July celebrations
- Pastel rainbow — works for any kids birthday party theme
Buy 3–4 colors and use one as your dominant color — about 50% of your balloons. Split the remaining 50% between your accent colors. This ratio gives your balloon arch a balanced, professional look.
Step 1: Set Up Your Frame
This is the first step on how to make a balloon arch Learning how to make a balloon arch starts with a strong and stable frame. The frame is what holds the entire balloon arch together and gives it its final shape. Even the most beautiful balloons will not look good if the base structure is weak or uneven. Taking a few extra minutes to properly set up your frame makes the rest of the process much easier.
There are two simple frame options beginners can use:
Option A — Balloon Decorating Strip Method (Easiest for Beginners)
Lay your balloon decorating strip flat on the floor. This plastic strip has small holes every inch. You push balloon knots through these holes to build your arch shape.
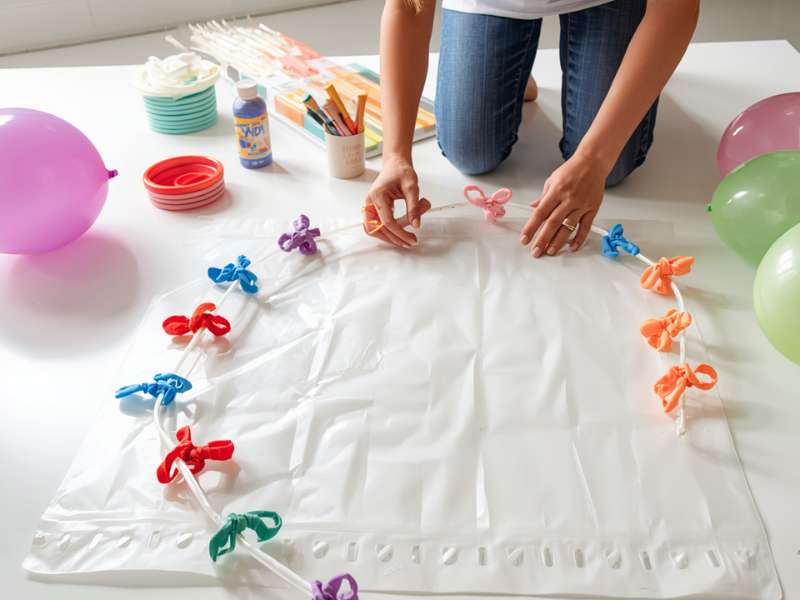
This is the easiest and most beginner-friendly method on how to make a balloon arch. The strip already helps guide the balloon placement for you. The decorating strip naturally bends into an arch shape once enough balloons are attached, making it almost impossible to mess up the design. It also helps balloons stay evenly spaced and secure throughout the party.
Most party stores and online balloon kits include these decorating strips because they make balloon arches faster, cleaner, and more professional-looking without needing advanced decorating skills.
Option B — Fishing Line Method
This is another way on how to make a balloon arch. Tie a length of fishing line between two anchor points two chairs, two door frames, or two PVC pipes. This method gives you more control over the arch curve.
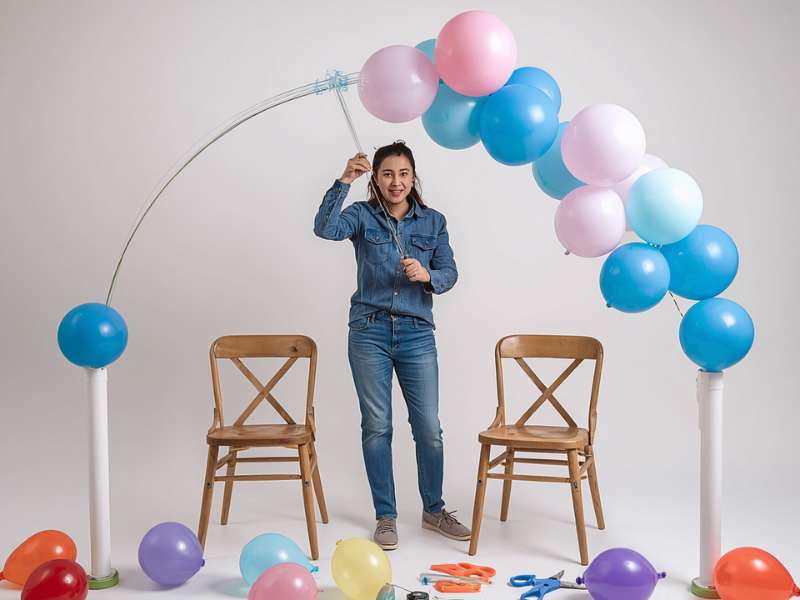
The fishing line method is often used by professional decorators because it allows more flexibility when creating custom shapes or oversized balloon arches. However, it requires more patience and balancing skills since the balloons are not locked into pre-made holes like they are with the decorating strip.
For a first-time balloon arch, use the decorating strip method. It is faster, neater, and more forgiving. Once you get comfortable building balloon arches, you can experiment with the fishing line method later.
Step 2 — Inflate Your Balloons
The second step on how to make a balloon arch. Inflate all your balloons before you start building. This makes the assembly process smooth and fast.
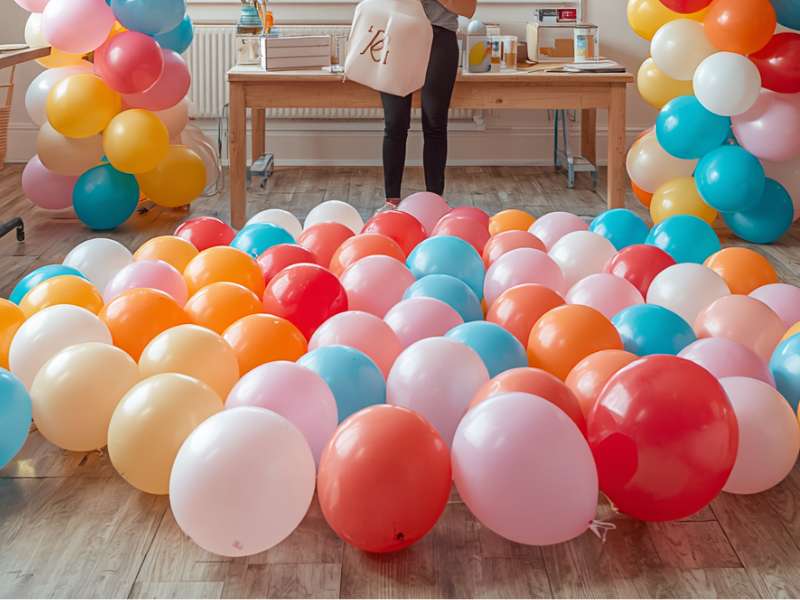
One of the biggest mistakes beginners make when learning how to make a balloon arch is inflating balloons while building the arch at the same time. This slows everything down and makes it harder to see your final color balance and balloon sizes. Preparing all your balloons first keeps the process organized and stress-free.
Key Inflation Rules
- Inflate balloons to different sizes — large (11 inch), medium (9 inch), and small (5 inch)
- Different sizes create that full, organic, professional balloon arch look
- Do not inflate every balloon to maximum — variety in size is the secret
- Tie each balloon tightly at the knot immediately after inflating
- Sort inflated balloons into color groups before you start building
Different balloon sizes are what make modern balloon arches look stylish and expensive. Perfectly identical balloons can make the arch look flat and stiff. Slightly varied balloon sizes create depth, texture, and a more natural flowing shape. Take note of this on how to make a balloon arch.
Save this for later: How to Make a Stunning Tissue Paper Pom Pom Backdrop for a Kids’ Party in 30 Minutes
An electric balloon pump makes a huge difference here. Inflating balloons by mouth is exhausting and time-consuming, especially if you need 80–100 balloons for a full arch. A simple electric pump can inflate balloons in minutes and helps keep balloon sizes more consistent.
If possible, slightly underinflate some balloons instead of filling every balloon completely. Overfilled balloons pop more easily and make the arch look less balanced.
Step 3 — Build Your Balloon Clusters
The third step on how to make a balloon arch. Professional balloon arch builders work in clusters of four. This is the core technique in learning how to make a balloon arch properly.
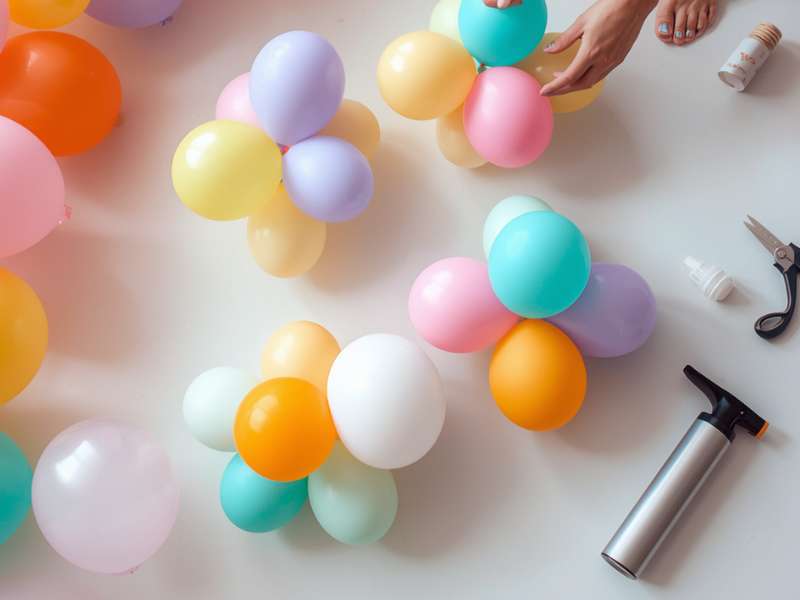
Instead of attaching single balloons one at a time, clusters help create volume quickly and make the arch look full and polished. Once you understand how to build clusters, the rest of the process becomes much easier.
How to Make a Balloon Arch (Making the Cluster)
- Take two inflated balloons of the same size
- Twist them together at the knots to make a pair
- Make a second pair with two more balloons
- Twist both pairs together at the center — you now have a cluster of four
As you build clusters, begin mixing colors strategically. For example, combine two blue balloons with two white balloons, or alternate pastel shades for a softer look. Avoid making every cluster identical because variation helps the balloon arch feel more dynamic and professional.
Pin this: 21 Most Stunning Kindergarten Graduation Party Ideas on a Budget
Make all your clusters before attaching them to the strip. Aim for 20–25 clusters for a 6-foot arch. Alternate your color combinations across clusters for a varied, flowing look.
Having all clusters prepared ahead of time also helps you build the arch much faster once assembly begins.
Step 4 — Attach Clusters to the Decorating Strip
Now you start building the actual arch shape.
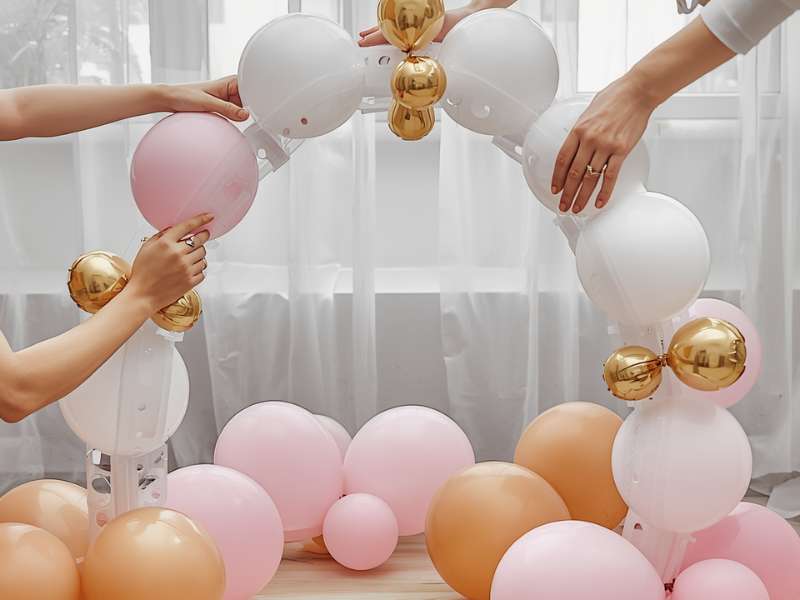
Push the center twist of each balloon cluster through one of the holes in the decorating strip. The plastic grips the balloon knot and holds it firmly in place.
This is the stage where your balloon arch finally starts looking impressive. As the clusters connect together, the shape becomes fuller, larger, and more visually dramatic.
Technique Tips
- Alternate cluster colors as you go — do not group the same color together
- Rotate each cluster slightly as you attach it — this fills gaps naturally
- Work from one end to the other in a single direction
- Stand back every 5–6 clusters to check the shape and color distribution
Rotating the balloon clusters is especially important because it helps hide empty spaces between balloons. Balloon arches look best when there are no visible holes or flat sections.
If you notice gaps, add smaller balloons into open spaces using leftover holes in the strip or balloon glue dots. Small balloons help create that trendy “organic balloon arch” style seen at professional parties and events.
Take your time during this step. A few small adjustments can dramatically improve the final appearance.
Step 5 — Mount and Shape Your Balloon Arch
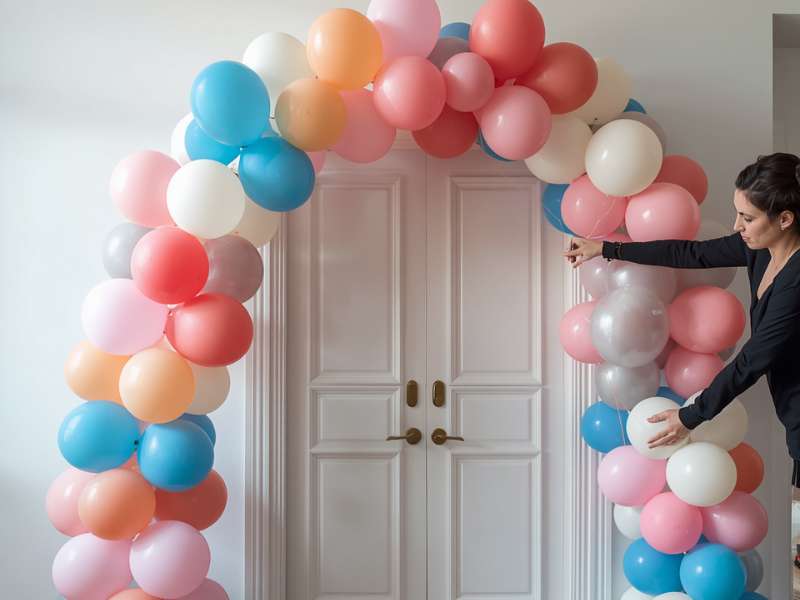
Now you hang and shape your finished arch. This step transforms a flat strip of balloons into a real arch.
For a Wall-Mounted Arch
Press two Command hooks onto the wall at your desired arch height and width. Hook the ends of the decorating strip onto each hook. The strip curves naturally into an arch shape under the weight of the balloons.
Wall-mounted arches are perfect for dessert tables, photo backdrops, gift tables, and indoor birthday parties. They take up less floor space and instantly create a party focal point.
Party ideas for you: 20+ Bluey Birthday Party Ideas That Will Make Your Toddler’s Day
For a Freestanding Arch
Attach each end of the strip to a weighted balloon base stand. These cost about $8 each on Amazon. Fill the base with sand or rocks for stability.
Freestanding arches work well for outdoor parties, entrance displays, and larger event spaces where you want guests to walk underneath the balloons.
Once mounted, shape the arch by gently pulling and rotating balloon clusters. Push any flat sections outward. Step back and adjust until the curve looks even and full.
Do not rush this part. Professional-looking balloon arches often come down to small shaping adjustments rather than expensive supplies.
Step 6 — Style and Finish Your Balloon Arch
The finishing touches make your balloon arch look professionally styled.
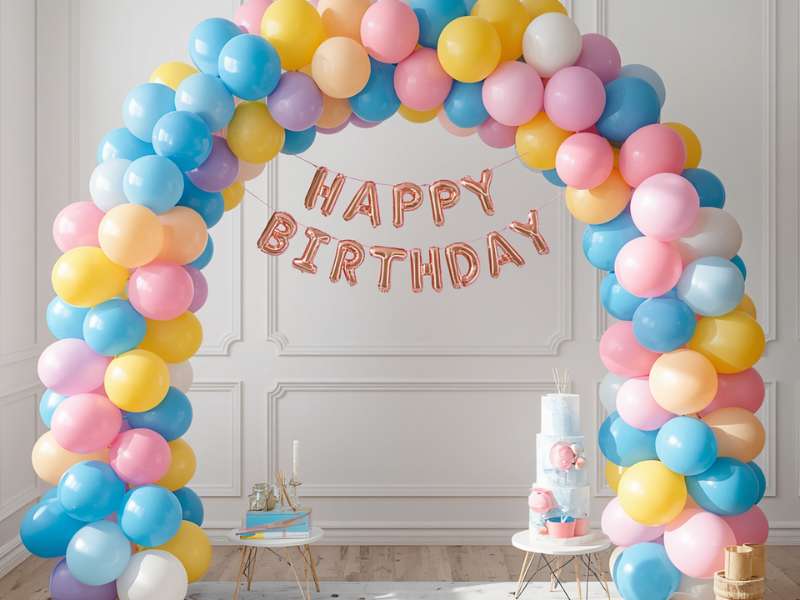
Once the main arch is complete, small decorative details help elevate the entire setup and make it look party-ready instead of simply homemade.
Styling Ideas
- Tuck in stems of faux greenery or eucalyptus between balloon clusters
- Add oversized foil star or heart balloons at the center peak
- Hang a “Happy Birthday” banner across the front of the arch
- Attach fairy lights through the balloons for an evening glow effect
- Tie ribbon streamers to the base ends for a flowing finish
Do not overcrowd the arch with too many decorations. A few carefully placed accents usually look more elegant and balanced than adding too much at once.
Balloon arches also photograph best when placed near natural light or open windows. If you are using the arch as a photo backdrop, leave enough open space around it for guests to stand comfortably in front.
Take your final photo from about 6 feet away and slightly below the arch center. This angle makes the arch look its most dramatic and full.
How Long Does a Balloon Arch Last?
A latex balloon arch lasts 12–24 hours indoors at room temperature. Outdoors in heat, balloons deflate faster usually within 6–8 hours.
Temperature, sunlight, humidity, and wind all affect balloon lifespan. Indoor arches typically last much longer because they are protected from weather and temperature changes.
Tips on How to Make a Balloon Arch Last Longer
- Build it the morning of the party, not the night before
- Keep it away from direct sunlight and air conditioning vents
- Do not use Hi-Float inside latex balloons — it makes them heavy and droopy
- Keep a few spare inflated balloons to replace any that pop during the party
If properly cared for indoors, some balloon arches can still look good for a day or two after the party ends.
Balloon Arch Size Guide on How to Make a Balloon Arch
Not sure how big to make your balloon arch? Choosing the right size depends on where you plan to place it and how dramatic you want the final setup to look. Larger arches create a big party statement, while smaller arches work perfectly for dessert tables, gift tables, or cozy indoor spaces.
Use this simple balloon arch size guide to estimate how many balloons you will need before you start building.
Doorway Arch
Size: 7–8 feet tall, 4 feet wide
Balloons Needed: About 80 balloons
A doorway balloon arch is perfect for party entrances. Guests walk through the arch as they enter, instantly making the party feel exciting and professionally decorated. This size works well for birthdays, baby showers, and graduation parties held indoors or outdoors.
Backdrop Arch
Size: 6 feet tall, 6 feet wide
Balloons Needed: About 120 balloons
This is one of the most popular balloon arch sizes for kids parties because it creates the perfect photo backdrop. Place it behind the cake table, dessert station, or gift table to create a stunning focal point guests will photograph throughout the party.
Full Ceiling Garland
Size: 10–12 feet long
Balloons Needed: About 150 balloons
A ceiling balloon garland stretches across walls, ceilings, staircases, or party tables for a dramatic party effect. This style works especially well for larger spaces and themed birthday parties where you want the decorations to feel full and immersive.
Table Top Mini Arch
Size: 3 feet tall
Balloons Needed: About 40 balloons
Mini balloon arches are ideal for smaller celebrations or simple party setups. They look beautiful above dessert trays, snack tables, or gift stations without taking up too much space. They are also easier and faster for beginners to build.
See more here: How to Make a Gorgeous DIY Paper Flower Backdrop for a Kids’ Party in Under an Hour
Helpful Tip
Always buy 10–15 extra balloons beyond your estimated amount. Some balloons may pop during inflation or assembly, and having extras helps you fill unexpected gaps or make last-minute adjustments to the arch shape.
A standard kids birthday party backdrop arch uses about 100–120 balloons and takes 60–90 minutes to build from scratch.
How to Make a Balloon Arch Supply Checklist
Before you start building your balloon arch, make sure you have all your supplies ready and organized in one place. Having everything prepared ahead of time makes the decorating process much faster, easier, and less stressful.
Basic Supplies You Will Need
- Latex balloons in different sizes and colors
- Balloon decorating strip
- Electric balloon pump or hand pump
- Command hooks or balloon arch stand
- Fishing line or balloon glue dots (optional)
- Foil balloons for accent decorations (optional)
- Ribbon streamers or faux greenery for styling (optional)
- Extra balloons for filling gaps or replacing popped balloons
Helpful Setup Tip
Choose your balloon colors before shopping so your arch looks coordinated and balanced. Using 2–4 colors usually creates the cleanest and most professional-looking result. Mixing large, medium, and small balloons also helps create that trendy organic balloon arch style seen at modern parties.
Here is exactly what a beginner balloon arch costs:
Bookmark this: Dollar Store Party Decor Hacks For Kids That Look Honestly Expensive
Common Balloon Arch Mistakes to Avoid
Every beginner makes these mistakes when learning how to make a balloon arch. Skip them completely.
Mistake 1 — Inflating all balloons to the same size Uniform balloons look flat and stiff. Mix sizes for an organic, full look.
Mistake 2 — Using only two colors Two-color arches look sparse. Use at least three colors for depth and visual interest.
Mistake 3 — Building the arch the day before Latex balloons shrink overnight. Build on the day of the party for best results.
Mistake 4 — Skipping the anchor points An unsecured arch tips over. Always anchor both ends firmly before adding balloons.
Mistake 5 — Not filling gaps A sparse arch looks unfinished. Fill every gap with small single balloons before calling it done.
Your Balloon Arch Is Ready
You now know exactly how to make a balloon arch for a kids party from scratch.
The full process takes under 2 hours. The result looks stunning in every party photo. Once you build your first balloon arch, you will never hire a decorator for one again. Try this with your child and see how you bond over it.