Some links on this blog may contain affiliate links. If you make a purchase through one of these links, I may earn a small commission at no extra cost to you. Thank you for supporting Enchanted Kids Moment!
Painting a ceramic mug with kids sounds simple until the paint starts smearing, the design doesn’t stick, or you realize the mug needs to be handled differently after painting. The good news is that you don’t need an elaborate craft setup to make this activity work.
With the right mug, kid-friendly painting supplies, and a little preparation, you can turn an ordinary ceramic mug into a fun personalized keepsake. This project works especially well for a rainy afternoon, family craft time, a handmade gift, or a quiet weekend activity.
If your child enjoys hands-on projects, you can also explore these easy rock painting ideas for kids for another simple painting activity.
Before you begin, keep in mind that painted ceramic mugs are not automatically food-safe or dishwasher-safe. The paint and curing method must specifically be rated for the intended use. For younger children, an adult should handle any oven curing and supervise the activity.
Painting a mug gives children plenty of room to be creative. They can choose colors, create simple patterns, write their names, or draw pictures that mean something to them.
However, preparation makes a big difference. Ceramic has a smooth surface, so regular craft paint may not adhere properly. Therefore, choosing the right materials is one of the first things you should consider.
You also need to think about how the finished mug will be used. A decorative mug that sits on a shelf has different requirements from one that will hold drinks.
For another creative painting activity, check out these 35 easy painting ideas for toddlers that don’t create huge messes.
What You Need
You don’t need a huge collection of supplies for this project. Keeping the setup simple also makes it easier for children to participate.
Here is what you will need:
- A plain ceramic mug
- Ceramic or porcelain paint designed for mugs
- Paintbrushes
- Pencil
- Paper towels
- Water for cleaning brushes
- Rubbing alcohol or the cleaner recommended by your paint manufacturer
- Newspaper or a washable craft mat
- Painter’s tape
- An apron or old clothes
- Oven, if your specific paint requires oven curing
You can also keep a few sheets of plain paper nearby.
This gives children somewhere to practice their designs before putting them on the mug.
If you are building a dedicated crafting area for your children, these craft station ideas for kids can help you create a more organized setup.
Choose the Right Ceramic Mug
Start with a plain ceramic mug that has a smooth, clean surface.
A simple white mug is often easiest for beginners because the colors stand out clearly. However, you can experiment with other light-colored mugs once your child becomes more comfortable painting.
Avoid mugs with heavily textured surfaces. The uneven areas can make painting difficult for younger children.
Also, check the condition of the mug before starting. Cracks, chips, or rough edges can make the project less suitable for children.
If you are making the mug as a gift, think about the person’s interests first. A child might enjoy dinosaurs, flowers, animals, rainbows, stars, or their favorite colors.
For more handmade gift inspiration, take a look at these 20 crafts kids can make as gifts.
How to Paint a Ceramic Mug at Home With Kids
Step 1: Gather and Prepare Your Supplies
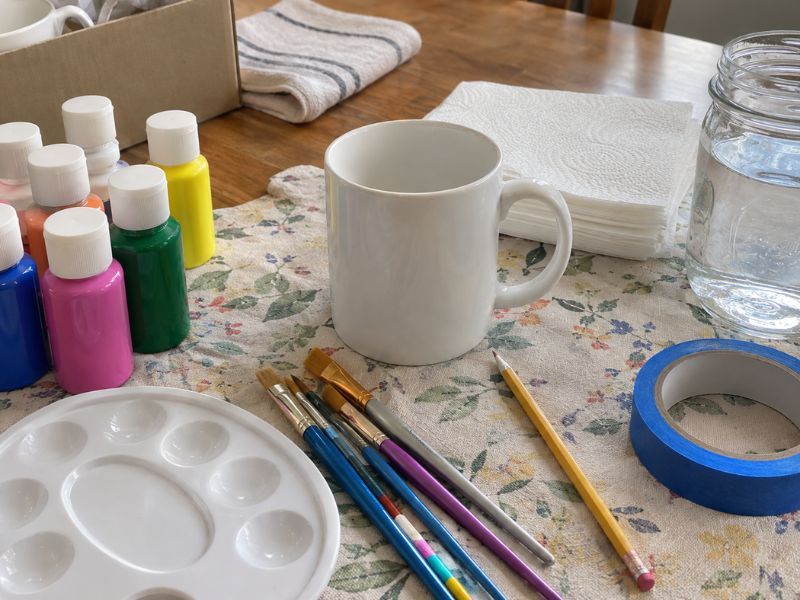
Start by setting up your workspace before bringing out the paint.
Cover your table with newspaper, kraft paper, or a washable craft mat. Put the mug in the middle and arrange the brushes, paint, pencil, and paper towels around it.
Try not to put every color of paint in front of your child at once. A smaller selection makes the activity easier to manage and gives them enough choices without creating unnecessary clutter.
If you’re painting with several children, give each child their own mug and small workspace. This helps prevent accidental bumps and makes everyone feel responsible for their own project.
It’s also a good idea to keep a bowl or container nearby for dirty brushes. That way, children don’t have to reach across the table every time they want to change colors.
Read this next: How to Make a Spooky Halloween Balloon Garland Kids Will Love
Step 2: Clean and Prepare the Mug
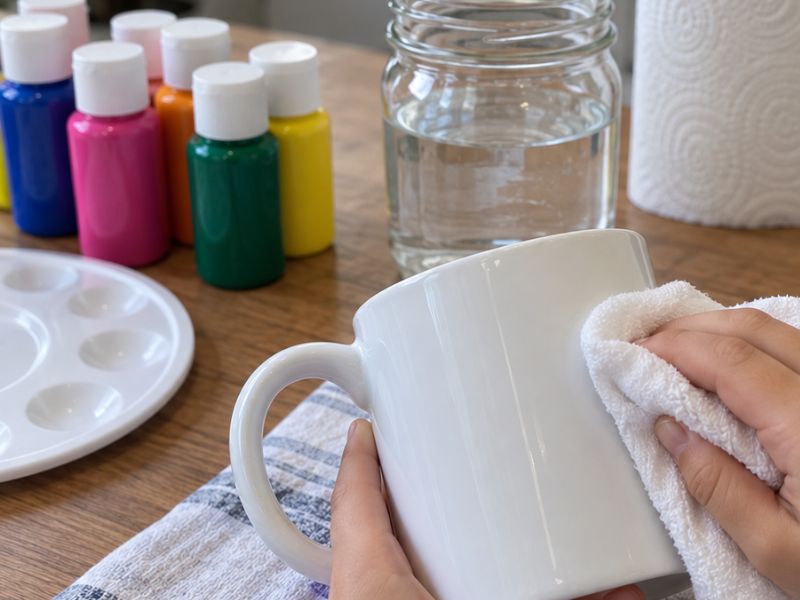
A clean ceramic surface is important before painting.
Wash the mug and dry it completely. If your ceramic paint recommends using rubbing alcohol or another cleaner before painting, follow those instructions.
Once the mug is clean, try not to touch the areas you plan to paint. Oils from your hands can transfer onto the ceramic surface.
Place the dry mug on your protected workspace.
This is also a good time to decide which parts of the mug your child will decorate. For a drinking mug, keeping the design on the exterior is the simpler option unless the paint manufacturer specifically says it is suitable for the inside or rim.
Don’t rush this part. A few extra minutes of preparation can make the actual painting much easier.
Step 3: Sketch Your Design
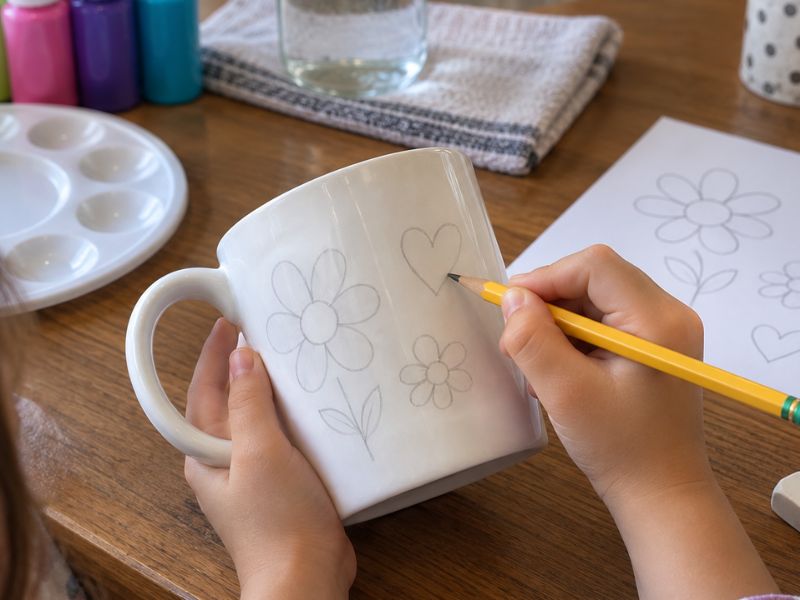
Before your child starts painting, give them a pencil and let them lightly sketch their design.
This doesn’t need to be a detailed drawing.
For younger children, simple designs work beautifully. They could draw:
- Hearts
- Stars
- Flowers
- Clouds
- Rainbows
- Smiley faces
- Simple animals
- Their name
- Dots and lines
Older children can try more detailed pictures or repeating patterns.
You can also let them practice the design on paper first. This is especially helpful if they’re nervous about making a mistake on the mug.
Don’t correct every little detail.
If your child draws a flower with uneven petals or a slightly crooked rainbow, let it stay. The purpose of this activity is to give them an opportunity to create something themselves.
If they enjoy themed crafts, you can also use ideas from these 25 fun Bluey crafts kids will be excited to make to inspire a character-themed design.
Step 4: Paint the Mug
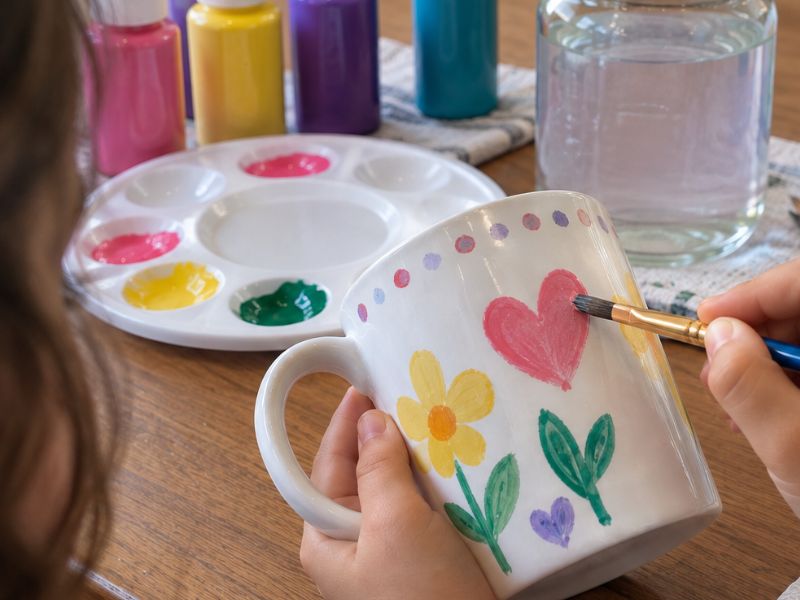
Now it’s time to bring the design to life.
Give your child a small amount of ceramic paint and let them begin filling in the design.
Start with larger sections first. A medium brush works well for bigger shapes, while a smaller brush is useful for outlines and details.
Encourage your child to use gentle brush strokes instead of putting a thick layer of paint onto the mug.
If they are using several colors, allow one section to dry when necessary before painting directly beside it. This can help prevent colors from smearing into each other.
You don’t have to stand over your child correcting every brush stroke. Instead, offer help when they ask or when they need assistance holding the mug.
For younger children, you can make the activity easier by limiting the design to a few large shapes.
For example, a simple flower made from circles and petals can be just as satisfying as an elaborate illustration.
If your child enjoys painting, you can also try these 35 Easy Painting Ideas for Toddlers That Don’t Create Huge Messes
Step 5: Add the Finishing Details
Once the main parts of the design are painted and sufficiently dry according to the paint instructions, let your child add the finishing touches.
This is where small details can make the mug feel truly personal.
They might add:
- Tiny dots
- Stars
- Hearts
- Flower centers
- Animal features
- Decorative lines
- Their initials
- Their name
- A simple border
Don’t feel pressured to fill every empty area.
Leaving some of the ceramic visible can actually make the design look cleaner.
If your child is getting tired, it’s perfectly fine to stop. The mug doesn’t have to be finished in one sitting if the paint manufacturer’s instructions allow the project to continue later.
The most important thing is that your child feels ownership of the finished creation.
For another personalized craft idea, you can explore these DIY childhood memory box ideas.
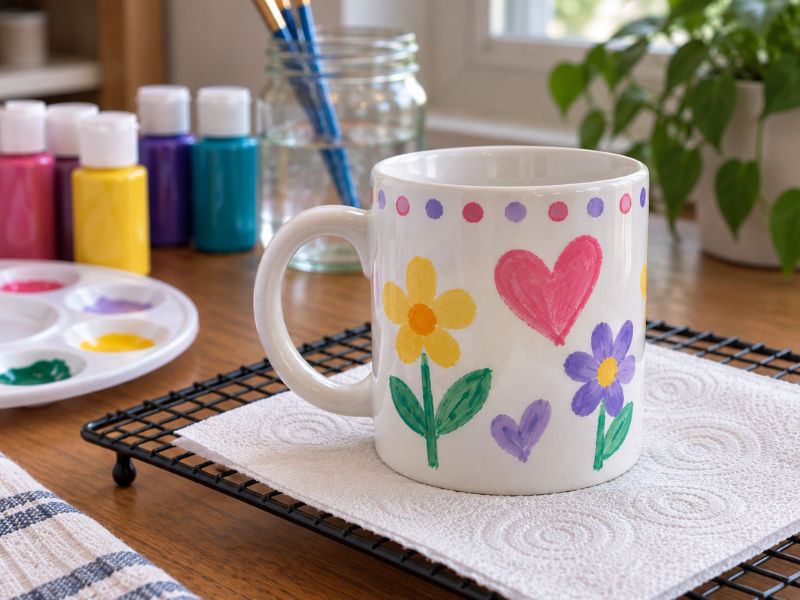
Step 6: Dry and Cure the Finished Mug
Once the painting is complete, place the mug somewhere safe where it won’t be bumped.
Follow the drying time provided by the ceramic paint manufacturer.
This is especially important because ceramic paints vary. Some products are designed to air-dry, while others require oven curing.
Do not assume that every ceramic paint should go into the oven.
If your paint requires oven curing, an adult should handle this step. Follow the manufacturer’s instructions for temperature, timing, cooling, and placement.
Never let children handle a hot mug.
After the mug has completely cooled, check the finished design.
Before using it as a drinking mug, also check the paint manufacturer’s instructions regarding food contact, the rim, dishwasher use, and microwave use.
If the product is intended only for decorative purposes, keep the finished mug decorative.
Easy Ceramic Mug Painting Ideas for Kids
Once your child understands the basic process, you can experiment with different designs.
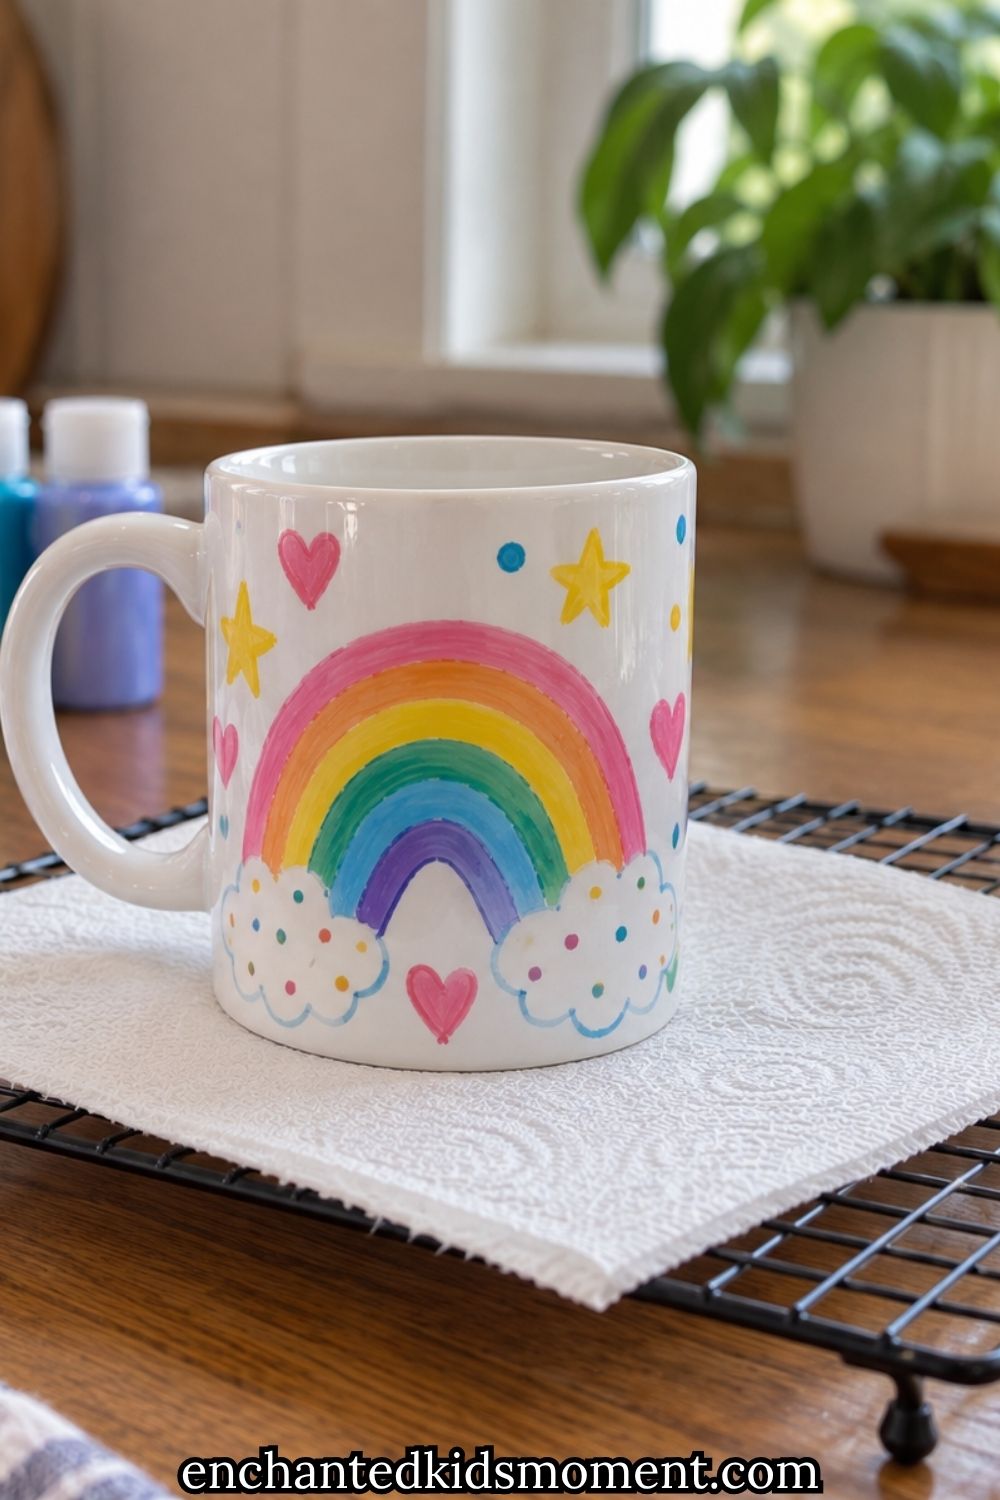
Rainbow Mug
Paint simple rainbow-colored arches around the mug.
Keep the shapes broad and simple for younger children.
Name Mug
Let your child write their name across the mug.
They can decorate around the letters with dots, stars, hearts, or flowers.
Polka Dot Mug
Use different colors to create dots around the mug.
This is one of the easiest designs for younger children.
Animal Mug
Choose one simple animal and create a face or silhouette.
For example, try a cat, bear, bunny, fish, or ladybug.
Flower Mug
Paint simple flowers around the outside of the mug.
You can use different colors for each flower.
Family Mug
Let each child contribute a small design.
This can turn one plain mug into a family keepsake.
For more keepsake inspiration, explore these DIY childhood memory box ideas.
How to Make This Activity Easier With Toddlers
Toddlers can participate, but the project needs more supervision.
Give them a simple design rather than expecting detailed artwork.
Dots, short lines, and large shapes are easier than complicated pictures.
You can also limit the number of paint colors.
Two or three colors can be enough.
Keep the activity short too.
Toddlers may lose interest before the mug is finished.
That’s completely fine.
You can allow them to paint one section and finish the remaining details later.
If your toddler enjoys sensory activities, you can also try how to make toddler sensory bins for another hands-on activity.
How to Make Mug Painting Fun for Older Kids
Older children can take more responsibility for their designs.
Let them create a theme.
They might design a mug around:
- Their favorite animal
- A hobby
- Nature
- Space
- Sports
- Books
- Their favorite colors
They can also experiment with patterns.
Instead of telling them exactly what to paint, give them a few design rules.
For example:
Use three colors and create a repeating pattern.
This gives them creative freedom while still providing some direction.
For more creative inspiration, your child may also enjoy these 31 Minecraft paper craft ideas.
Common Mistakes to Avoid
Painting Before Cleaning the Mug
Paint may not adhere properly to a dirty or greasy surface.
Clean the mug first.
Using the Wrong Paint
Regular washable craft paint isn’t automatically suitable for ceramic mugs.
Use paint specifically intended for ceramic or porcelain and follow its instructions.
Painting Too Thickly
Heavy layers can take longer to dry and may affect the finished appearance.
Thin, controlled layers are often easier to manage.
Touching Wet Paint
Give each section enough drying time.
Otherwise, one accidental touch can smear an entire design.
Rushing the Curing Process
Don’t shorten the manufacturer’s recommended curing time.
The curing process matters just as much as the painting.
Letting Children Handle Hot Ceramic
If oven curing is required, this should be an adult-only step.
Safety comes before finishing the craft quickly.
How to Turn Mug Painting Into a Gift
A painted mug can become more meaningful when your child makes it for someone special.
They could create one for:
- A parent
- Grandparent
- Teacher
- Caregiver
- Older sibling
- Family friend
Pair the mug with a handmade card.
You could even let your child write a short message on a separate card explaining why they made the design.
For another personalized project, check out these simple Father’s Day cards kids can make.
How to Keep the Activity From Getting Too Messy
You don’t need a complicated craft room.
Start by covering your table.
Then put only the colors your child needs in front of them.
Keep the rest of the supplies nearby but out of the immediate workspace.
Paper towels should be easy to reach.
You can also give each child their own small painting area if several children are participating.
This reduces accidental bumps and spilled paint.
For another low-mess option, try these easy summer crafts kids can make in 10 minutes.
What Makes This Craft Worth Doing?
Painting a ceramic mug isn’t only about making something pretty.
Children get opportunities to make creative choices.
They choose colors, plan designs, practice brush control, and decide how to decorate their mug.
You can also use the activity to encourage conversation.
Ask your child why they chose certain colors.
Ask what their picture represents.
Let them explain their design.
That turns a simple craft into a shared experience.
If you’re looking for more ways to create meaningful experiences with your children, explore the ultimate guide to creating meaningful childhood memories with kids.
Frequently Asked Questions
Can kids paint ceramic mugs?
Yes, children can participate in ceramic mug painting with age-appropriate supplies and adult supervision. Younger children will generally need more help, especially with holding the mug and using paint.
What kind of paint should I use?
Use a ceramic or porcelain paint that is specifically intended for the type of project you’re making. Always follow the manufacturer’s instructions for application, curing, and finished use.
Can I use acrylic paint on a ceramic mug?
Acrylic paint may adhere to ceramic, but ordinary acrylic paint is not automatically suitable for a mug that will be used for drinking. Check the product instructions before deciding how the finished mug can safely be used.
Can painted mugs go in the dishwasher?
Not necessarily. Dishwasher safety depends on the specific paint and curing method. Follow the manufacturer’s care instructions.
Can kids paint the inside of the mug?
For a functional drinking mug, be very careful about painting the interior. Only use a product specifically approved for that application. Otherwise, keep children’s designs on the exterior.
How long does a painted mug take to finish?
The painting itself can be relatively quick. However, drying and curing can take considerably longer. Follow the instructions for the specific ceramic paint rather than relying on a general drying time.
Final Thoughts
Painting a ceramic mug at home with kids can be a simple way to turn an ordinary object into something personal. You don’t need complicated designs or expensive supplies. A few colors, a plain mug, and some creative freedom can be enough.
Most importantly, don’t worry about making the mug perfect. Let your child choose the colors, experiment with shapes, and enjoy the process. The little imperfections are often what make a handmade keepsake special.
If you want to continue the creative afternoon, you can explore how to make a paper squishy ice cream that looks real and feels soft or try another painting project together.