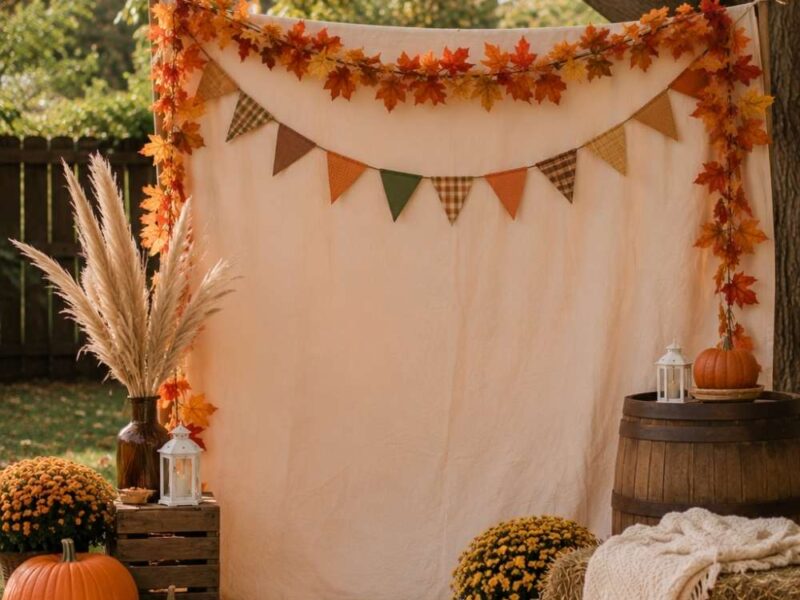
Your child’s birthday is only a few days away. The cake is ready, the invitations are sent, and the guests are counting down to the celebration. Yet when you look around the room, it still looks like an ordinary space instead of a place where magical memories are about to happen.
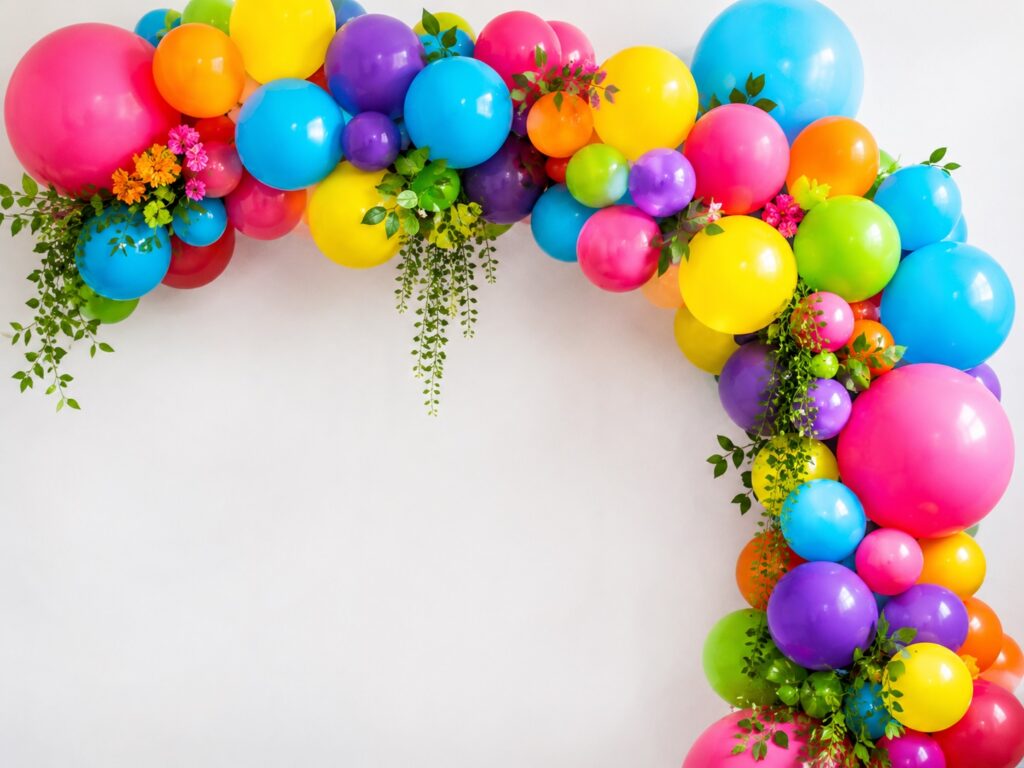
One thing I look forward to at every kids’ party is seeing the balloon garland. There is something so exciting about watching a simple wall transform into a colorful masterpiece filled with joy and celebration. A beautiful balloon garland creates the perfect photo backdrop, makes a simple party table look extraordinary, and instantly tells a child that their special day has finally arrived.
If you are looking for more ways to fill your party with color and fun, you may also love these beautiful balloon decoration ideas for kids’ parties that will completely transform your setup.
The best part is that you do not need professional decorating skills, expensive tools, or endless hours of preparation to create something stunning. With just balloons, a decorating strip, and a little creativity, you can make a show-stopping display right at home. If you are looking for more ways to fill your party with color and fun, you may also love these beautiful balloon decoration ideas for kids’ parties that will completely transform your setup.
For an even bigger statement piece, do not miss this beginner-friendly tutorial on how to make a balloon arch for a kids party and create a celebration guests will remember long after the last balloon comes down.
Keep reading to discover how to make a gorgeous DIY balloon garland, choose the perfect color combinations, assemble it with confidence, and hang it beautifully for a celebration that looks magical from every angle.
Why a DIY Balloon Garland Is the Best Party Decoration You Can Make
Before diving into the tutorial of DIY balloon garland, it is worth understanding exactly why balloon garlands have become the single most popular DIY party decoration in the world and why making your own is almost always better than buying a pre-made kit.
First, a DIY balloon garland gives you complete control over color. Pre-made kits come in predetermined color combinations that rarely match your specific theme perfectly. When you build your own DIY balloon garland from scratch, you choose every single balloon color, proportion, and size. The result is a decoration that feels completely custom and intentional rather than generic.
Second, a homemade DIY balloon garland is significantly more cost-effective than hiring a balloon decorator or purchasing a professional installation. A full, lush garland of 80 to 100 balloons costs approximately $20 to $40 in materials when you source supplies yourself. A fraction of what professional balloon decorating services charge for the same visual impact.
Come back to this: 31 Beautiful Balloon Decoration Ideas for Kids’ Parties That Will Absolutely Wow Every Guest
Third, the process itself is genuinely enjoyable. Unlike many party preparation tasks, building a balloon garland is satisfying and meditative. You see it grow and fill out in real time. The transformation from a pile of deflated balloons to a lush, dimensional garland happens right in front of you. The result feels deeply rewarding.
Furthermore, balloon garlands are extraordinarily versatile. They work indoors and outdoors, against walls and over doorways, behind cake tables and above party entrances. They suit every theme, every color palette, and every party size. Once you learn the basic technique, you will use it for every celebration you ever plan.
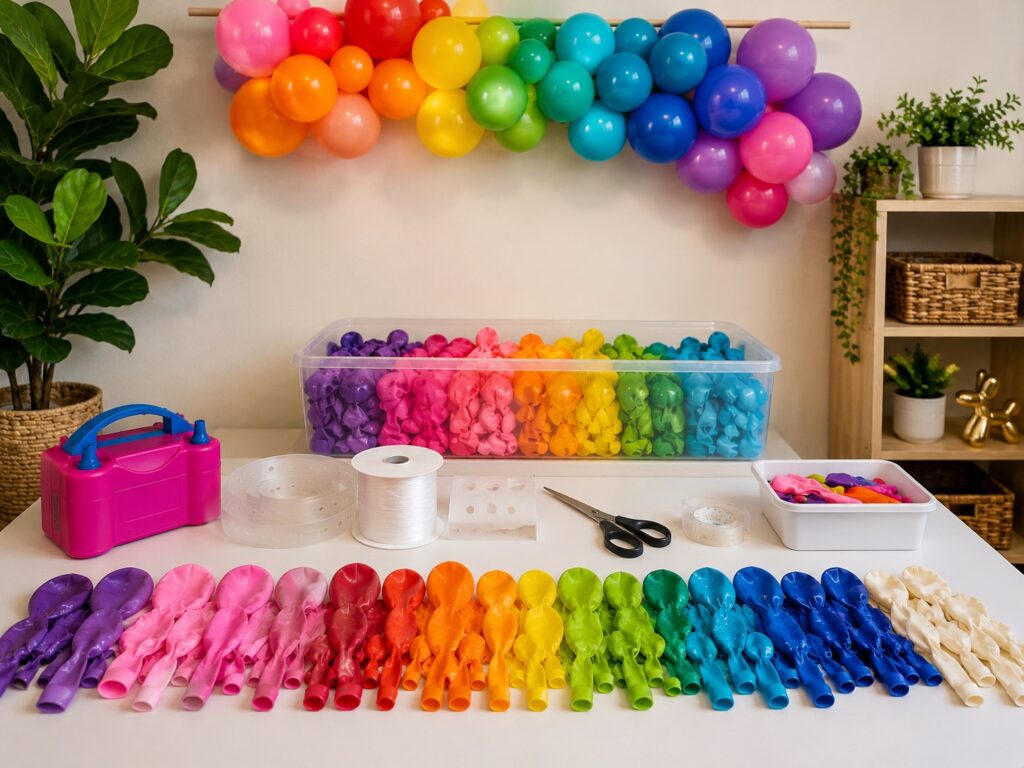
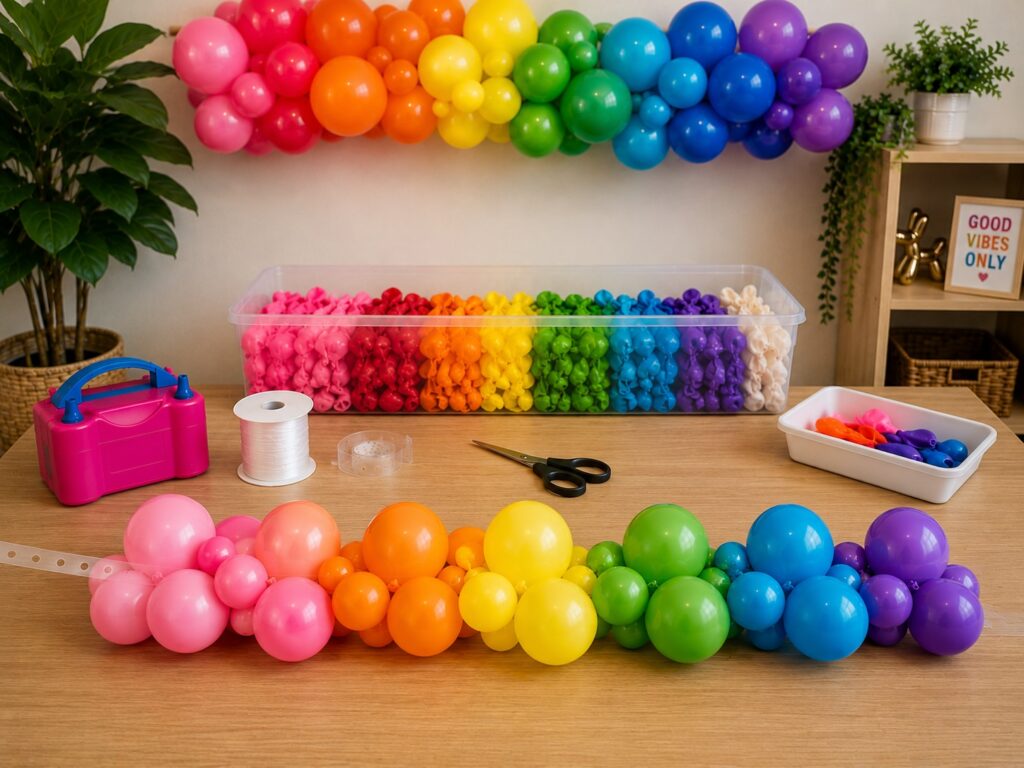
Supplies You Need to Make a DIY Balloon Garland
Gathering your supplies before you begin is non-negotiable for a smooth, efficient build. A mid-project supply run destroys momentum and adds unnecessary time to the process. Everything on this list is widely available at party supply stores, craft stores, and dollar stores.
Inflating the balloon:
- Latex balloons in your chosen colors plan for approximately 80 to 100 balloons for a 6-foot garland. Buy more than you think you need having extras allows you to fill gaps and replace any that pop
- A handheld electric balloon pump this is the single most important supply investment you will make. Inflating 80 to 100 balloons by mouth or with a manual pump takes enormous time and energy. An electric pump inflates each balloon in approximately three seconds and costs very little
- Balloon sizing template optional but highly recommended for beginners. A simple cardboard template with holes cut at your desired sizes helps you produce consistent balloon sizes that create a polished, professional-looking garland
Building the DIY balloon garland:
- Balloon decorating strip a long plastic strip with pre-punched holes that forms the structural spine of your garland. This is the tool that makes DIY balloon garlands beginner-accessible. You simply push balloon knots into the holes to secure them without tying anything together
- Scissors for trimming excess strip length
- Fishing line or clear string for hanging
Hanging:
- Command hooks rated for the weight of your garland clear hooks are virtually invisible against most walls
- A measuring tape and pencil for positioning hooks accurately before placing them
- A step stool for reaching high hanging points safely
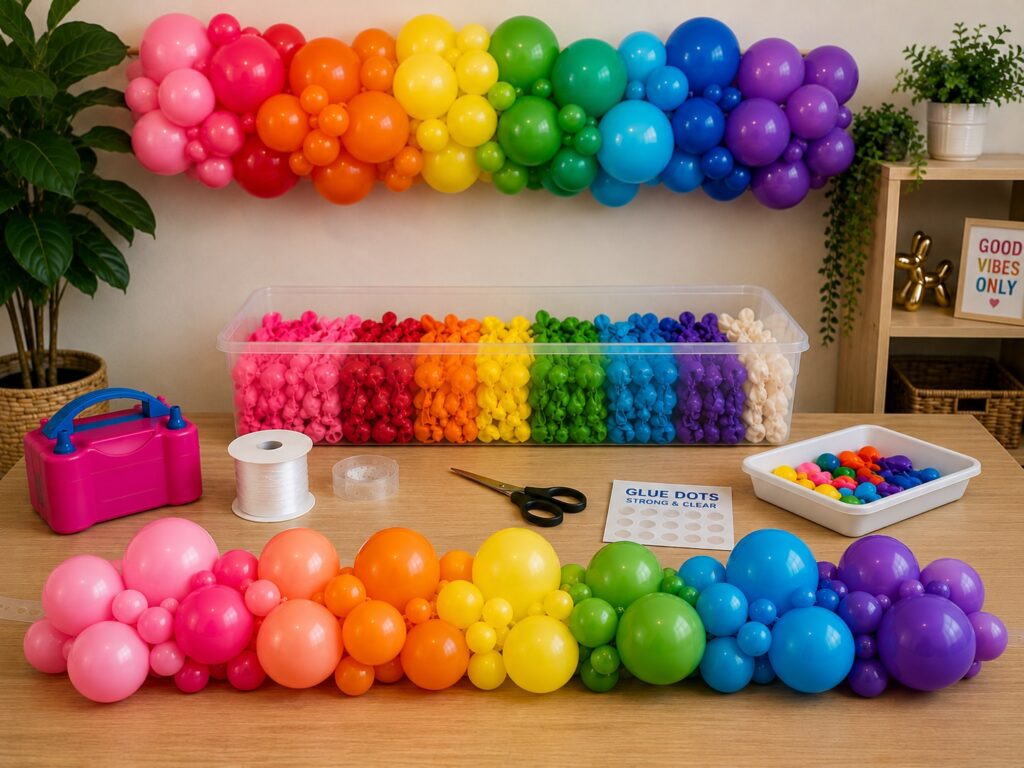
For finishing:
- Small 5-inch balloons in white, gold, or a complementary accent color these small balloons fill gaps between larger balloons and add the textural fullness that separates a professional-looking garland from a flat, sparse one
- Balloon glue dots small adhesive dots that allow you to attach gap-filling balloons without tying or threading them through the strip
- Artificial greenery or eucalyptus stems to weave through the garland for an organic, lush finishing touch if your theme calls for it
How to Choose Balloon Colors for Your DIY Balloon Garland
Color selection determines whether your finished DIY Balloon Garland looks cohesive and intentional or chaotic and random. This is where most beginners make their biggest mistake choosing too many colors without a clear organizational strategy.
The most reliable color formula for a stunning DIY balloon garland uses four colors: one dominant, one complementary, one accent, and one neutral. Your dominant color makes up approximately 40 percent of the garland. The complementary color makes up 30 percent. Your accent color makes up 20 percent. Your neutral typically white, cream, or clear fills the remaining 10 percent and adds breathing room to the palette.
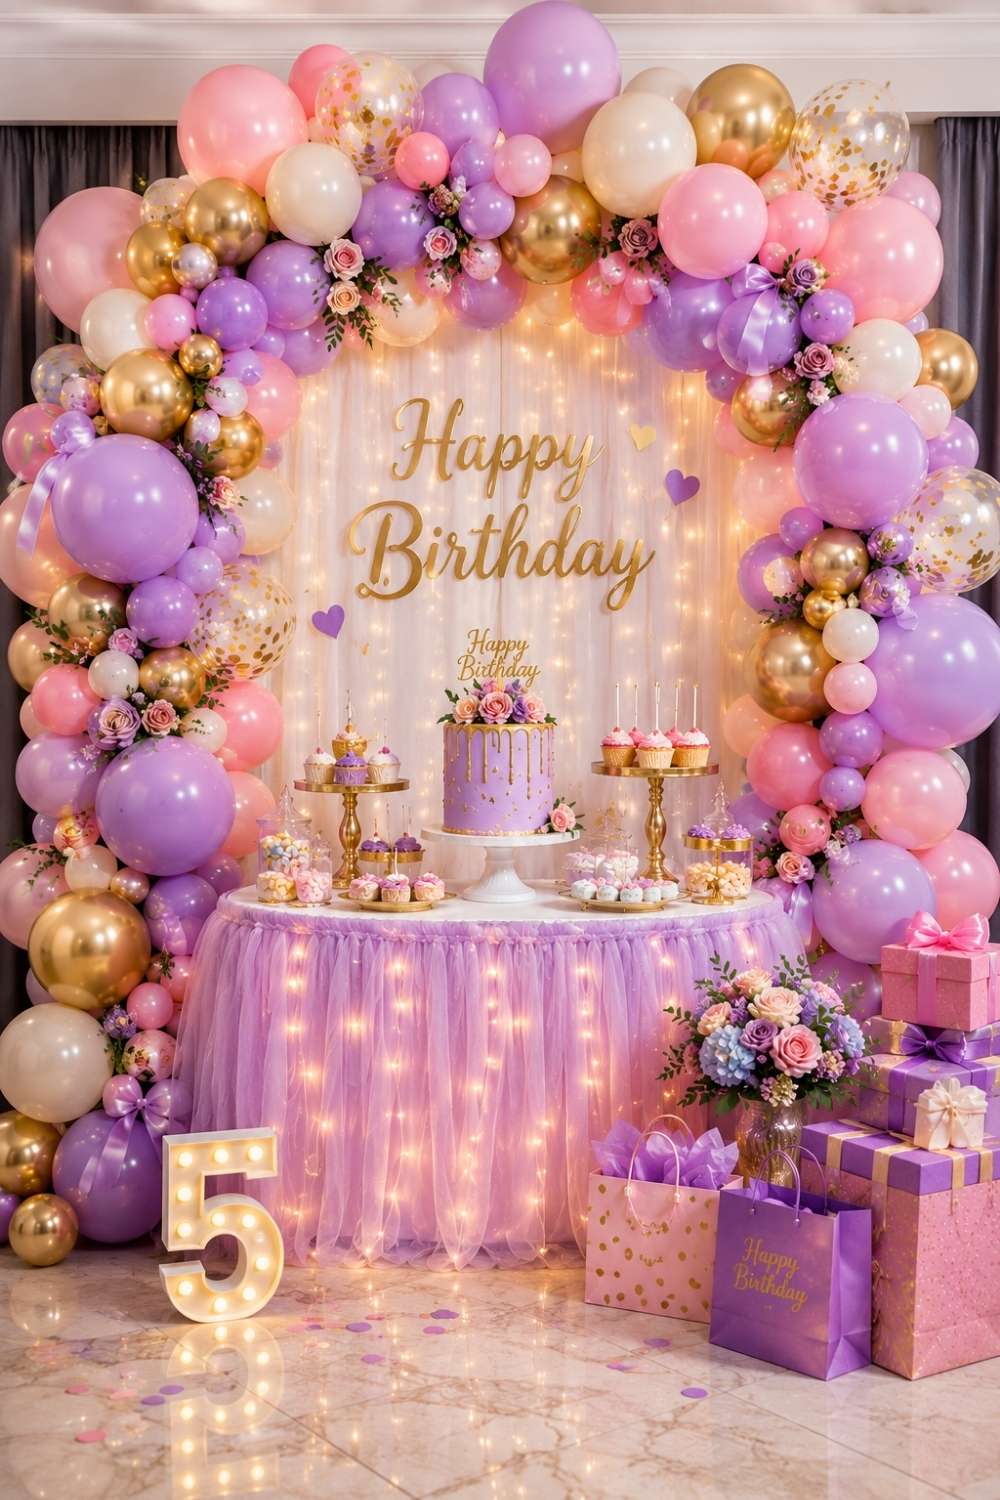
For a Bluey party, use royal blue as dominant, orange as complementary, sky blue as accent, and white as neutral. If you’re going for a unicorn party, use lavender as dominant, blush pink as complementary, mint as accent, and white or gold as neutral. For a princess party, use hot pink as dominant, gold as complementary, soft pink as accent, and white as neutral. For a 4th of July party, use red as dominant, white as complementary, navy as accent, and clear or silver as neutral.
Varying balloon sizes within each color adds the depth and dimension that makes garlands look full and luxurious rather than flat. Use your dominant color in large 11-inch balloons, your complementary color in a mix of large and medium 5-inch balloons, your accent color in medium sizes, and your neutral primarily in small 5-inch gap-fillers. This size variation is the professional balloon decorator’s most important technique and it works every single time.
Open this: Dollar Store Party Decor Hacks For Kids That Look Honestly Expensive
Avoid matte-only or metallic-only garlands. The most visually interesting garlands mix matte latex balloons with chrome or metallic balloons in the same color family. A cluster of matte royal blue balloons punctuated by chrome navy balloons creates a sophisticated shimmer that photographs beautifully and adds genuine visual complexity to the finished display.
Step-by-Step Tutorial: How to Make a DIY Balloon Garland
Read through every step once before you begin so the process flows from start to finish without interruption. The steps build on each other and the whole process makes more sense as a complete picture than as individual isolated actions.
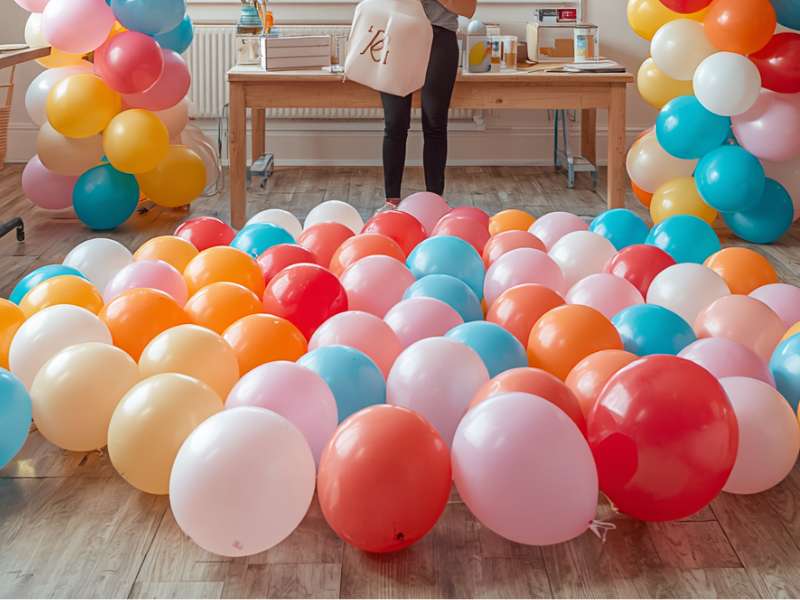
Step 1: Set Up Your Workspace
Clear a large floor area or long table you need space to lay your balloon decorating strip flat as you build the garland. Balloon garlands are built horizontally on the floor or table, then transferred to the wall for hanging. Attempting to build directly on the wall adds enormous difficulty and is never recommended for beginners.
Unroll your balloon decorating strip and cut it to your desired garland length. For a 6-foot wall garland, cut the strip to approximately 7 feet to allow extra length for shaping and adjustments. Lay it flat on your workspace and set your balloon colors nearby in separate grouped piles so you can reach each color quickly during the building process.
Step 2: Inflate Your Balloons
Switch on your electric pump and begin inflating balloons. Sort them into three distinct size groups as you go — large at approximately 11 inches, medium at approximately 7 to 8 inches, and small at approximately 5 inches. Your sizing template makes this sorting process fast and consistent.
Inflate the majority of your balloons before beginning to build. Working with a large pre-inflated supply allows you to focus entirely on the building and arranging process without stopping and starting. Aim to have at least 60 to 70 percent of your total balloon count inflated and sorted before attaching the first balloon to the strip.
Bookmark this: How to Make a Gorgeous DIY Paper Flower Backdrop for a Kids’ Party in Under an Hour
Tie each balloon as you inflate it. The tying step takes practice wrap the balloon neck around two fingers, loop it through, and pull tight. This knot is what clicks into the decorating strip holes and holds each balloon securely in place.
Step 3: Attach the First Balloons to the Strip
Start from one end of the decorating strip. Take a large balloon in your dominant color and push its knotted neck firmly into one of the pre-punched holes in the strip. The knot clicks through the hole and holds the balloon securely. Work down the strip alternating colors and sizes according to your chosen palette formula.
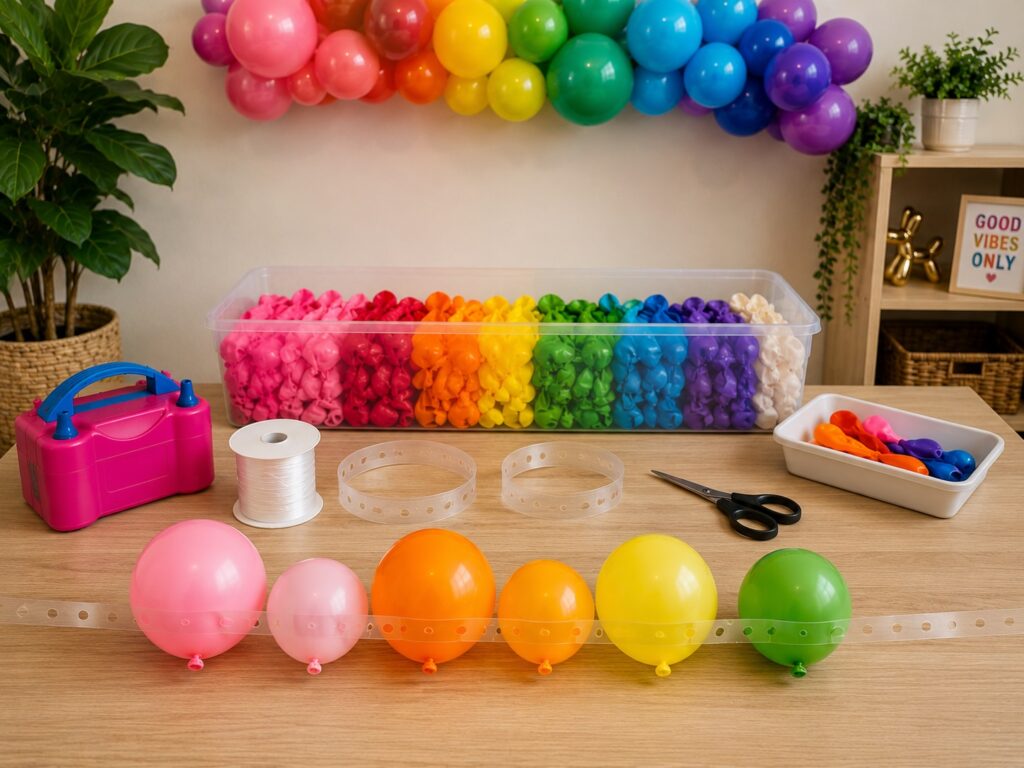
Push balloons into holes on alternating sides of the strip one balloon on the top hole, the next on the bottom hole — to begin building a three-dimensional, rounded garland shape rather than a flat two-sided display. This alternating technique is the fundamental difference between a full, professional-looking garland and a flat, sparse one.
Read this next: How to Make a Stunning Tissue Paper Pom Pom Backdrop for a Kids’ Party in 30 Minutes
Do not try to make it look perfect at this stage. The first pass of balloons through the strip creates the basic structure. Fullness, gap-filling, and styling come in the later steps.
Step 4: Build the Garland in Clusters
Rather than attaching balloons randomly along the entire strip length, work in deliberate clusters of four to five balloons. Group your dominant color in one cluster, transition into your complementary color for the next, shift to your accent, then cycle back. This cluster approach creates a natural, organic color flow that looks both intentional and visually dynamic.
Vary your balloon sizes within each cluster. Place a large balloon at the centre of each cluster as the anchor, surround it with two or three medium balloons, and tuck small balloons into the gaps around the edges. This within-cluster sizing variation creates the dimensional, layered look that makes balloon garlands appear three-dimensional rather than flat.
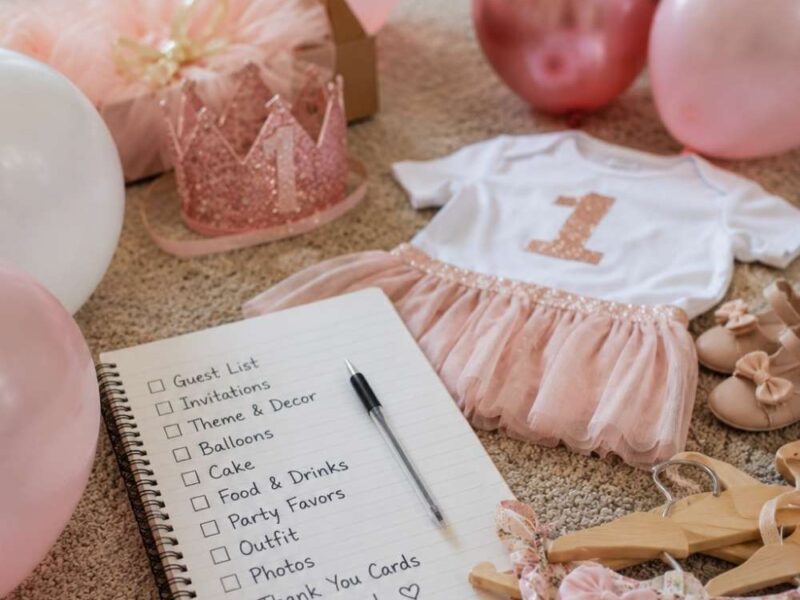
Your party guide is here: 21 Enchanting First Birthday Themes for Girls You’ll Absolutely Love
Step back every few clusters to assess the overall shape and color distribution from a distance. Gaps, color imbalances, and sizing inconsistencies are far easier to spot from across the room than up close. Make adjustments as you go rather than waiting until the garland is complete.
Step 5: Fill Gaps With Small Balloons and Glue Dots
Once you have worked through the full length of the decorating strip with your main balloon clusters, step back and assess the garland for gaps areas where wall or strip is visible between balloons. Gap-filling is the step that transforms a decent garland into a truly impressive one.
to achieve this for a DIY balloon garland, take your small 5-inch balloons white, gold, or your neutral color and use balloon glue dots to attach them directly to the sides and undersides of larger balloons, pushing them into any visible gaps. These small balloons do not go through the strip holes. Instead, the glue dot bonds them to the latex surface of an adjacent balloon, nestling them snugly into the spaces between larger balloons.
Work systematically from one end of the garland to the other, filling every visible gap until no strip or wall is visible from the front viewing angle. The transformation during this gap-filling step is remarkable a garland that looked 70 percent complete suddenly looks 100 percent lush and full.
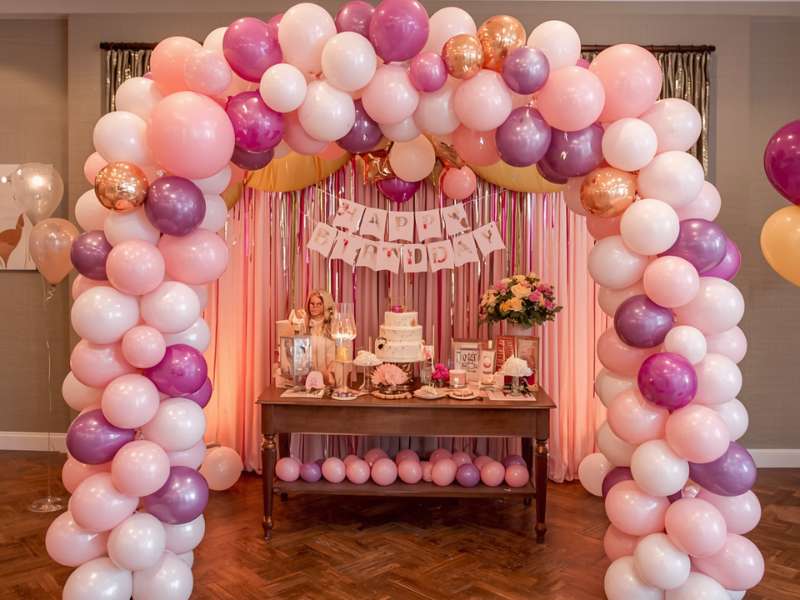
Step 6: Shape the Garland
Before hanging, spend a few minutes shaping the DIY Balloon Garland into your desired form. A straight garland is the simplest option ideal for a flat wall display behind a cake table. A curved or arching DIY Balloon Garland achieved by gently bending the decorating strip works beautifully over a doorway or above a birthday child’s chair. An asymmetric cascading garland, where one end is shorter than the other, creates a modern, editorial look that photographs exceptionally well.
Gently manipulate the strip into your chosen shape and hold it in position while a helper spots from a distance to confirm the silhouette looks balanced. Minor adjustments at this stage cost nothing and make a significant difference to the finished display.
How to Hang Your DIY Balloon Garland Without Damaging Walls
Hanging the garland correctly is the final technical step and the one that causes the most anxiety for first-time balloon garland makers. The good news is that modern command hooks make this step almost entirely stress-free.
Position your command hooks along the wall at your desired hanging points before transferring the garland from the floor. For a 6-foot garland hung against a flat wall, two to three hooks positioned at the top of the display area provide sufficient support. Space them evenly along the intended garland width and check that they are level before pressing them firmly against the wall.
Allow command hooks to cure for the manufacturer’s recommended time typically 30 to 60 minutes before hanging any weight on them. Hanging before full adhesion is the primary cause of mid-party command hook failures.
Save this: 15+ Magical Unicorn Birthday Party Ideas That Will Blow Your Little One’s Mind
Thread fishing line or clear string through the decorating strip at several points along the garland length and tie the other end to your command hooks. The fishing line is virtually invisible against most walls and ceilings, creating the impression that the garland is floating independently rather than hanging from hooks.
For garlands over doorways, tension rods spanning the doorframe provide an excellent hook-free hanging solution. Tie the garland directly to the tension rod using fishing line at multiple points for even weight distribution.
For outdoor garlands, use adhesive outdoor-rated hooks on smooth exterior surfaces, or tie the garland between two fixed points fence posts, tent poles, or trees using strong twine threaded through the decorating strip.
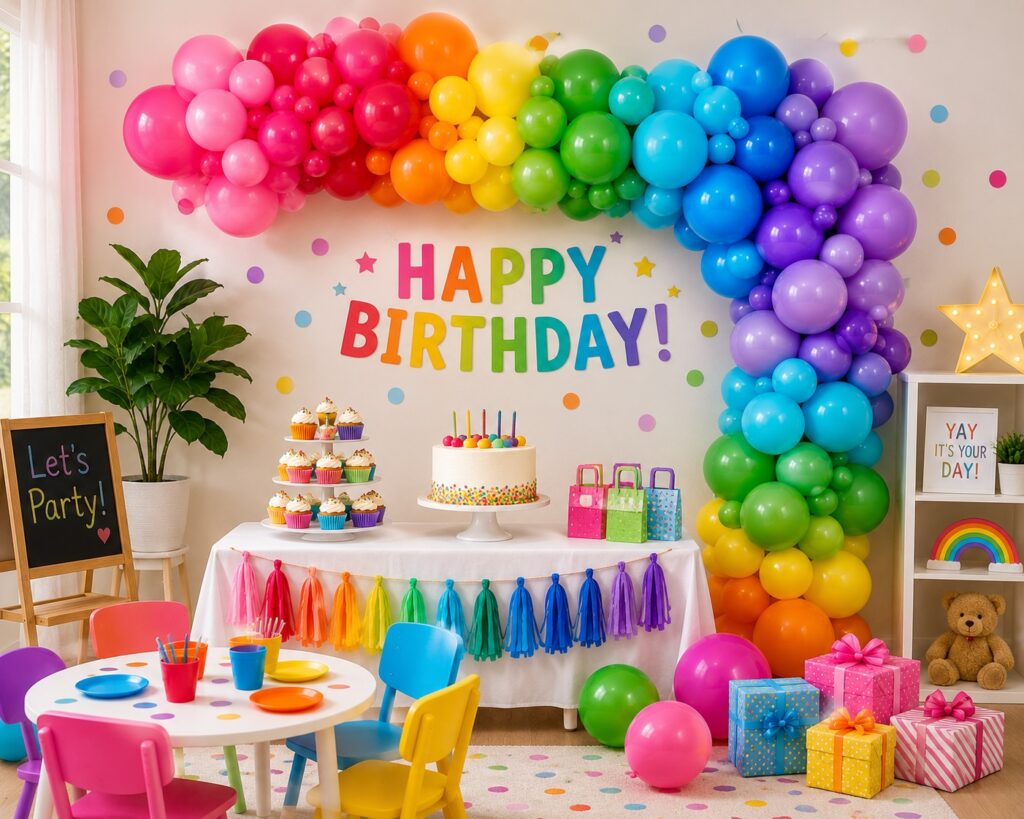
Styling Your DIY Balloon Garland for Maximum Party Impact
The balloon garland is your foundation. What you add around and beneath it determines whether the finished display looks like a standalone decoration or a fully considered party styling moment.
Position a dressed table directly below or in front of a wall-mounted garland. Cover it with a tablecloth in your dominant balloon color. Place the birthday cake at the centre, flanked by smaller decorative elements — candles, floral stems, a personalised cake topper, or small figurines relevant to the party theme.
Add greenery to the garland itself for an organic, textured finishing touch. Weave stems of artificial eucalyptus, tropical leaves, or silk flowers through the balloon clusters, tucking stems between balloons and securing them with a small piece of clear tape or a glue dot. Greenery adds an unexpected natural element that elevates the garland from festive to genuinely beautiful.
Consider adding a personalised sign or letter board beneath the garland. A sign reading the child’s name and age, positioned on an easel directly below the centre of the garland, creates a complete, cohesive focal point that draws the eye and anchors the whole display.
Finally, set up a small marked photo spot a small rug, a low chair, or simply a chalk arrow on the floor inviting guests to stand in front of the garland for photos. This transforms your decoration from a backdrop into an interactive party experience that generates the beautiful photos every parent hopes to take at their child’s birthday party.
DIY Balloon Garland Ideas for Every Kids’ Party Theme
The same technique and structure used to create a DIY balloon garland works for every party theme. Here are specific color and styling combinations for the most popular kids’ party themes.
For a Bluey party, combine royal blue, sky blue, orange, and white balloons with chrome navy accents. Weave orange ribbon through the garland for an extra pop of the complementary color. For a unicorn party, use lavender, blush pink, mint, and gold balloons with iridescent chrome balloons scattered throughout. Add silk flower stems in pastel shades between balloon clusters.
See this: 20+ Bluey Birthday Party Ideas That Will Make Your Toddler’s Day
For a dinosaur party, combine forest green, olive, mustard yellow, and terracotta balloons. Tuck artificial palm or tropical leaves between clusters for a jungle-like finish. For a superhero party, use bold red, blue, and yellow in large sizes with black chrome accents. Keep the garland shape tight and structured for a graphic, high-impact look.
For a rainbow party, arrange balloons in strict rainbow color order—red, orange, yellow, green, blue, indigo, violet transitioning smoothly from one color to the next along the garland length. Add white balloons throughout as cloud-like spacers between color sections. For a 4th of July party, alternate red, white, and navy clusters along the full garland length and add silver chrome balloons as metallic accents.
One of the best things about a DIY balloon garland is its versatility. By simply changing the colors, textures, and decorative accents, you can customize the design to match birthdays, baby showers, holidays, graduations, and themed celebrations. Once you master the basic DIY balloon garland technique, creating professional-looking party decorations for any occasion becomes surprisingly simple and budget-friendly.
Common Mistakes Beginners Make With DIY Balloon Garlands
Knowing these mistakes before you start your DIY balloon garland saves you time, balloons, and frustration during the build.
Inflating all balloons to the same size is the most common beginner mistake. Size variation is what creates depth and dimension. Without it, your DIY balloon garland looks flat and repetitive regardless of how beautiful the colors are.
Skipping the gap-filling step is the second most common mistake. A garland without gap-filling balloons always looks sparse and unfinished. The small 5-inch balloons tucked between larger ones are what create the lush, full look that makes a DIY balloon garland so visually impressive.
Using too many colors without a clear formula produces a chaotic result. Four colors maximum dominant, complementary, accent, and neutral almost always creates a more beautiful and cohesive garland than six or eight colors chosen without a unifying strategy.
Save for later: 15 Trending Birthday Party Themes for Girls
Hanging the garland before the command hooks have fully cured causes adhesion failures that bring the entire display down mid-party. Always follow the manufacturer’s curing time recommendation without exception.
Building the garland directly on the wall rather than on the floor or table first adds enormous difficulty to every step of the process. Always build horizontally, then transfer to the wall.
By avoiding these common errors, your DIY balloon garland will look fuller, more professional, and much easier to assemble. A little planning and patience can make the difference between a frustrating decorating experience and a stunning party centerpiece that guests can’t stop talking about.
Frequently Asked Questions About DIY Balloon Garlands
How many balloons do I need for a DIY balloon garland?
For a full, lush 6-foot garland, plan for 80 to 100 balloons across all sizes. For a 10-foot garland, plan for 130 to 150 balloons. Always buy 20 percent more than your estimate to account for popped balloons and gap-filling needs. Running out of balloons mid-build is far more disruptive than having extras left over.
Do I need helium for a DIY balloon garland?
No — and this is one of the most liberating facts about balloon garlands. The decorating strip structure holds all balloons in place without helium. Air-filled balloons also last significantly longer than helium-filled ones — several days versus several hours — which means you can build your garland the day before the party without any loss of quality.
How long does a DIY balloon garland last?
An air-filled balloon garland built indoors and kept away from direct sunlight and sharp surfaces lasts three to five days without significant deflation. Building the day before the party is perfectly safe and strongly recommended. Outdoor garlands exposed to heat and direct sunlight may begin deflating faster — build these on the morning of an outdoor party rather than the day before.
How do I make a DIY balloon garland without a decorating strip?
Without a decorating strip, cluster balloons in groups of four by tying two pairs of balloons together at their necks, then twisting two pairs around each other to form a four-balloon cluster. Connect clusters together using fishing line threaded through the knots. This method produces a beautiful organic garland but takes longer than the decorating strip method and is slightly more difficult for beginners.
Can I make a DIY balloon garland the night before the party?
Yes — and this is the recommended approach. Building the night before removes all time pressure on the party morning and allows you to hang the garland in a calm, unhurried way. Air-filled balloons maintain their size and shape beautifully overnight indoors. Store the completed garland in a cool indoor space away from direct sunlight until hanging time.
What is the easiest way to hang a DIY balloon garland without damaging walls?
Removable command hooks are the easiest and most reliable wall-safe hanging method. Use clear hooks for a virtually invisible finish. Always follow the weight limit recommendations on the hook packaging and allow the full curing time before hanging any weight. For zero wall contact, a tension rod across a doorway or a freestanding balloon arch frame are excellent alternatives.
How do I add greenery to a DIY balloon garland?
Weave artificial eucalyptus or silk flower stems directly between balloon clusters, tucking the stems into gaps between balloons. Secure with a small loop of clear tape or a glue dot where needed. Use approximately one stem per 12 inches of garland length for a lush but not overwhelming organic effect. Avoid real fresh greenery — the moisture content causes balloon latex to deteriorate faster.
Can kids help make a DIY balloon garland?
Older kids aged 8 and up can absolutely help with the balloon garland building process specifically the gap-filling step, which requires no special technique and produces immediate visible results that kids find extremely satisfying. Younger children can help sort balloons by color before the build begins. Supervise closely around inflated balloons with very young children and keep uninflated balloons away from babies and toddlers at all times.
Your DIY Balloon Garland Starts Right Now
A DIY balloon garland is one of those decorations that looks wildly impressive and takes far less skill than anyone expects. Guests will ask where you ordered it. Parents will photograph their children in front of it for the entire party. Your birthday child will point at it and announce proudly that their party has the best decorations of anyone they know.
And you made it yourself, with a bag of balloons, a decorating strip, and about 90 minutes of your time.
Here are your action steps to get started this week:
- Choose your party theme and select your four balloon colors using the dominant, complementary, accent, and neutral formula
- Count your DIY Balloon Garland length and calculate how many balloons you need then add 20 percent
- Pick up your supplies this week balloons, decorating strip, electric pump, command hooks, and glue dots
- Build your DIY Balloon Garland the evening before the party on a clear floor space
- Hang using command hooks with full curing time before attaching the garland weight
- Style the space beneath with a dressed table, a personalised sign, and a marked photo spot
- Step back, take a photo of your finished garland before the guests arrive, and feel genuinely proud of what you made
Which party theme are you building your DIY balloon garland for? Share in the comments below and if this tutorial helped you, please save it to your Pinterest party planning boards so other parents can find it when they need it most.