Some links on this blog may contain affiliate links. If you make a purchase through one of these links, I may earn a small commission at no extra cost to you. Thank you for supporting Enchanted Kids Moment!
Have you ever come home from the beach with a bucket full of seashells and wondered what to do with them? I have, and those little treasures usually sit on a table for days because they seem too special to throw away. That is exactly how a simple picture frame became one of my favorite beach crafts.
A seashell picture frame craft is one of my favorite ways to keep those happy beach memories alive. It is also a wonderful activity for preschoolers because they love choosing their favorite shells, deciding where each one should go, and watching an ordinary frame slowly come to life.
The finished project becomes more than a craft. It becomes a keepsake filled with memories of sunny days, sandy toes, and time spent together. If your family enjoys collecting treasures along the shore, you’ll also love The Ultimate Guide to Seashell Crafts for Kids: Fun, Easy Projects That Turn Beach Finds Into Precious Keepsakes for even more creative ideas.
The best part is that this project stays simple from start to finish. You only need a few supplies, a favorite photo, and plenty of imagination. As children arrange shells, glue each piece into place, and admire their finished work, they also build fine motor skills and confidence without even realizing it. Simple crafts like this often become the childhood memories kids treasure most because they are filled with laughter, creativity, and time spent together.
Before long, your preschooler will have a handmade picture frame that deserves a special place on the shelf. Every time someone sees it, those happy beach memories come rushing back. If you love turning ordinary moments into lasting traditions, you’ll find plenty of inspiration in The Ultimate Guide to Creating Meaningful Childhood Memories With Kids.
Why a Seashell Picture Frame Craft Is Perfect for Preschoolers
Before getting out the glue and paint, you might wonder if this project is too difficult for little hands.
The good news is that it is just right for preschoolers.
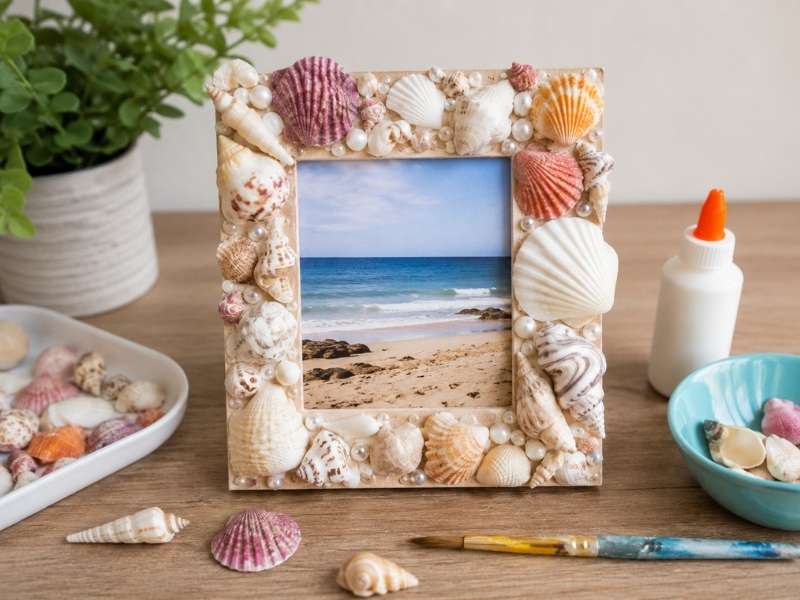
A seashell picture frame craft gives children the chance to create something beautiful without needing perfect cutting, drawing, or painting skills. They simply choose their favorite shells, decide where each one belongs, and watch an ordinary frame slowly turn into something special.
That freedom helps preschoolers feel proud of what they make.
There is no right or wrong design. Some children may place every shell in neat rows. Others may create colorful patterns or fill every little space they can find. Both results are wonderful because every frame reflects their own creativity.
This project also encourages children to slow down.
They carefully pick up each shell.
They compare different shapes.
They make little decisions throughout the activity.
Those small choices help build confidence while strengthening fine motor skills at the same time.
Open this next: How to Make an Easy Sea Turtle Craft for Kids Using Paper Plates (Step-by-Step)
Seashell Picture Frame Craft as a Keepsake That Gets More Special Every Year
Imagine placing a favorite beach photograph inside the finished frame.
Years later, your preschooler will see that picture and remember collecting shells, laughing together, and proudly gluing every piece into place.
That is what makes this project so meaningful.
It is not simply about decorating a frame.
It is about saving a memory in a way children can actually hold.
The frame may even become part of your family’s yearly traditions.
Every beach trip could inspire another handmade frame.
Before long, you will have a shelf filled with vacation memories created by little hands.
Simple activities like this often become the childhood moments children remember most because they connect creativity with time spent together.
If you enjoy preserving special family memories, Documenting Your Child’s Milestones shares more thoughtful ideas you’ll treasure for years.
Skills Preschoolers Practice During This Seashell Picture Frame Craft
Many preschool crafts secretly teach important skills.
Children simply think they are having fun.
A seashell picture frame craft naturally supports several areas of early learning without making the activity feel like a lesson.
Fine Motor Skills
Picking up small shells strengthens little fingers.
Applying glue carefully also improves hand control.
Then placing each shell exactly where they want it encourages patience and coordination.
Those simple movements prepare preschoolers for writing and drawing later.
Decision Making
Children make dozens of tiny choices during this activity.
Which shell should go first?
Which color looks nicest?
Should the biggest shell sit in the corner?
Making those decisions helps preschoolers build confidence.
They begin trusting their own ideas.
Creativity
Every finished frame looks different.
Some children enjoy colorful paint.
Others prefer leaving the shells exactly as they found them.
Both choices encourage imagination.
The goal is never perfection.
The goal is helping children create something they genuinely love.
If your preschooler enjoys colorful art projects, Easy Painting Ideas for Toddlers offers more creative activities for little artists.
Gather Everything Before You Begin
One question many caregivers ask is, “What do I actually need?”
Thankfully, this project uses simple supplies that many families already have.
Preparing everything first also helps preschoolers stay focused once the crafting begins.
Supplies
- A plain wooden picture frame
- Clean seashells in different sizes
- White craft glue or child-friendly strong craft glue
- Washable acrylic or tempera paint
- Paintbrushes
- Small paper plate or paint palette
- Cup of water for rinsing brushes
- Paper towels
- Old newspaper or a craft mat
- Favorite printed photograph
- Small pearls or tiny beads (optional)
- Child-safe glitter glue (optional)
Place everything within easy reach before inviting your preschooler to the table.
Children become much more engaged when they do not need to stop every few minutes to search for supplies.
Prepare the Seashells First Before the Seashell Picture Frame Craft
This step may seem small but it actually makes a huge difference later. Freshly collected shells often have sand tucked inside tiny spaces.
Some also feel a little dusty after sitting in a beach bag.
Taking a few minutes to clean them helps the finished craft look much nicer.
Wash the Shells Together
Fill a bowl with warm water.
Add a tiny drop of gentle dish soap.
Invite your preschooler to gently swish the shells around.
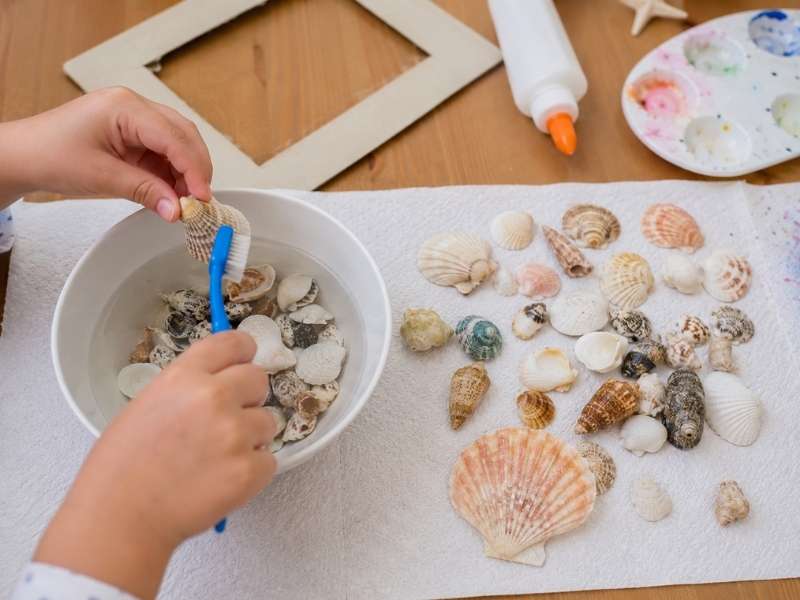
Children usually enjoy this part because it feels like another little activity before the crafting begins.
Next, use a soft toothbrush to remove any stubborn sand. Adults should handle shells with sharp edges.
Finally, rinse everything with clean water. Spread the shells across a towel.
Allow them to dry completely before moving to the next step. Dry shells help the glue stick much better.
Create a Calm Craft Space
You do not need a fancy craft room. Your kitchen table works perfectly.
Cover the table with newspaper or a washable craft mat. Place supplies in small containers instead of leaving everything in one large pile.
Children can easily see what they need. They also feel less overwhelmed.
Keep paper towels nearby because little spills happen during almost every preschool craft.
That is completely normal.
Playing soft music in the background also helps create a calm atmosphere.
Simple moments like these often become just as memorable as the finished project.
If your family enjoys quick creative afternoons, Easy Summer Crafts Kids Can Make in 10 Minutes offers more relaxed projects to try together.
How to Make a Seashell Picture Frame Craft (Step by Step Guide)
Step 1: Explore the Seashells Together
Before opening the glue, spend a few minutes simply looking at the shells. This helps preschoolers become excited about the project.
Spread every shell across the table. Invite your child to touch each one. Talk about the different shapes. Notice which shells feel smooth.
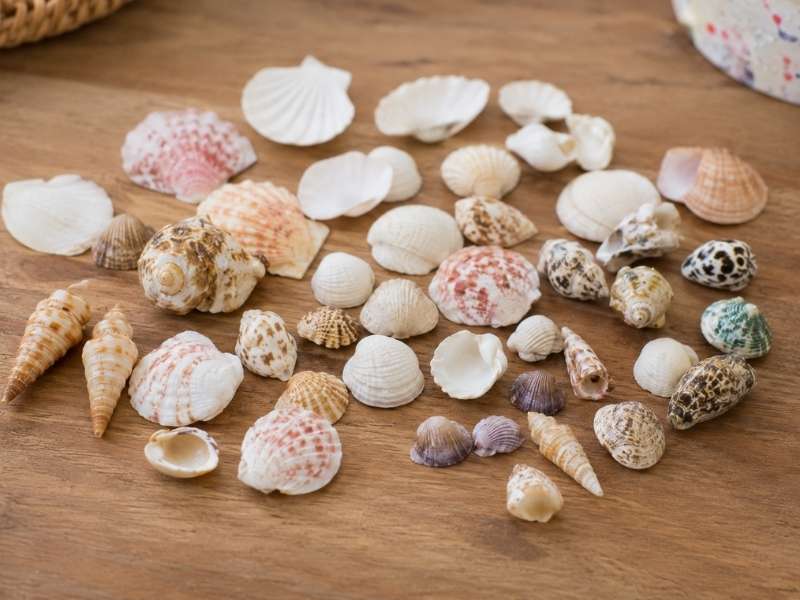
Look for shells with interesting patterns.
Ask simple questions along the way.
“Which shell is your favorite?”
“Can you find the biggest one?”
“Which one looks like a tiny fan?”
These little conversations build excitement before the crafting even begins.
Many preschoolers naturally begin imagining where each shell should go.
Resist the urge to arrange everything yourself.
Let them explore their own ideas first.
Step 2: Get a wooden frame and Place the Shells Without Glue
This step saves a lot of frustration later.
Give your preschooler the wooden frame.
Now encourage them to place shells around the edges without using glue yet.
Some children create balanced patterns.
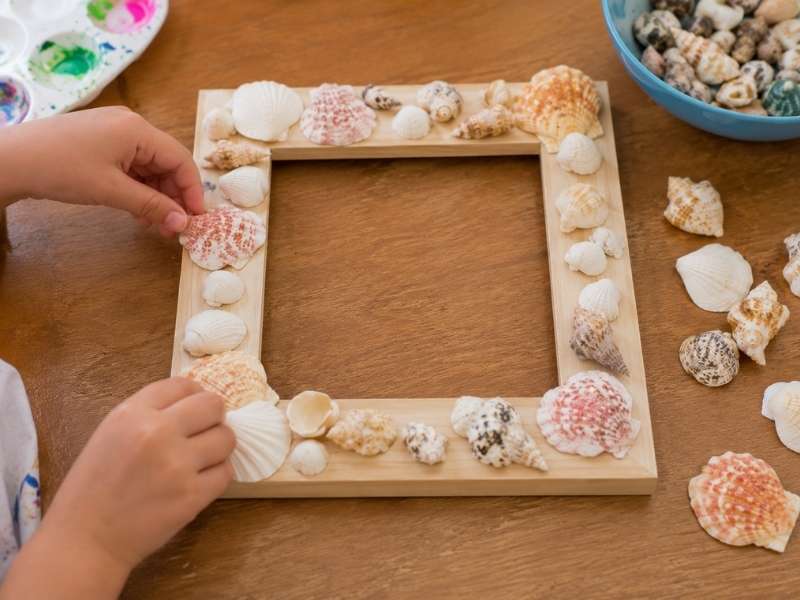
Others prefer mixing every size together.
Both designs work beautifully.
If a shell rolls away, simply laugh together and try again.
Moving the shells around first allows little hands to experiment without worrying about making mistakes.
Parents often feel tempted to “fix” the arrangement.
Instead, celebrate your child’s creativity.
Their design tells part of the story.
That makes the finished seashell picture frame craft much more meaningful.
Step 3: Start Gluing One Shell at a Time
Once everyone feels happy with the design, it is time to begin gluing.
Show your preschooler how to squeeze a small dot of glue onto the back of one shell.
Too much glue creates slippery shells that slide around the frame.
Small amounts work much better. Press the shell gently onto the frame.
Hold it for a few seconds. Then move on to the next shell.
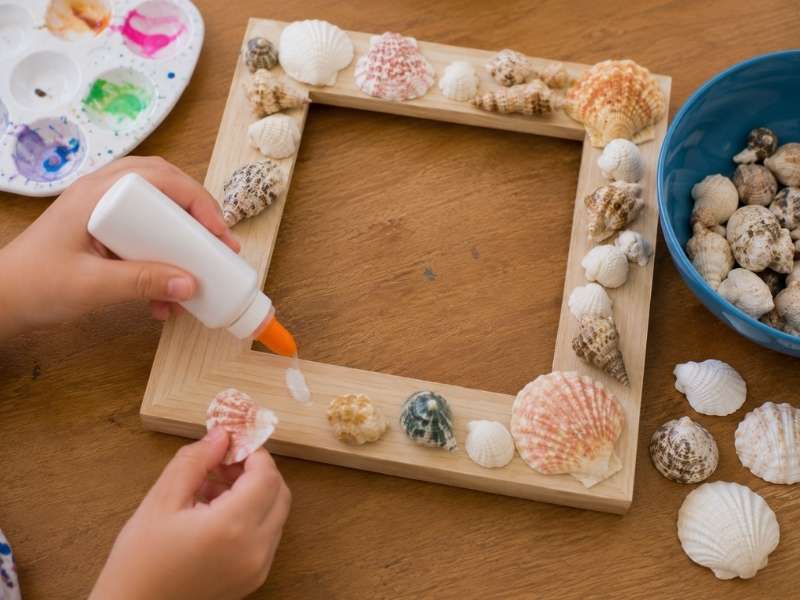
Continue working slowly around the frame instead of jumping from one corner to another.
Preschoolers usually enjoy watching their design slowly come together.
Offer plenty of encouragement along the way.
Little comments like, “I love where you placed that shell,” help build confidence while keeping the activity fun.
By the end of this step, your child will already see their beautiful seashell picture frame craft beginning to take shape.
Step 4: Fill the Small Spaces
At this point, your preschooler will probably notice little gaps between the larger shells.
That is exactly what you want.
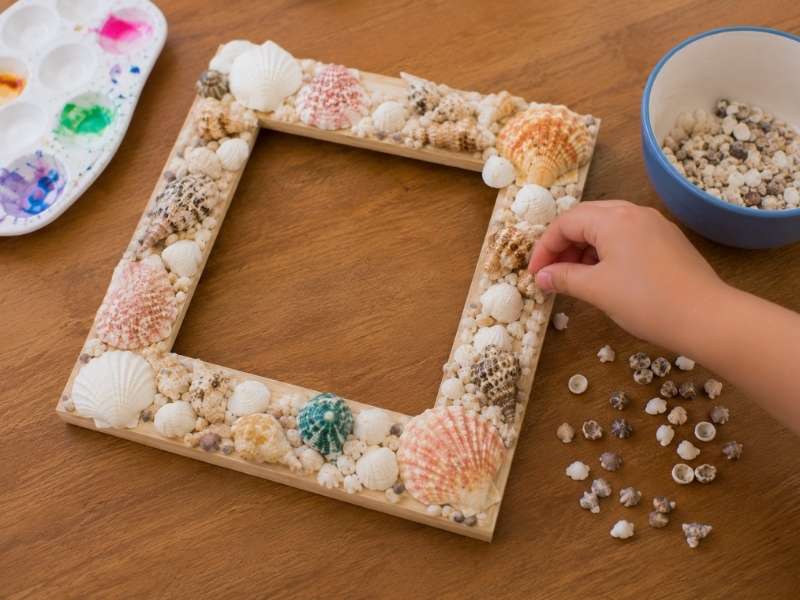
Now comes one of the most enjoyable parts of the entire seashell picture frame craft.
Spread the smaller shells across the table.
Invite your child to look for tiny pieces that fit into the empty spaces. You can turn it into a simple game.
Ask questions like, “Which shell looks just right for this spot?” or “Can you find one that is a little smaller?”
Children love solving little puzzles like this. Allow them to test different shells before adding glue.
If one does not fit, simply try another. There is no need to rush.
Every little decision helps preschoolers build confidence.
By the time all the gaps are filled, the frame will already look much fuller and more beautiful.
Step 5: Add Color if Your Preschooler Wants To
Some children love bright colors.
Others fall in love with the shells just as they are.
Both choices are perfect.
If your preschooler enjoys painting, now is the time to bring out the brushes.
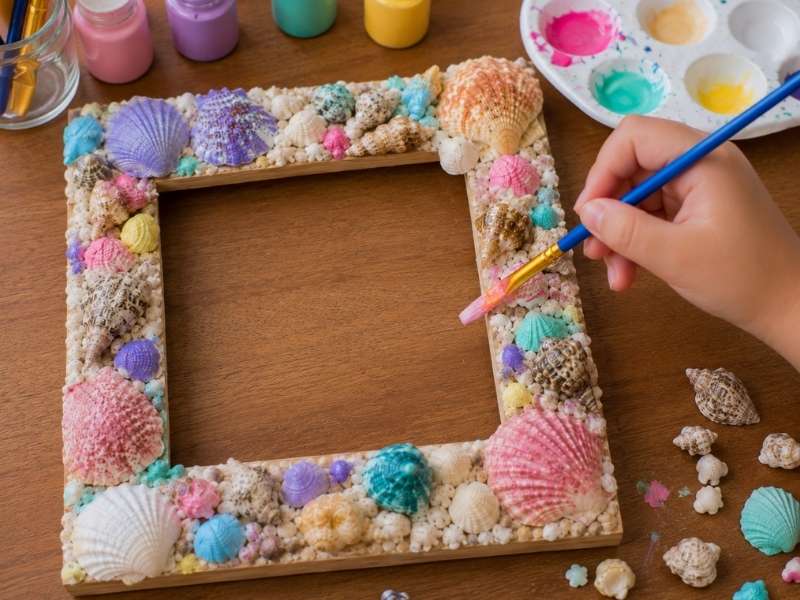
Choose washable paint in cheerful colors.
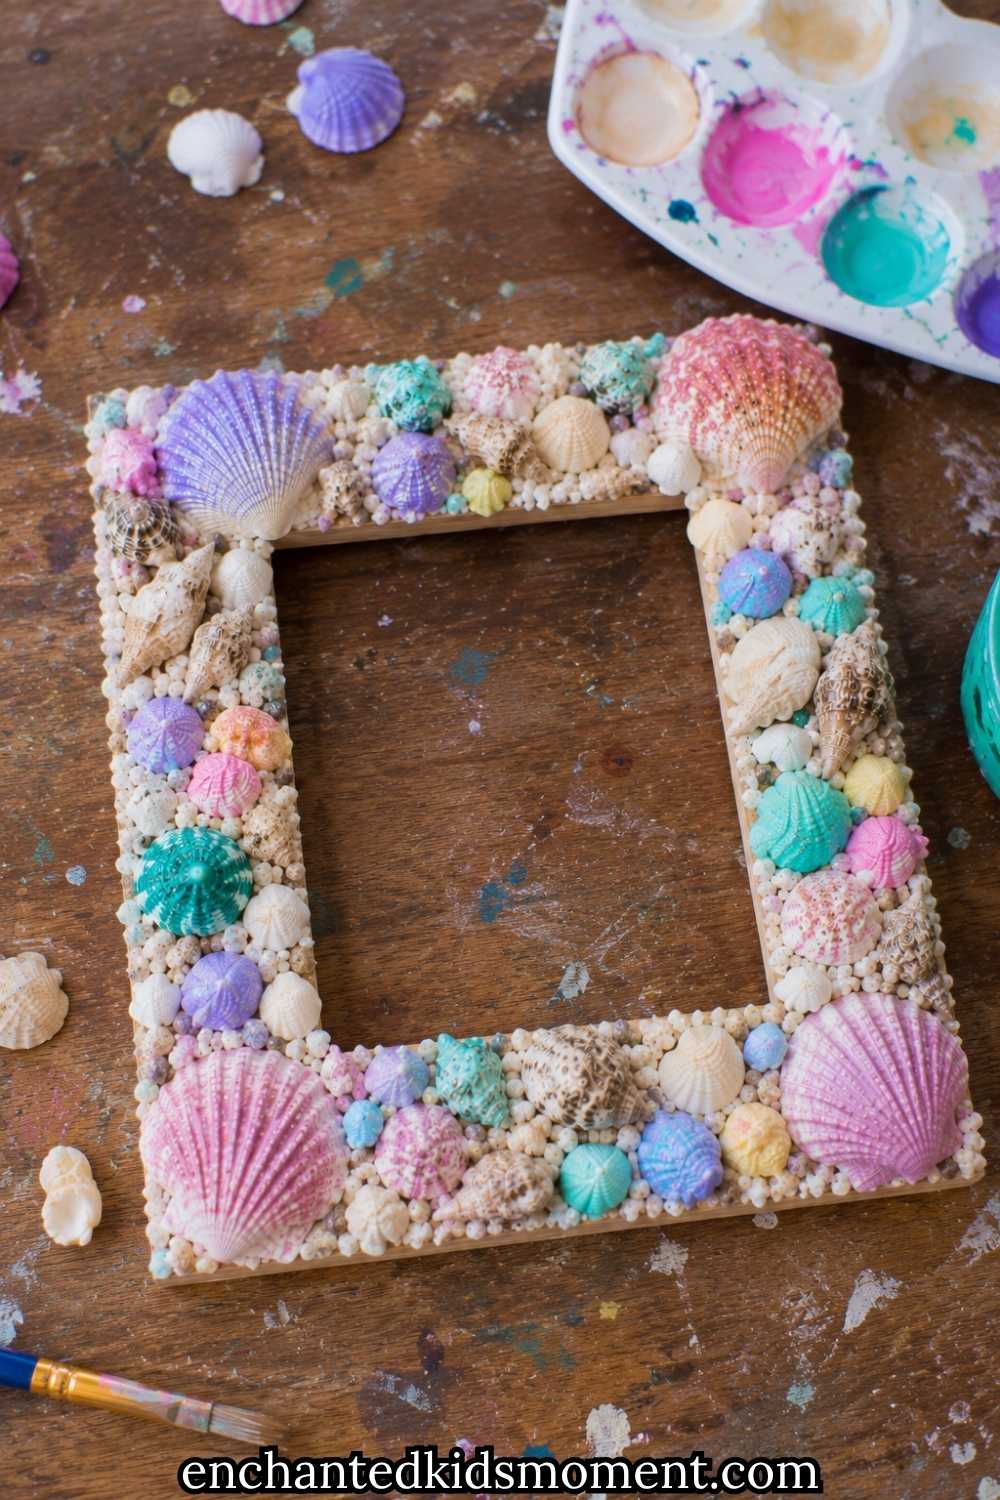
Pastel shades create a soft beach look.
Bright colors make the frame feel playful and fun.
Instead of painting every shell, encourage your child to decorate only a few.
That keeps the natural beauty of the shells while adding pops of color.
Tiny dots, little stripes, hearts, stars, or simple swirls all look lovely.
If paint accidentally lands on the wooden frame, do not worry.
Those little imperfections often become your favorite part later because they remind you that little hands made this keepsake.
Children who enjoy decorating objects may also love Ceramic Mug Painting Ideas for Kids for another creative afternoon.
Step 6: Personalize the Frame
This is the step that transforms the project from a fun craft into a treasured keepsake.
Ask your preschooler how they would like to make the frame extra special.
Some children want glitter glue.
Others choose tiny pearls or colorful beads.
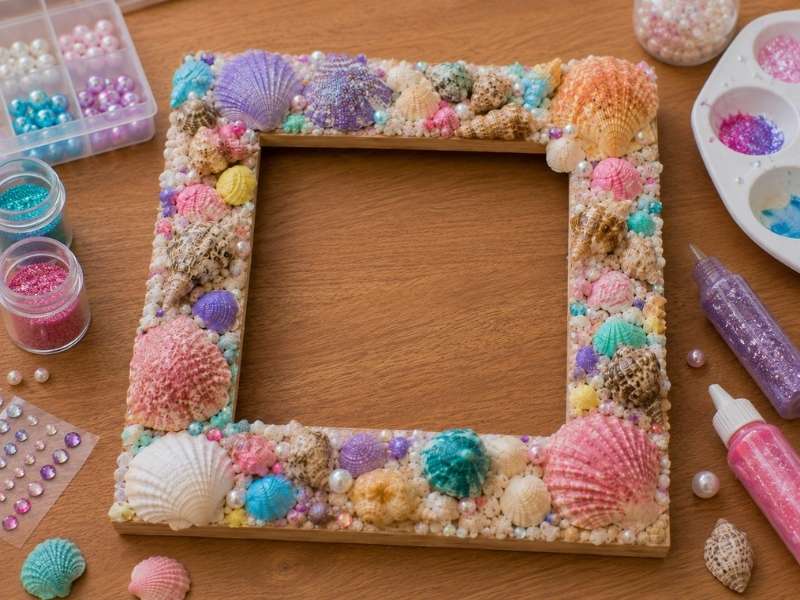
A few may simply smile and say it is already finished.
Every answer is perfectly okay.
If your child knows a few letters, help them write their name on the bottom of the frame.
You could also add the beach name or the year the shells were collected.
These little details tell the story behind the craft.
Years from now, your preschooler may not remember every step.
They will remember making something with their own hands.
That memory becomes just as valuable as the finished frame itself.
Step 7: Let Everything Dry
This part feels difficult for excited preschoolers.
Once the frame looks finished, they usually want to hold it right away.
Explain that the glue needs a little quiet time before the frame is ready.
Place the frame somewhere flat where nobody will bump into it.
Leave it to dry according to the glue instructions.
You can use this waiting time for another simple activity.
Read a favorite story, have a snack together or talk about your beach adventure.
Avoid moving the frame too early.
Even shells that look secure may still slide if the glue has not completely dried.
Patience helps the finished seashell picture frame craft stay strong for years.
If your preschooler still has creative energy, Paper Plate Sun and Moon Crafts make a fun project while the frame dries.
Step 8: Add Your Favorite Photo
Choose a photograph that makes your preschooler smile A beach picture works beautifully.
A family walk by the ocean also fits perfectly.
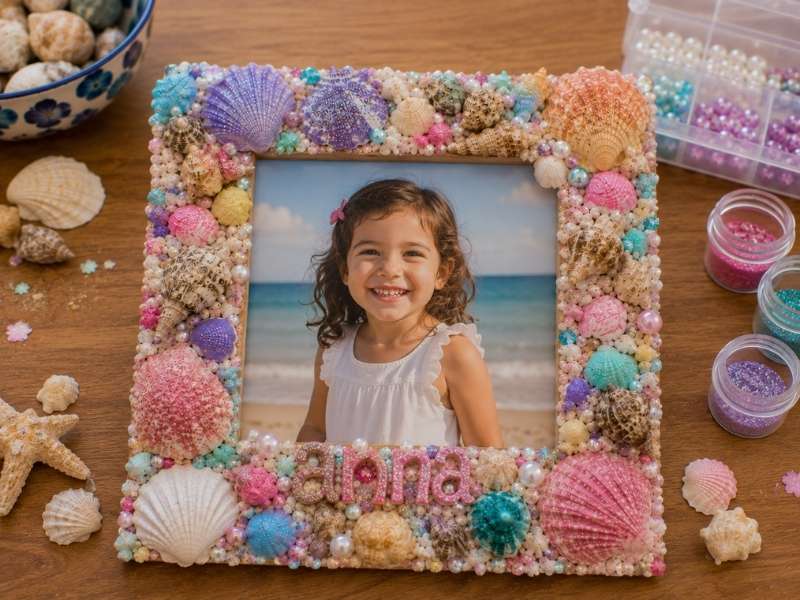
You might even choose a picture of your child collecting the very shells used in the craft.
Slide the photo into the frame. Then invite your preschooler to admire their finished creation.
Watch how proud they become.
Children light up when they see something they made displayed like real artwork.
Place the frame on a bookshelf. Stand it on a bedside table.
Display it in the living room where everyone can enjoy it.
Every glance at the picture will bring back wonderful memories of your time together.
That is the real magic of a seashell picture frame craft.
This guide is for you: The Ultimate Guide to Creating Meaningful Childhood Memories With Kids
Fun Ways to Personalize Your Seashell Picture Frame Craft
Every preschooler has different interests.
Small personal touches make every frame feel one of a kind.
Add Tiny Beach Treasures
Do you still have a little sea glass?
Perhaps your child collected tiny pebbles.
Maybe you found miniature driftwood pieces.
Adding one or two extra treasures makes the frame even more meaningful.
Avoid adding too many decorations.
Leaving a little empty space helps every shell stand out.
Match the Colors to the Photo
Look closely at the picture going inside the frame.
Does it have lots of blue from the ocean?
Try adding blue paint to a few shells.
Perhaps everyone wore bright yellow shirts.
Paint a couple of shells to match.
These little details help the entire project feel connected.
Create One Every Summer
This simple idea often becomes a family tradition.
Collect new shells every beach trip.
Then create another seashell picture frame craft each year.
Imagine displaying several finished frames on one shelf.
Each one tells the story of another wonderful family adventure.
Watching the collection grow becomes almost as exciting as making the crafts themselves.
If your family enjoys seasonal traditions, Summer Kids Crafts Activities can inspire many more creative memories throughout the warmer months.
How to Display Ideas for Your Finished Frame
Children love seeing their work displayed proudly.
Instead of storing the frame away, make it part of your home.
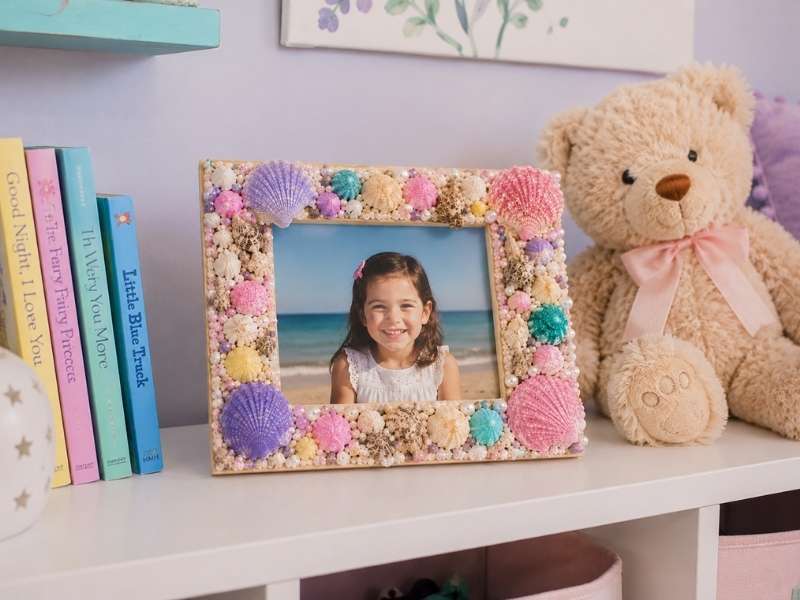
Bedroom Shelf
Place the frame beside favorite books or stuffed animals.
Your preschooler will smile every time they see it.
Reading Nook
A cozy reading space feels even more personal with handmade decorations.
The frame adds warmth while reminding children of happy adventures.
If you’re creating a special reading corner, Cozy Reading Nook for Kids offers plenty of inspiring ideas.
Family Gallery Wall
Mix the seashell picture frame craft with family photos and children’s artwork.
The finished display feels cheerful, personal, and full of memories.
Grandparent Gift
Handmade gifts often become treasured keepsakes.
Imagine your preschooler proudly handing over a frame they created themselves.
Adding a favorite family photo makes the gift even more meaningful.
Simple handmade treasures often mean much more than store-bought presents.
If your family enjoys making thoughtful gifts, Father’s Day Rock Painting Ideas can inspire another keepsake project little hands will love creating.
Wrapping Up
Creating a seashell picture frame with your preschooler is about much more than making something pretty. It is a chance to slow down, work together, and turn ordinary shells into a keepsake your family will treasure for years. Every shell your child chooses and every tiny decoration they add tells part of their own creative story.
Do not worry if the shells are uneven or the decorations are not perfectly placed. Those little imperfections make the finished frame even more special because they reflect your child’s imagination and growing confidence. Display it proudly on a shelf, desk, or bedside table where everyone can enjoy it.
You can also make a new frame after every beach trip and watch your collection grow as your child gets older. Years from now, these handmade frames will remind you of happy afternoons spent crafting together. Gather your shells, enjoy the creative process, and celebrate every smile that comes from making something with your own hands.
Come here next:
How to Make a Gorgeous DIY Paper Flower Backdrop for a Kids’ Party in Under an Hour
25 Fun Bluey Crafts Kids Will Be Excited to Mak
19 Unicorn Paper Crafts Kids Can Make in 30 Minutes